Converting an equirectangular image to a perspective projectionWritten by Paul BourkeNovember 2016 See also: sphere2fish to convert a equirectangular projection to a fisheye
Aug 2017: Added offaxis perspective projections, also known as a tilt-shift camera/lens often used in architectural photography. Nov 2021: Added inverse projection persp2sphere that maps a perspective image onto an equirectangular.
The source code implementing the projections below is only available on request for a small fee. It includes a demo application and an invitation to convert an image of your choice to verify the code does what you seek. For more information please contact the author.
sphere2persp The following describes a tool for extracting an ideal, pinhole camera style perspective projection from an equirectangular (also called spherical) projection. The real-time way to do this might be to map the equirectangular image onto a sphere and using a real-time API (eg: Opengl) view the result with a virtual camera located in the center of the sphere. The computational method here has some advantages, for example: it can result in higher quality conversions and it can handle unlimited image sizes (both input and output). The following image will be used for the examples illustrated on this page. 
The usual approach for such image transformations is to perform the inverse mapping. That is, one needs to consider each pixel in the output image (perspective) and map backwards to find the best estimate pixel in the input image (spherical). In this way every pixel in the output image is found (compared to a forward mapping), it also means that the performance is governed by the resolution of the output image (and supersampling) irrespective of the size of the input image. A key aspect of these mappings is also to perform some sort of antialiasing, the solutions here use a simple supersampling approach. The default usage creates an image with a 100 degree horizontal field of view, the vertical field of view is calculated based upon the image dimensions, the default being 1920x1080. Zero degrees longitude is 1/4 of the width of the image from the left edge. 
The code here in written in plain vanilla C tested on Unix style operating systems using the gcc compilers (specifically Mac and Linux), but the algorithms/code can readily be modified for other operating systems and programming languages. This is not meant to be a final application but rather something you integrate into your code base. Having said that it is wrapped up in a simple TGA image reader/writer for the purposes of algorithm testing, the intent is that one would be implementing the function into ones own pipeline. They all operate on a RGB buffer (fisheye image) in memory. Usage string
Usage: sphere2persp [options] sphericalimage
Options
   -w n       perspective image width, default = 1920
   -h n       perspective image height, default: 1024
   -t n       horizontal FOV of perspective (degrees), default = 100
   -x n       tilt angle (degrees), default: 0
   -y n       roll angle (degrees), default: 0
   -z n       pan angle (degrees), default: 0
   -vo n      vertical offset for offaxis perspective (percentage), default: 0
   -ho n      horizontal offset for offaxis perspective (percentage), default: 0
   -f         create remap filters for ffmpeg, default: off
   -a n       antialiasing level, default = 2
   -n s       output file name, default: derived from input image filename
   -c         enable circular crop, default: off
   -long n n  specify the longitude range of the image, default: -pi and pi
   -lat n n   specify the latitude range of the image, default: -pi/2 and pi/2
   -d         enable verbose mode, default: off
Tilt, pan and roll are performed with the command line options -x, -y and -z. That is the x axis is to the right, the z axis is up and the y axis is forward. The following pans the camera 90 degrees and tilts up 40 degrees. 
If the mapping is performed correctly, and the original equirectangular image is correct, all lines in the scene that should be straight will be straight, unlike the curvature in the equirectangular image. Any perspective field of view can be chosen, smaller fields of view result in zooming in, larger are equivalent to zooming out. While perspective views are defined up to, but not including 180 degrees, for practical purposes perspective projections become increasingly inefficient after 150 degrees. The following is a 150 degree perspective view. 
Assuming a correct equirectangular, there should be no distortion looking straight down or straight up. 

In architectural photography there is the concept of a shift-tilt lens and indeed these can be purchased as real lenses. They effectively allow the projection plane to be shifted on the sensor. In practical terms they allow for the correction of the perspective effects that occur when one tilts a camera, most notably when photographing buildings. For reasons we won't go into here, shift-tilt lenses have interesting depth of focus properties which has lead them to often be used to create the miniature world effect. The support here implements the "perfect" shifting of the projection plane and does not (can not) simulate the depth of focus characteristics of these lenses. The effect will be illustrated with the following equirectangular image. 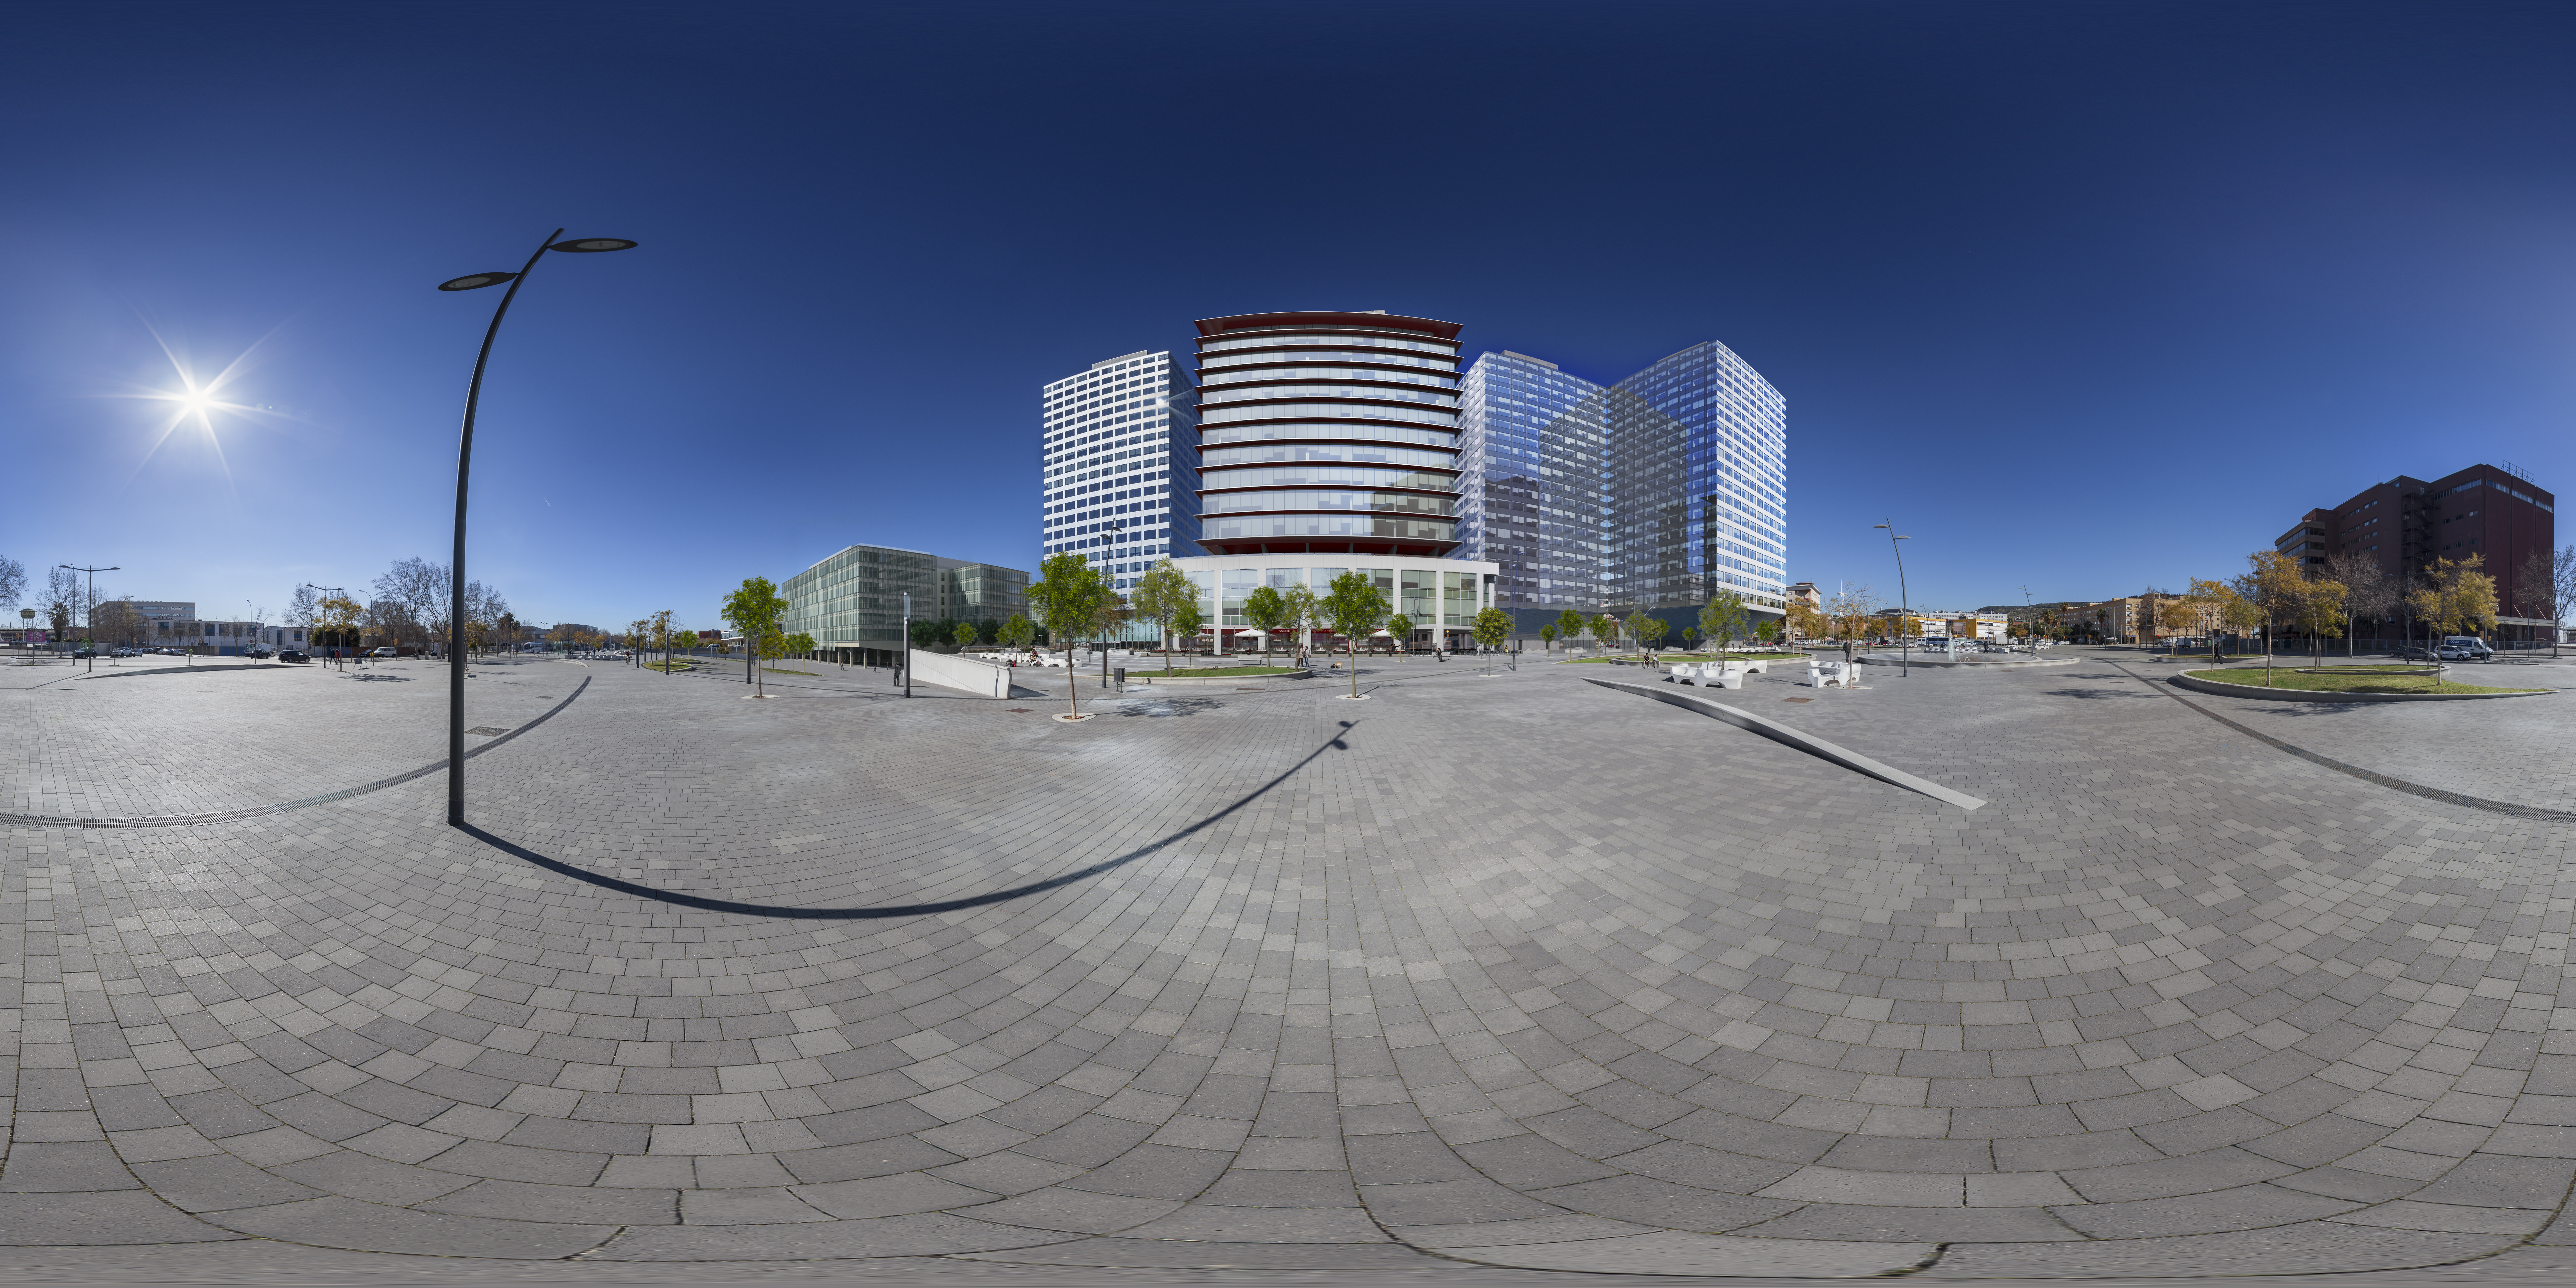 Image courtesy Jordi Vallverdu
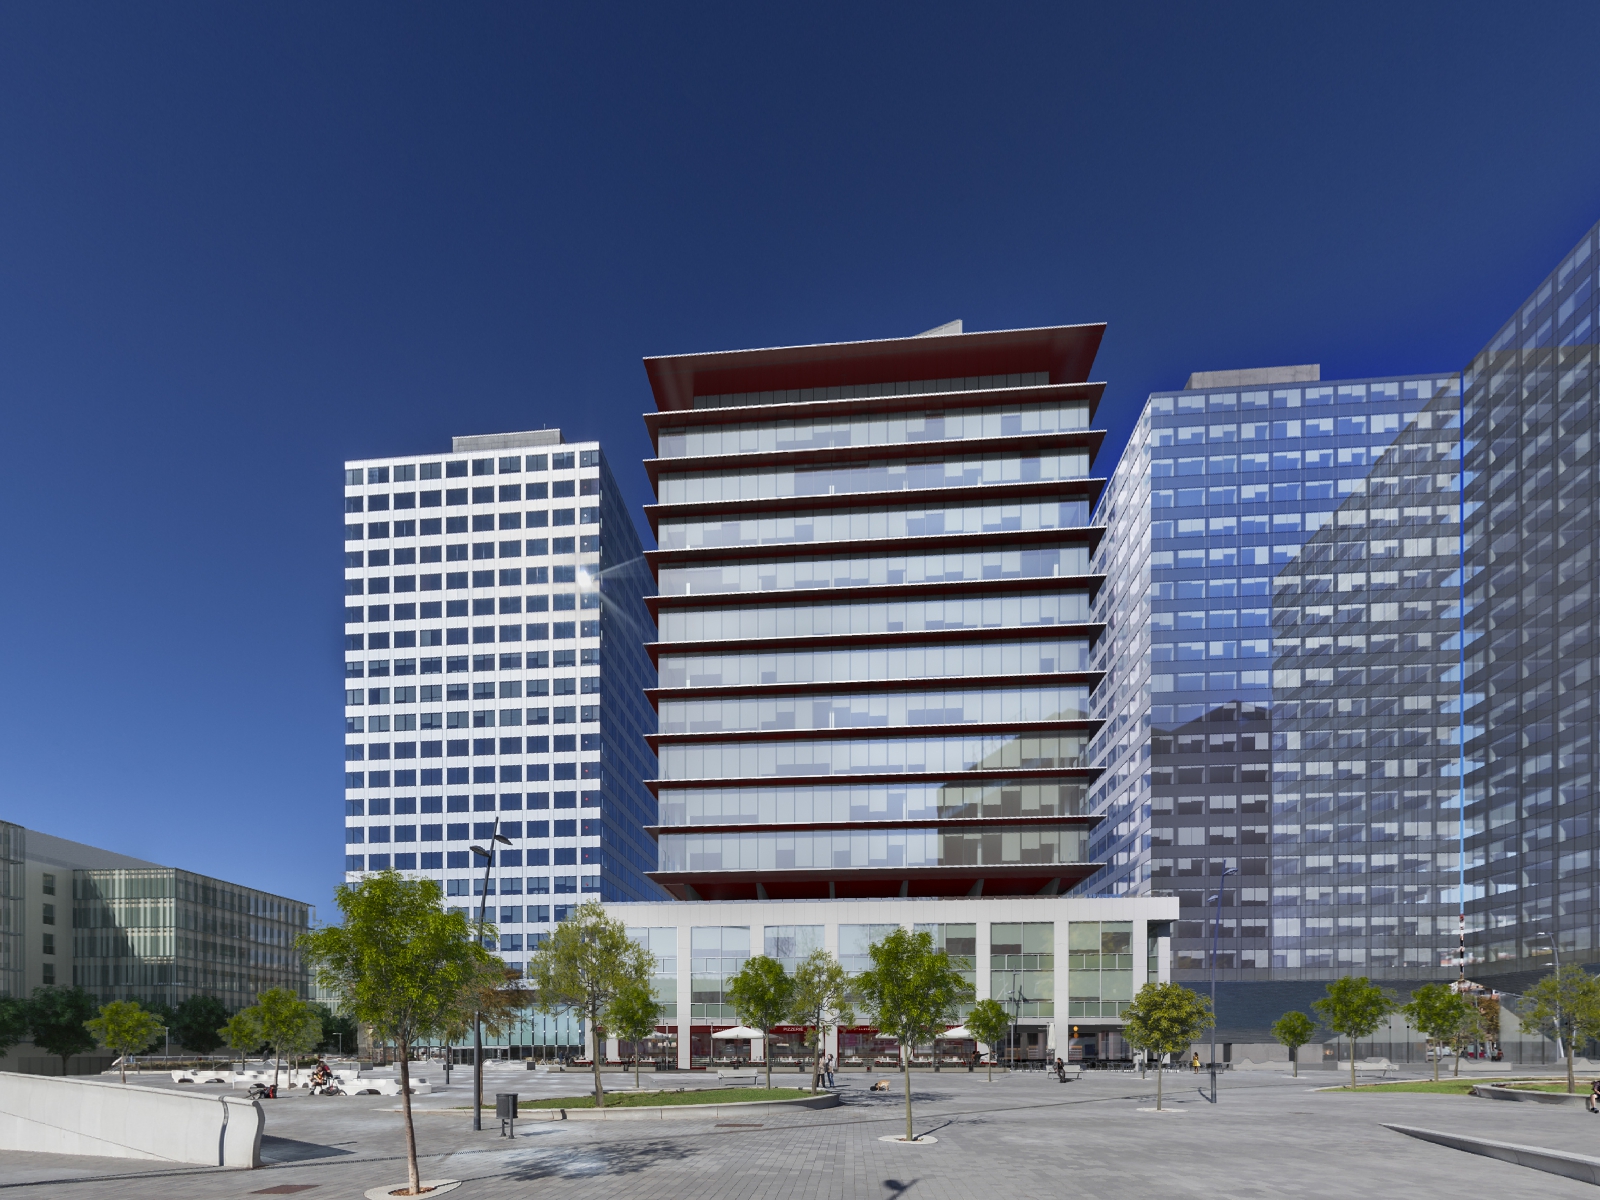
The following is a standard asymmetric perspective projection with a horizontal field of view of 100 degrees. 
In order to capture the top of buildings one might tilt the camera upwards, as follows. 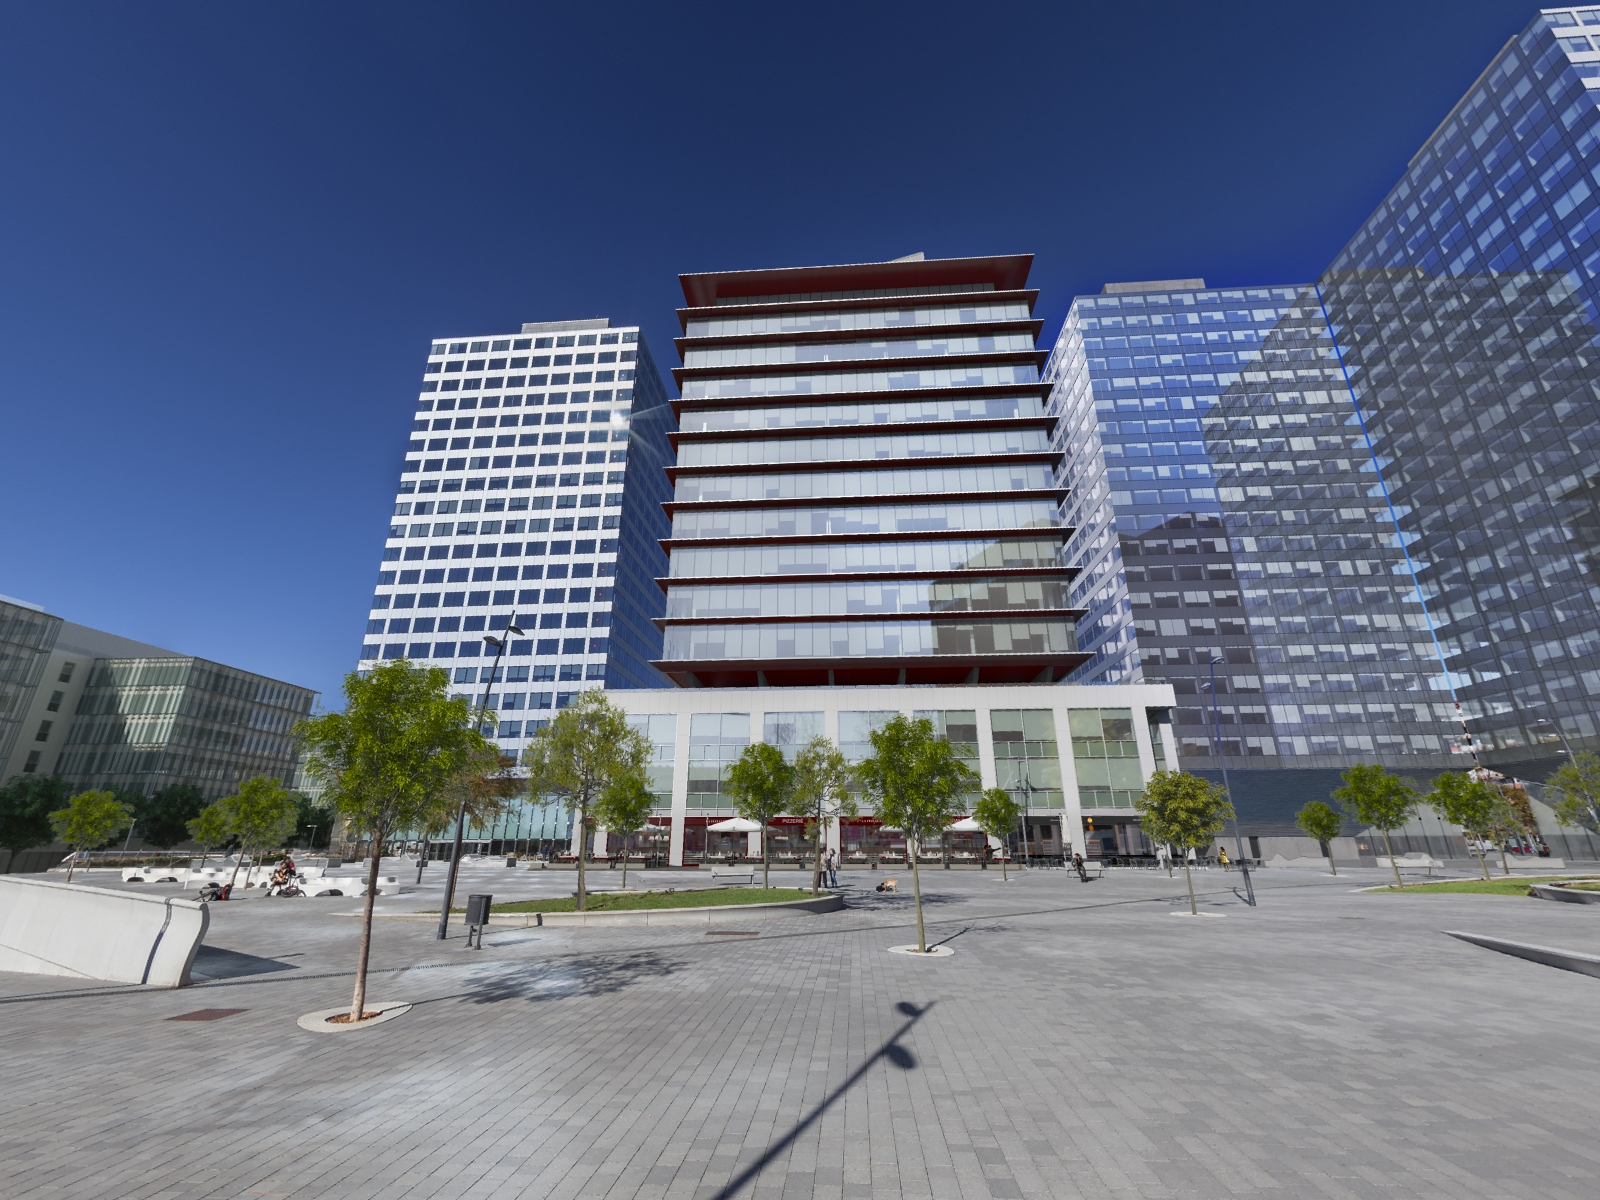
In order to avoid the perspective narrowing (keystone effect) of the buildings one can instead not tilt the camera but rather shift the projection plane. The following show this for 50% and 75% tilt respectively. 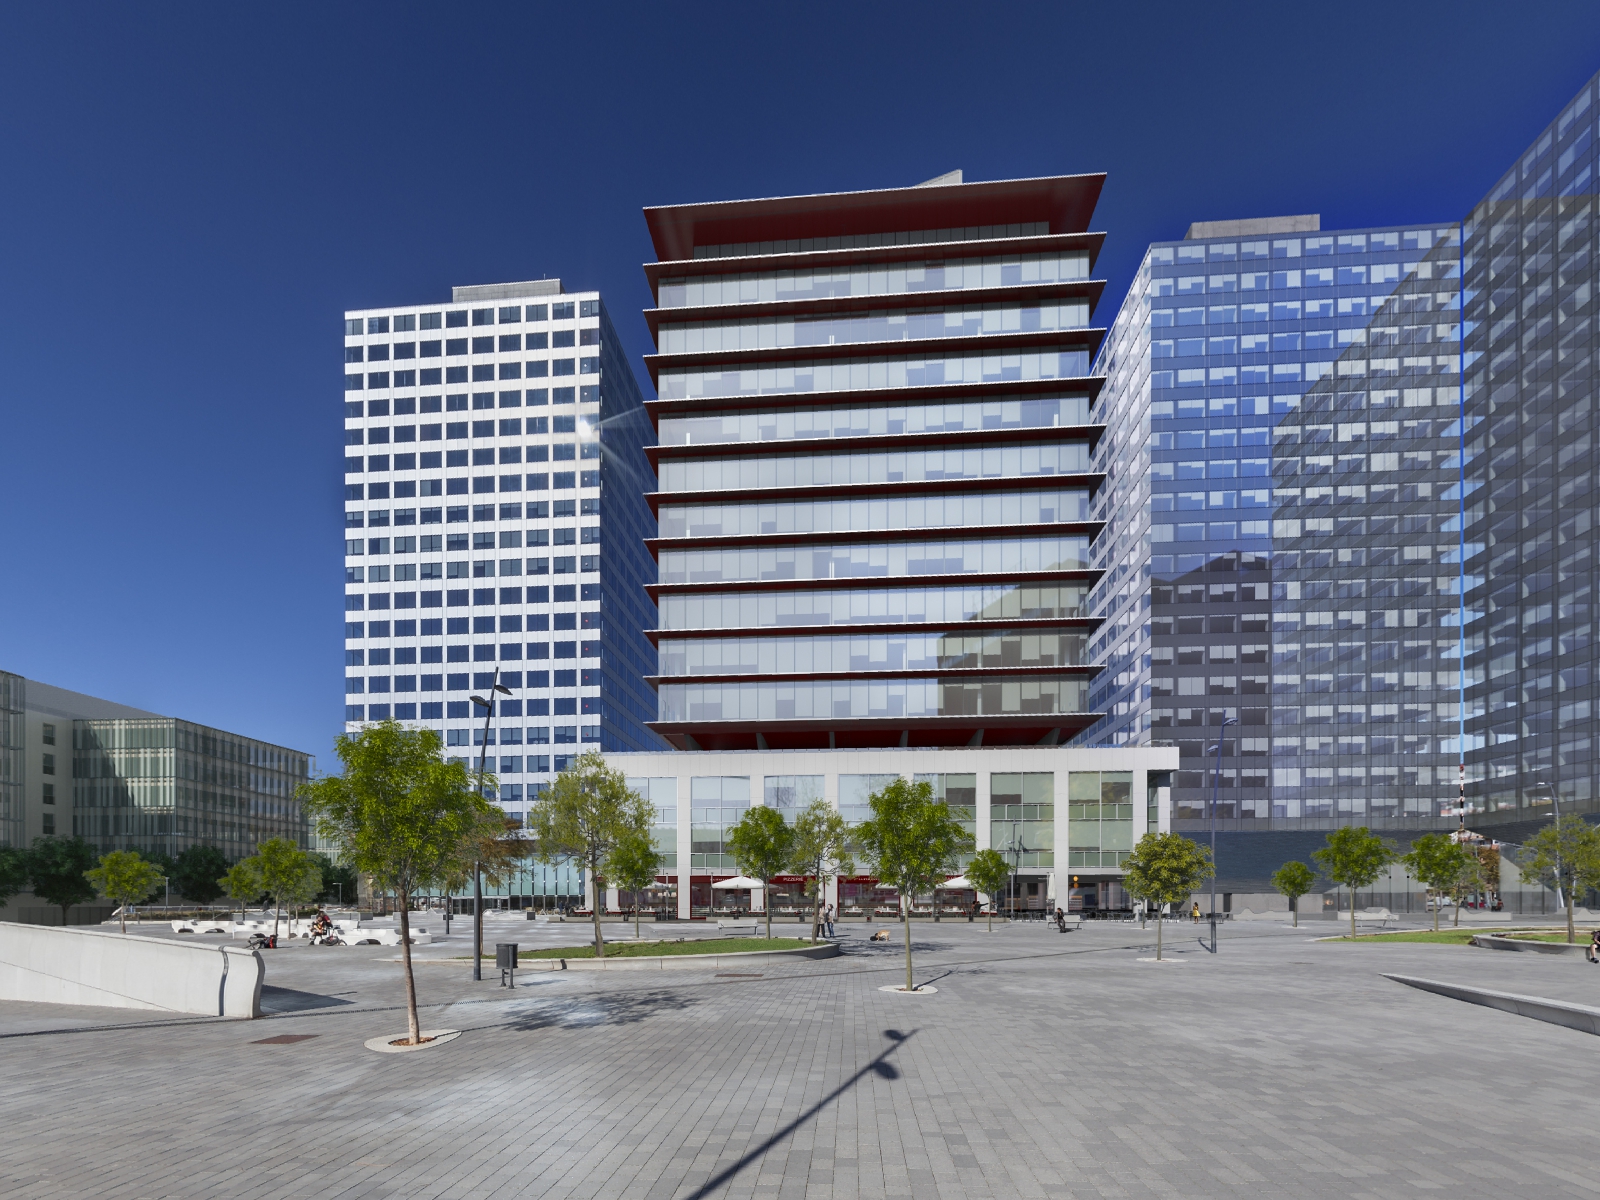
This is supported by two new command line options -vo and -ho for vertical and horizontal shift. They are followed by a percentage shift of the projection plane relative the width or height. A shift of 0 refers to no shift and results in a symmetric perspective frustum. Usage: sphere2persp [options] sphericalimage Options -w n perspective image width, default = 1920 -h n perspective image height, default: 1024 -t n horizontal FOV of perspective (degrees), default = 100 -x n tilt angle (degrees), default: 0 -y n roll angle (degrees), default: 0 -z n pan angle (degrees), default: 0 -vo n vertical offset for offaxis perspective (percentage), default: 0 -ho n horizontal offset for offaxis perspective (percentage), default: 0 -f create remap filters for ffmpeg, default: off -a n antialiasing level, default = 2 -n s output file name, default: derived from input image filename -c enable circular crop, default: off -d enable verbose mode, default: off 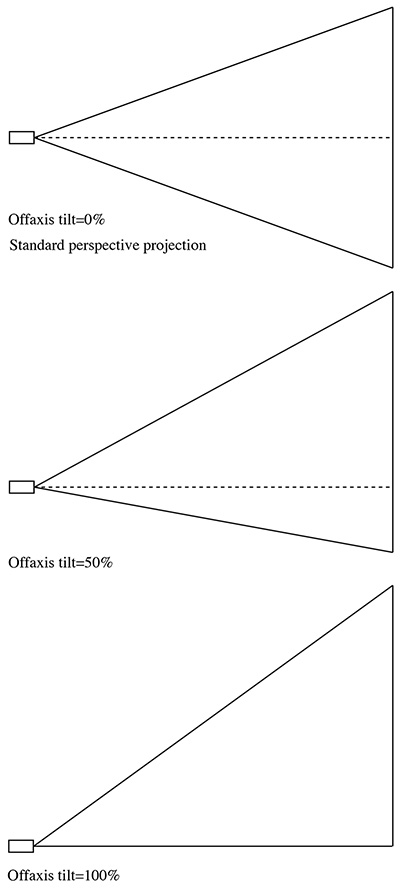
The following does the inverse of the above, that is, given a perspective image map it correctly onto an equirectangular image. The exact position of the perspective rectangle can be controlled by the three rotation options: -x, -y, -z. This function is symmetric with sphere2persp, that is, if one performs one mapping then the other will exactly reverse the result. Usage: persp2sphere [options] imagefile Options -w n sets the output image size, default: 4 perspective image width -a n sets antialiasing level, default: 2 -t n perspective horizontal fov (degrees), default: 100 -x n tilt camera, default: 0 -y n roll camera, default: 0 -z n pan camera, default: 0 -d debug mode Note that the vertical field of view of the perspective image is calculated internally as it is entirely defined by the horizontal field of view and the aspect ratio of the image.  Example perspective photograph
 Resulting equirectangular
|