Focus Stacking with the Phase OneWritten by Paul BourkeApril 2016
Focus stacking is the process by which multiple photographs, each with a different focal plane, are combined into a single image with an overall deeper depth of focus. The most common application is in macro photography where the object is close to the lens and the depth of focus does not extend across the depth of the object. While using limited depth of focus is often an artistic/composition choice, there are other applications such as digital recording for archive purposes where having all depths in focus is desirable. There are a number of ways the multiple focal levels can be arranged. They may be set manually, simply focusing on a different part of the object for each photograph. Or one can use a mechanical slider, focus on the camera set and the camera is moved closer or further from the object. This later approach has the benefit of not introducing focus breathing, the process by which the zoom changes slightly with focus. However current focus stacking algorithms are able to correct for slight zoom changes. There are also motorised and various levels of automation that can be applied to each of the above two techniques. It goes without saying that this process is only suited to tripod mounted camera and stationary subject matter. This document presents focus stacking in the context of the Sony Phase One camera, one of a number of tests conducted with the camera. The Phase One is the most recent medium format camera from Sony with a 100MPixel back. The latest revision (at the time of writing) of the Capture One Pro software includes an automated focus scan controller. These focus stacking controls consist of setting the near and far focus points and the number of focus points within that range. For optimal results for accurate focus on the Phase One the computer controlled focus controls through Live View on the Capture One Pro software is a necessity.  Automatic focus stacking controls Example 1
Two examples are presented here, fairly traditional applications of focus stacking. The lens used on the Phase One is their 120mm macro lens. In this first example only 12 photographs were taken, as it happens this was insufficient (see zones of slight lack of focus in the final stacked image). The number of photographs to take is not always a simple matter to determine, it depends on the aperture and the range of depth one is trying to capture. The algorithms require an overlap in the focused zones in order to align and deal with scaling from focus breathing. Typically a 30% overlap of the in-focus layer is the rule of thumb, if you have a camera that shows in-focus regions then that can be used to check suitable overlap. 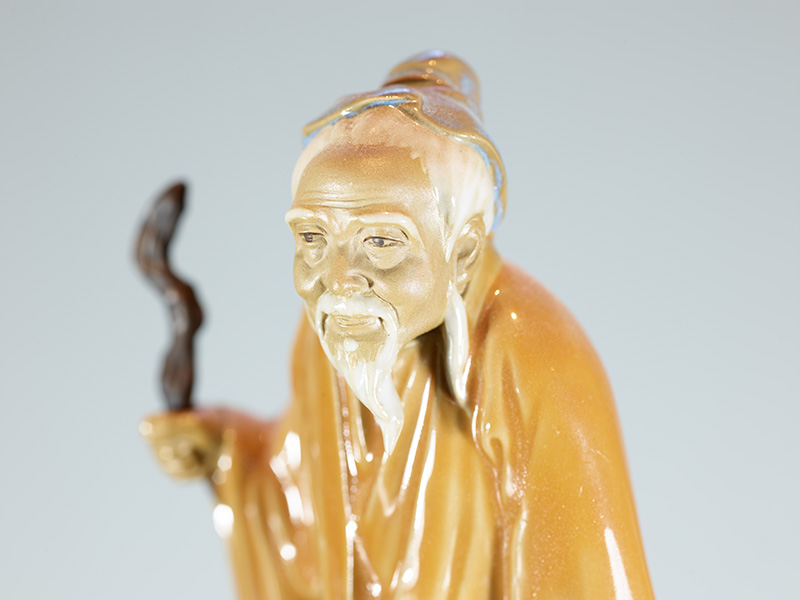 Closest part of object
Note that one does not necessarily choose ever smaller apertures (higher f-numbers). At some point blurring will start to occur due to diffraction effects. While the lens employed was determined to be safe up to f16, for the image here f7 was chosen. 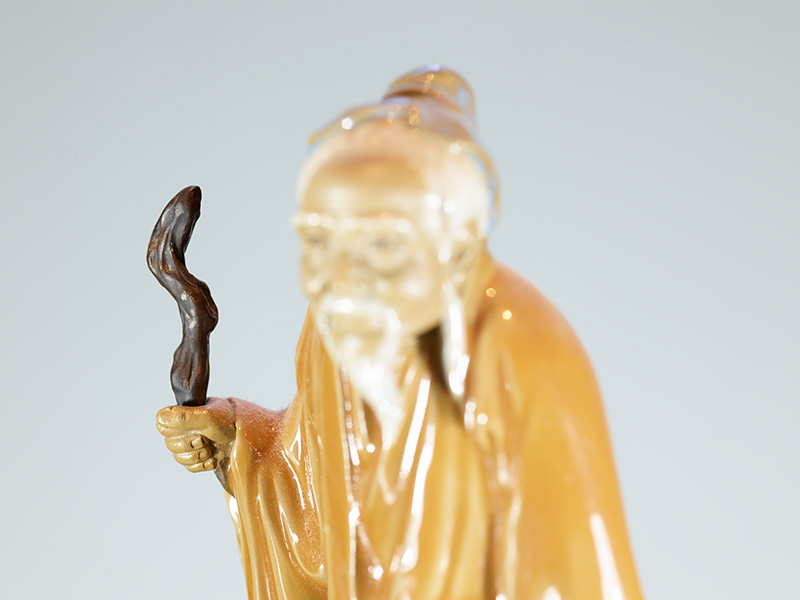 Furthest part of object
The following is the final focus stacked image. 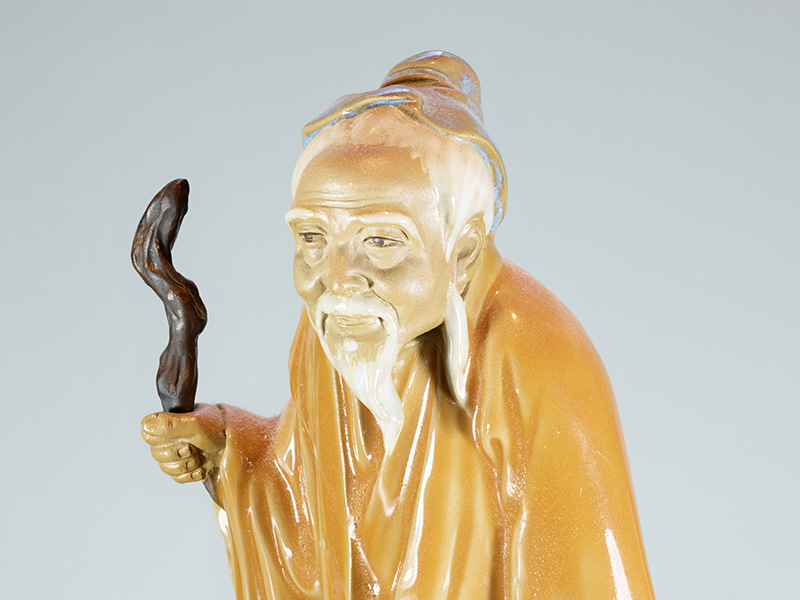 Download or click to explore full resolution
Fundamental to the algorithm is determining the various in-focus zones. These are shown below shaded by depth (white most distant, black closest to the lens), the black surround arises from lack of any focus on the grey background. 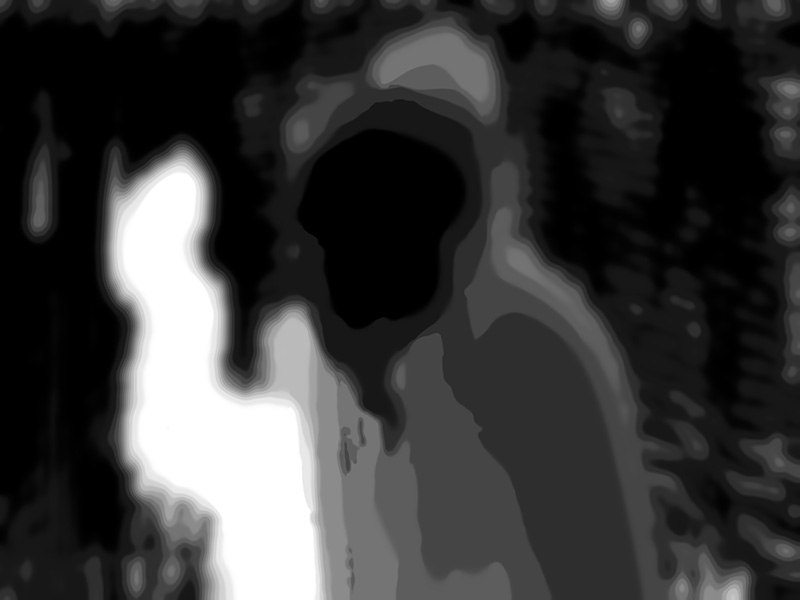 Greyscale depth map
One could then also interpret these layers as depths of a 3D surface, this is shown below. In this case it is a rather poor 3D model with clear discrete steps in depth, not unexpected from only 12 photographs. While one may consider this an alternative approach to 3D reconstruction, it performs much poorer for a number of reasons. Mainly, it is just a height field perpendicular to the camera position so obviously cannot resolve concave features. Also the focus zones are generally quite coarse compared to the structures once could readily derive from a 3D reconstruction approach. 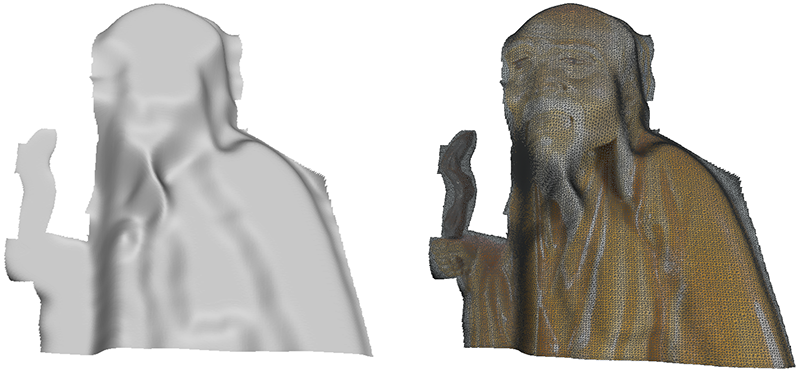 3D model
Example 2
In this example 30 photographs were taken across the chosen depth range. One can imagine that now that the process is automated then one might choose to err on the side of too many photographs knowing that only every 2nd or 3rd might be used for the focus stacking process. 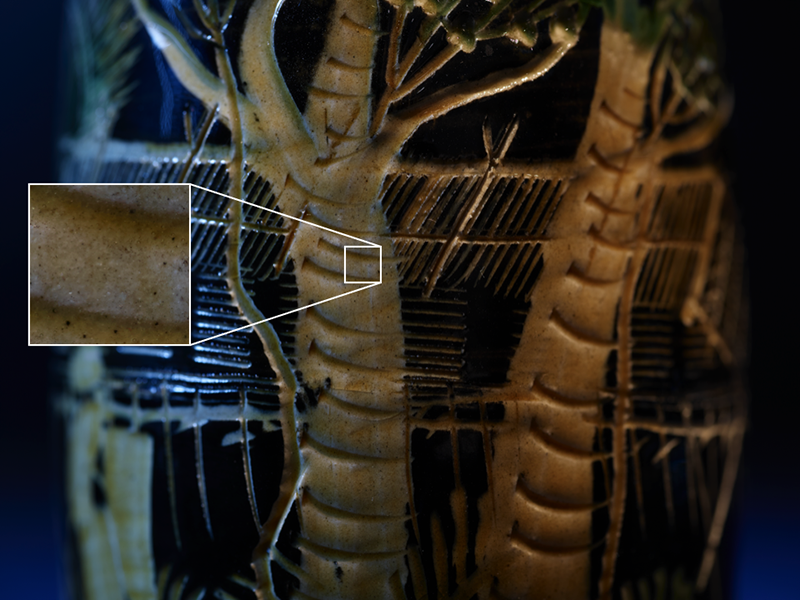 Closest part of object
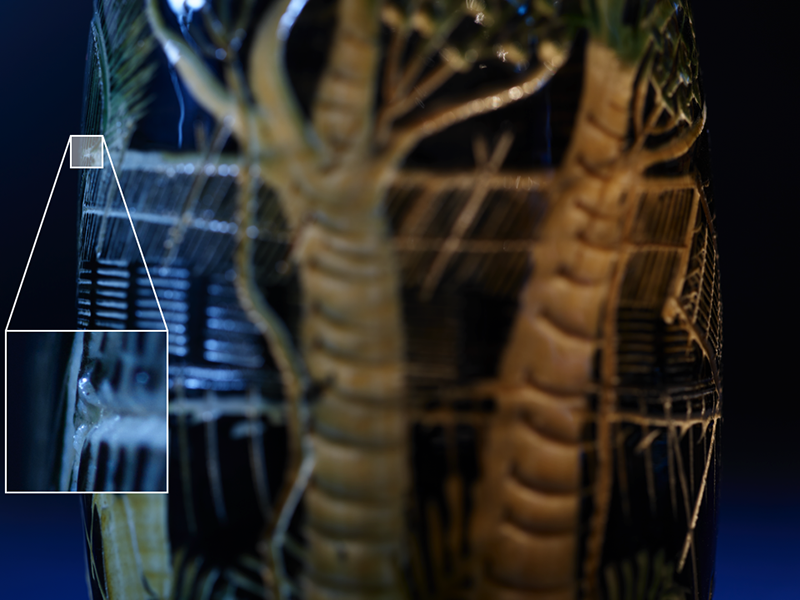 Furthest part of object
Focus stacked image. 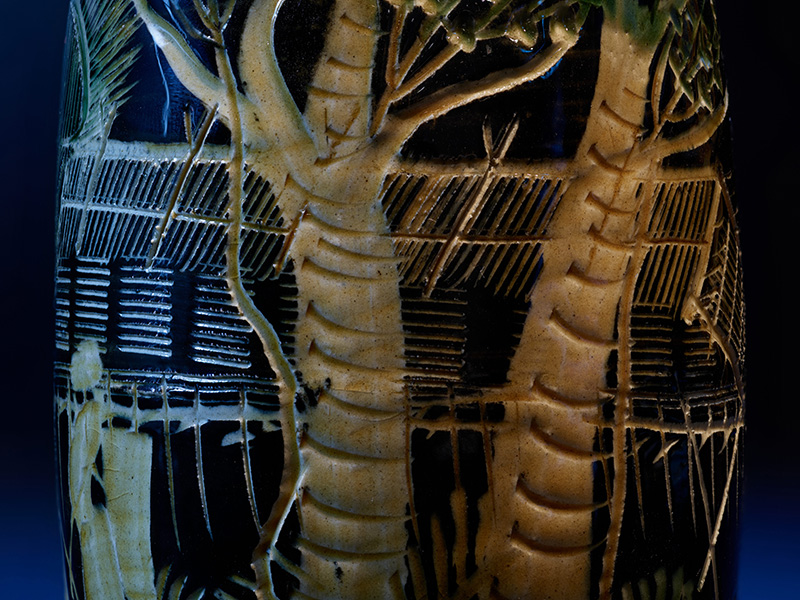 Download or click to explore full resolution Software
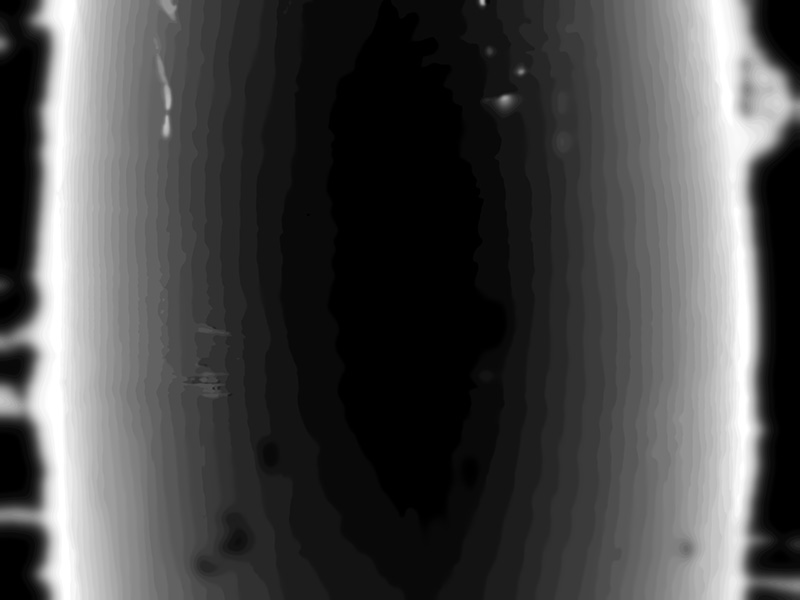 Greyscale depth map
While the increased number of layers has improved from the first example, they are still discrete layers capturing global curvature but not surface structure. Quality of reconstructed surface is clearly inferior to other techniques, such as 3D reconstruction. Additionally it is only from one view position. However it may provide better results for surfaces not suited to 3D reconstruction such as highly reflective/specular surfaces. One might ask if focus stacking can be used to create photographs that are then used for 3D reconstruction. The answer is definitely yes but the automated approach used here would not be suitable due the focus breathing and the resulting variation in the focus stacked images. 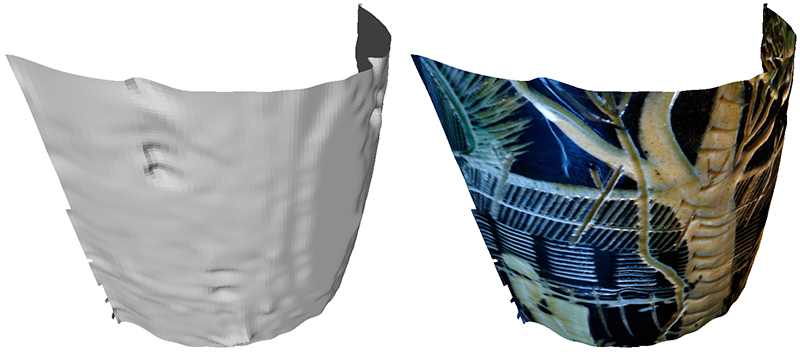 3D model
Image mosaicking with the Phase OneWritten by Paul BourkeApril 2016
The following documents some experiments aimed at evaluating the high fidelity capture of artworks using, at the time, the newly released Phase One camera. The Phase One is the most recent medium format camera from Sony with a 100MPixel back. There are a number of reasons why the Phase One was chosen for these tests, these include the high resolution sensor so fewer images need to be acquired for the same final stitched resolution, high dynamic range, availability of a high quality macro lens (in this case a 120mm macro lens). There are some other unique characteristics of the camera such as the seismometer to ensure photographs are only taken when the camera is steady. Example 1 Two artworks works were chosen, the first is a relatively flat painting (700mm across) but one with strong repeating patterns. This was chosen to test for any stitching issues. The aim in this case was to achieve a scan resolution of 1200DPI (approximately 50dots per mm). The final mosaic consisted of 4 photographs wide and 3 photographs high, each photograph from the Phase One is 11600x8700 pixels and an approximate 30% overlap was aimed for.  Global and zoomed in detail of dot painting
Example 2 The second example is a smaller piece, 300mm on each side, but it consisted of some degree of roughness in the form of up to 5mm raised oil paint strokes. The aim in this example was to scan at 2400DPI (approximately 100 dots per mm), 15 photographs in a 3x5 grid were acquired.  Phase One and two area lights (turned off here)
A discussion of the lighting is out of the scope of this document and indeed was not optimised for the tests conducted here.  Global photograph and zoomed in view of second example
There are a number of ways to deal with the narrow depth of focus of these macro lenses, noting that these photographs were already taken at f16 which is considered the limit for the lens in question before one strikes diffraction issues. One approach is focus stacking, for notes on evaluating this with the same camera see here. As the surface depth increases a tiled mosaic style capture becomes a less complete means for capturing the artwork. One is essentially recording a planar projection of a 2.5D surface. Not only does increased depth have implications for focus but also on lighting. One approach to address this is to capture the geometry of the surface through photogrammetric methods. The following is a surface representation acquired using the same camera, during the same shooting process. 15 photographs were taken, all from different positions and angles to the artwork.  Surface representation with side lighting to illustrate the surface features
The pipeline is to mosaic the high resolution image with highly diffuse lighting. This high resolution image is then co-registered with the surface model from the 3D reconstruction. Lighting of the artwork by different lighting scenarios can then be simulated by standard computer graphics lighting models and rendering methods. 
An outstanding missing acquisition are material properties, for example, diffuse and reflective components that in general are also angle dependent. Capturing BDRF (Bidirectional reflectance distribution functions) at the scale of a large art work is highly problematic. Focus Stacking with the Lumix GH5Written by Paul BourkeJune 2017
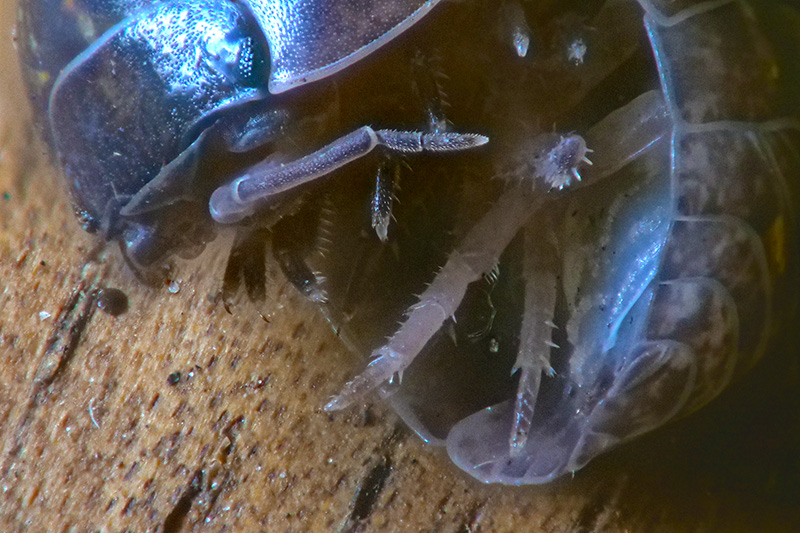
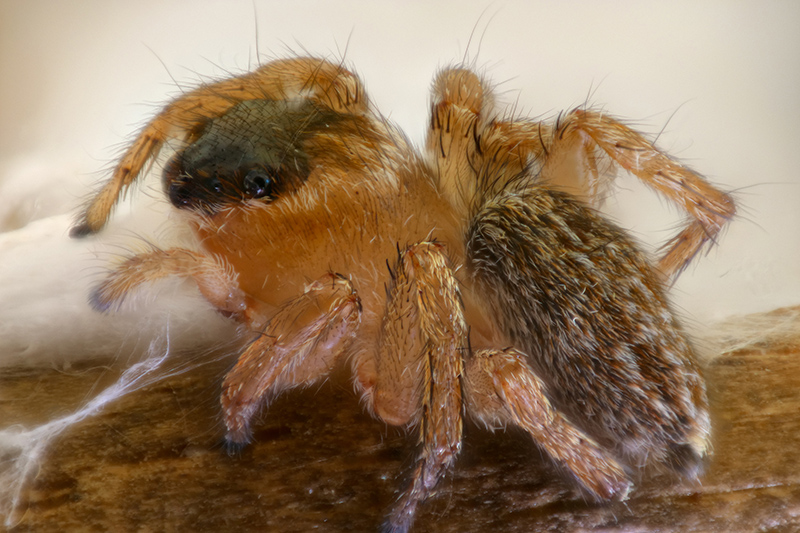
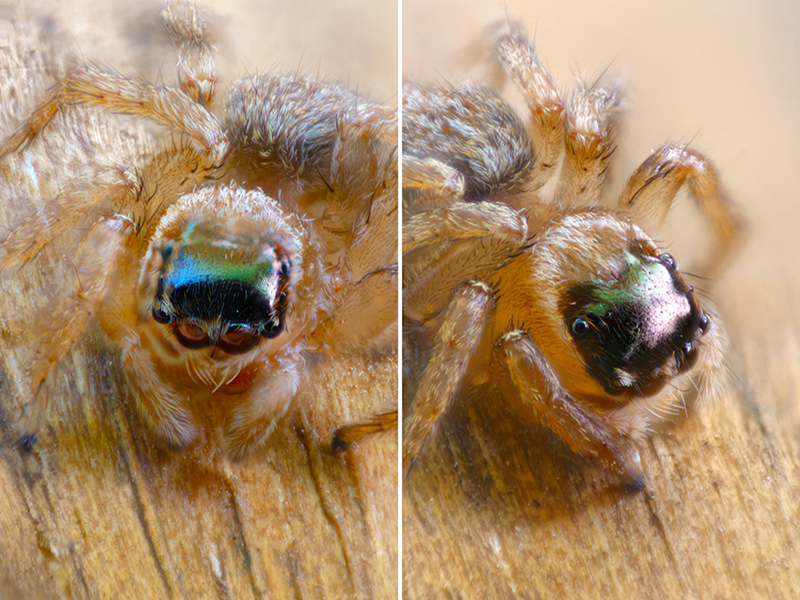
Focus stacking is the process by which multiple photographs, each with a different focal plane, are combined into a single image with an overall deeper depth of focus. The most common application is in macro photography where the object is close to the lens and the depth of focus does not extend across the depth of the object. While using limited depth of focus is often an artistic/composition choice, there are other applications such as digital recording for archive purposes where having all depths in focus is desirable. The interest for the author is the photography of small small objects for the purpose of 3D reconstruction. The Lumix GH5 has two built-in focus stacking modes they both automatically scan across the focus range. In one mode (focus stacking) one can save individual frames by choosing focus depth, or merge the images in the camera to achieve a wide focus range. In addition to the individual images one might save, the result in the form of a mp4 movie is saved on the SD card. This makes one suspect the image quality may not be as good (probably using the 4:2:2 or 4:2:0 compression the other video modes use). Examples
In the other mode one can choose the number of focus steps and the separation between each step, this is accessed through the focus bracketing mode. Unfortunately this separation is in some undocumented step so some trial and error is required. In this mode one just gets N images, one at each focus setting, and use a third party focus stacking software to combine the images. Examples
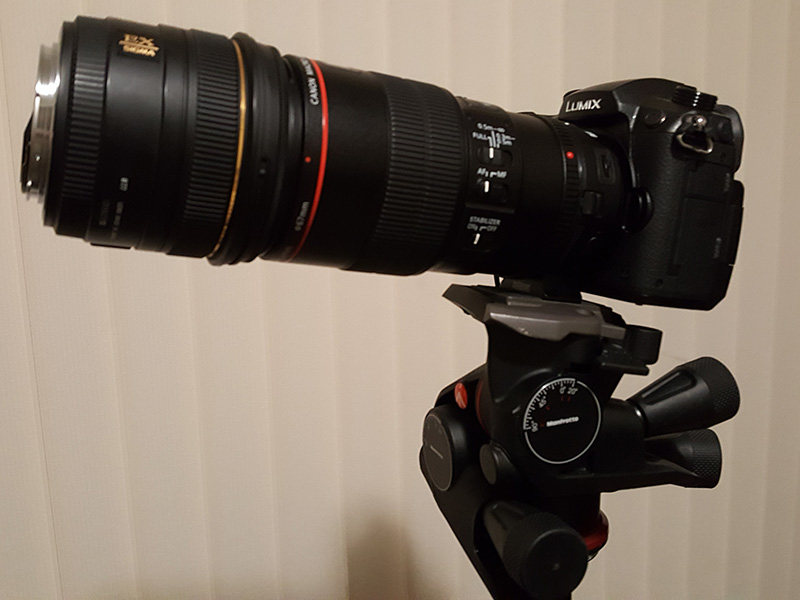
In the following examples, two lenses are used, a 100mm macro attached to the camera and a 50mm prime attached in reverse to the 100mm lens. 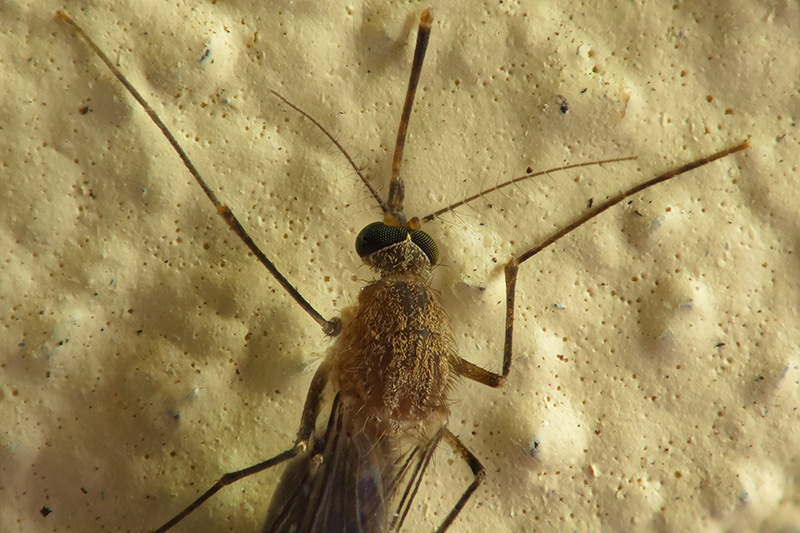
Experiments with the GoPro camerasWritten by Paul BourkeJune 2011
Please note the following applies to the GoPro HD Hero released early in 2011. The specifications for the GoPro HD Hero2 are different.
The small GoPro cameras gained rapidly in popularity during 2011, and found uses in areas other than for what they were originally intended, namely an action sports camera. For example, being light and self contained they were used on kites and remote miniature helicopters for aerial photography. Having relatively wide angle lens they also caught the interest of those capturing panoramic video, the following briefly notes some activities by the author in that area during 2011. The camera is both a still, time lapse, and full 1080 HD video camera. In video mode it uses a portion of the sensor as shown below, and a correspondingly narrower field of view. 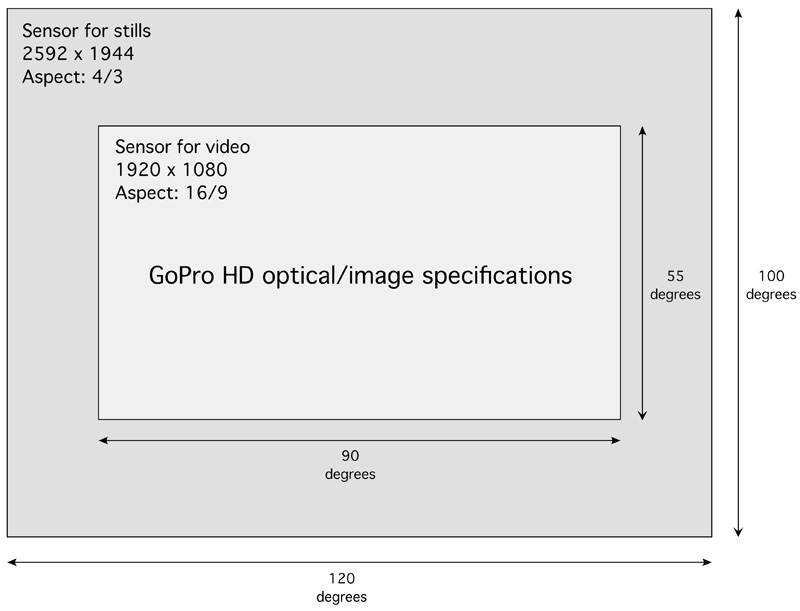
Example of three shots with the cameras aligned horizontally. (Click for higher resolution). The pipeline here generally involves an image rectification (turning the lens distorted image into a pure pinhole camera), followed by colour histogram matching, and finally a stitching/blending of the images together. This last stage can be performed purely on a geometric basis or by doing an initial feature point extraction between pairs of images and using that to perform the stitching. 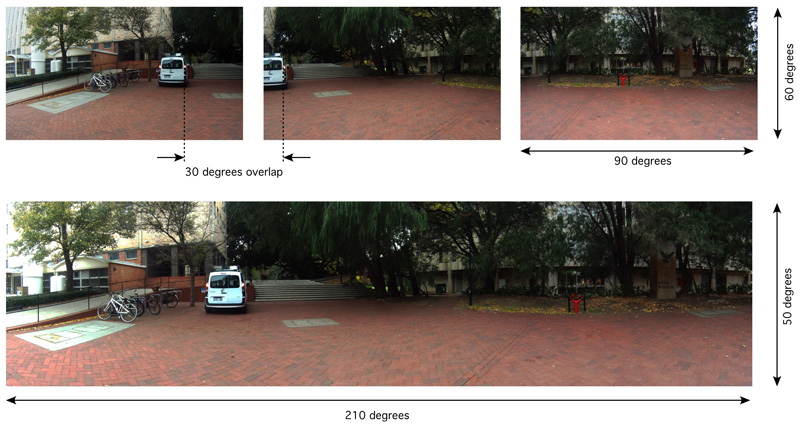 Example of seven shots with the cameras aligned vertically. (Click for higher resolution) 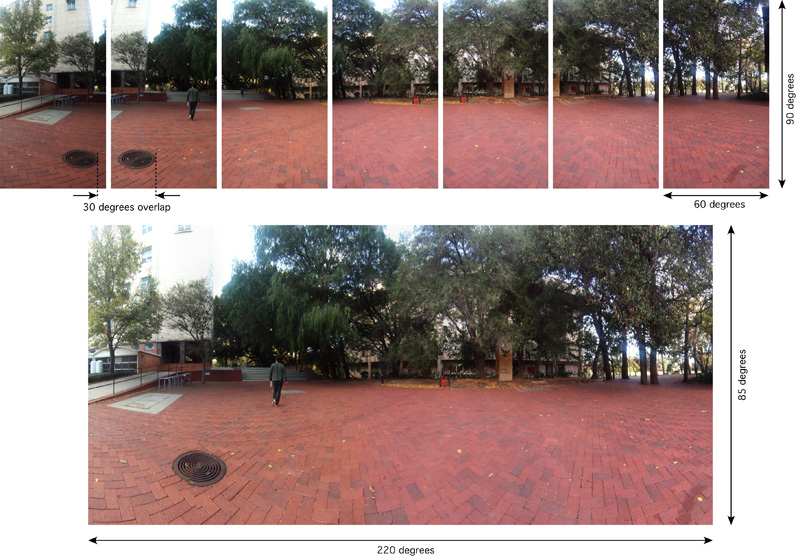 Mount for multiple camera rig designed for 360 degree video panorama (Click for higher resolution). Six cameras gave 360 degrees with easily enough overlap for blending/stitching. 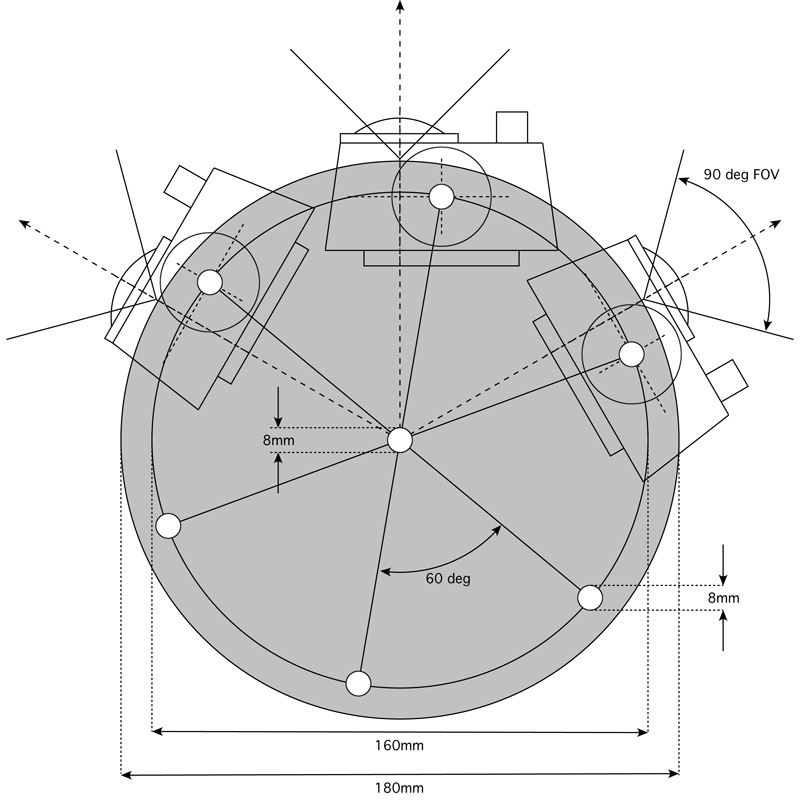 Sample QuickTime movie (scaled down to 1024 pixels wide). Vertical field of view approximately 50 degrees, note cameras are mounted horizontally. The black portion masked out on the left and right hides the cyclist, performed in post production. The biggest impediment to a high quality result are artefacts arising from the rolling shutter of the camera. This essentially means that time at the top of the frame is not the same as time at the bottom of the frame. This places an upper limit in stitching quality when the camera or objects in the scene move rapidly. This is in addition to the stitching errors that inevitably arise from the cameras not all having the same nodal point, this is only solved by mounting the cameras pointing upwards say and having mirrors to reflect the FOV onto the horizontal. Such a system can align the nodal points of the cameras to a single point. 
Instructions (full): instructionsfull.pdf
|


