Testing various fisheye capture optionsCompiled and written by Paul Bourke2006-2011
Conversion of images from OneShot cameraMay 2004
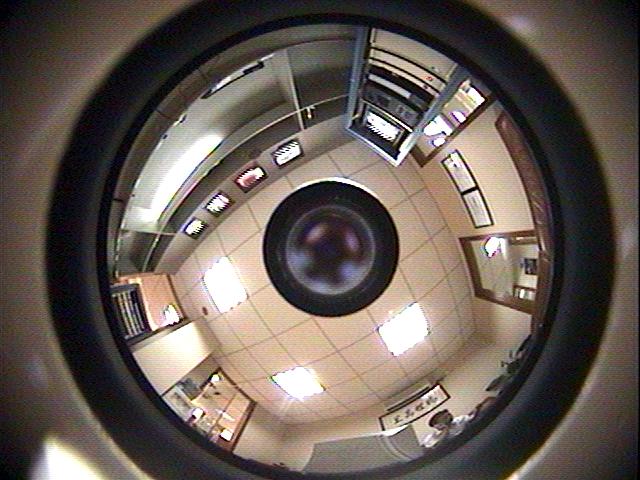
Photographic 360 degree capture devices such as the "360 One VR" manufactured by EyeSee360 and Kaidan are based upon conical mirrors mounted in front of the lens of an ordinary still or video camera. They allow one to capture the whole 360 horizontal field of view and a limited vertical field of view, typically around 100 degrees. The resulting image looks not unlike a panoramic image but with a different radial distortion. Obviously one wants to undistort these images to create more conventional views, in the discussion here that includes panoramic images, and cubic (perspective) maps. 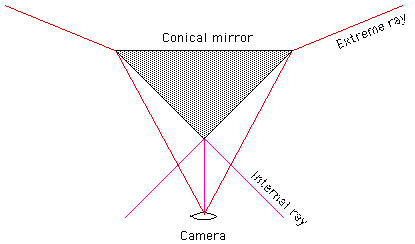
The suppliers of these capture devices typically provide stand alone software or plug-ins for other commercial image manipulation packages, eg: PhotoShop. They don't generally provide source code so that the undistortion can be integrated into a customers software. The goal of this exercise was to verify the geometric undistortion required was correctly understood and to demonstrate that with efficient and portable algorithms written in C/C++. Conversion to a cylindrical panoramic
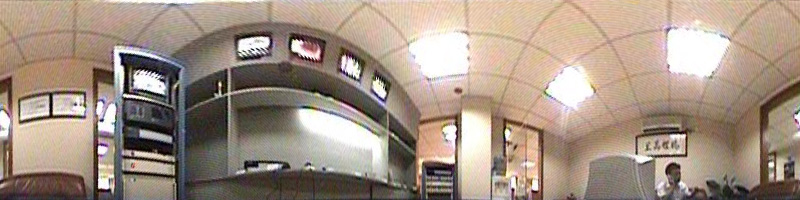
Transformation to a panoramic image is relatively straightforward in theory, lines of longitude in the panoramic are concentric circles in the oneshot image. Lines of latitude in the panoramic are radial lines in the oneshot image. In practice the oneshot image is not necessary centered and the inner and outer ray rims need to be specified. 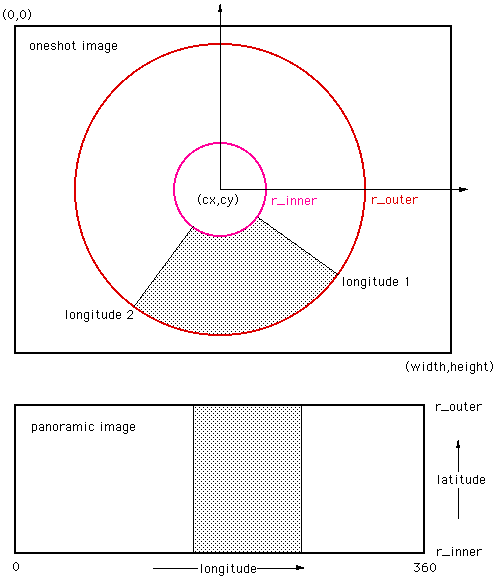
Antialising is achieved using supersampling with a rectangular weighted window. The right horizontal axis of the panoramic is taken as 0 degrees longitude. Options are also provided to create a subset of the panoramic image, namely, the panoramic image between two lines of longitude. Command line usage
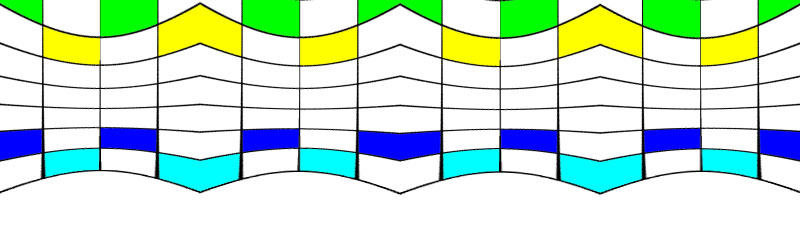
oneshot2pan [options] tgafile
Options:
   -long1  n   start longitude value
   -long2  n   start longitude value
   -r1     n   inner radius
   -r2     n   outer radius
   -c    x y   center of cone
   -a      n   set antialias level
   -w      n   width of the output image
   -h      n   height of the output image
   -i          apply vertical flip
   -d          change direction
Test pattern
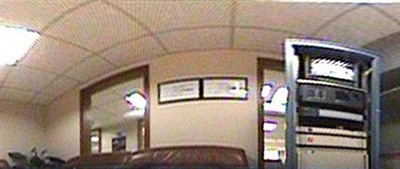
Conversion to cubic map
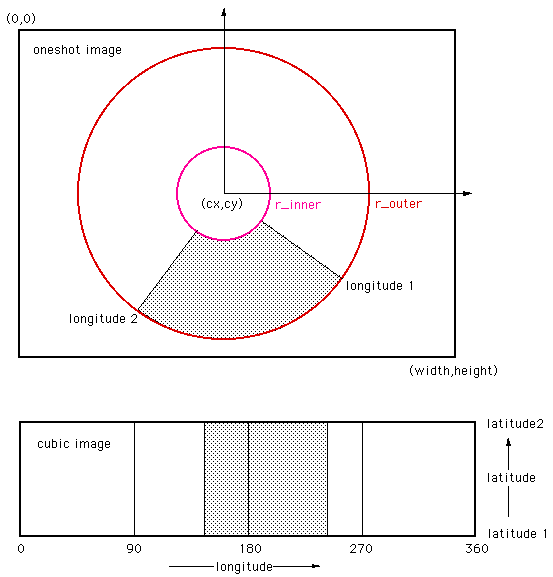
oneshot2cube [options] tgafile
Options:
   -r1     n   inner radius
   -r2     n   outer radius
   -c    x y   center of cone
   -a      n   set antialias level
   -w      n   width of the output image
   -h      n   height of the output image
   -l1     n   latitude at r1
   -l2     n   latitude at r2
   -i          apply vertical flip
Test pattern
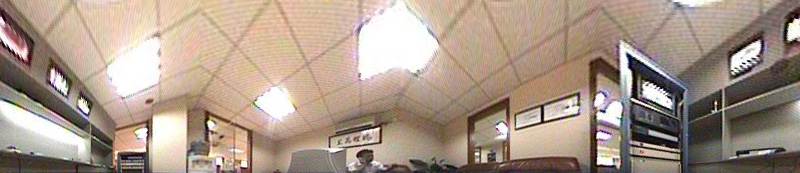
Conversion to cubic map with a range of longitudes
Standard perspective projections can be considered to be longitude subsets (less than 90 degrees wide) taken from the cubic map. Ideally the cubic map would be aligned so that edges didn't not fall within the perspective frustum (not yet implemented). Of course one could derive the perspective views directly without using this cubic map approach.
oneshot2cube2 [options] tgafile
Options:
   -r1     n   inner radius
   -r2     n   outer radius
   -c    x y   center of cone
   -a      n   set antialias level
   -w      n   width of the output image
   -h      n   height of the output image
   -lat1   n   latitude at r1
   -lat2   n   latitude at r2
   -long1  n   start longitude
   -long2  n   stop longitude
   -i          apply vertical flip
References
A Catadioptric Sensor with Multiple Viewpoints
Single viewpoint catadioptric cameras.
Omnidirectional vision: Theory and algorithms.
A unifying theory for central panoramic systems
and practical applications.
Non-metric calibration of wide-angle lenses and polycameras.
Evaluation of the lomography fisheye camerafor capturing images for dome/planetarium applicationsApril 2005
Evaluation of the Canon HV20 and Nikon FC-E9 lens
October 2007
| ||||||||||||||||||||||||||||||||||||||||||||||||||||||||||||||||||||||||||||||||||


|
|
The first thing one notices is that the circular fisheye, with the minimum zoom, does not fit within the sensor and it also isn't centered. The details (which may vary slightly with each camera) are shown below. While this may seem like a serious problem, for many applications it isn't. Many small planetarium systems employing a single projector and fisheye lens often only use 3/4 of the fisheye image, the portion at the "back" of the dome isn't used. Alternatively for upright domes it is common for the lower portion of the dome to be truncated (see examples later).
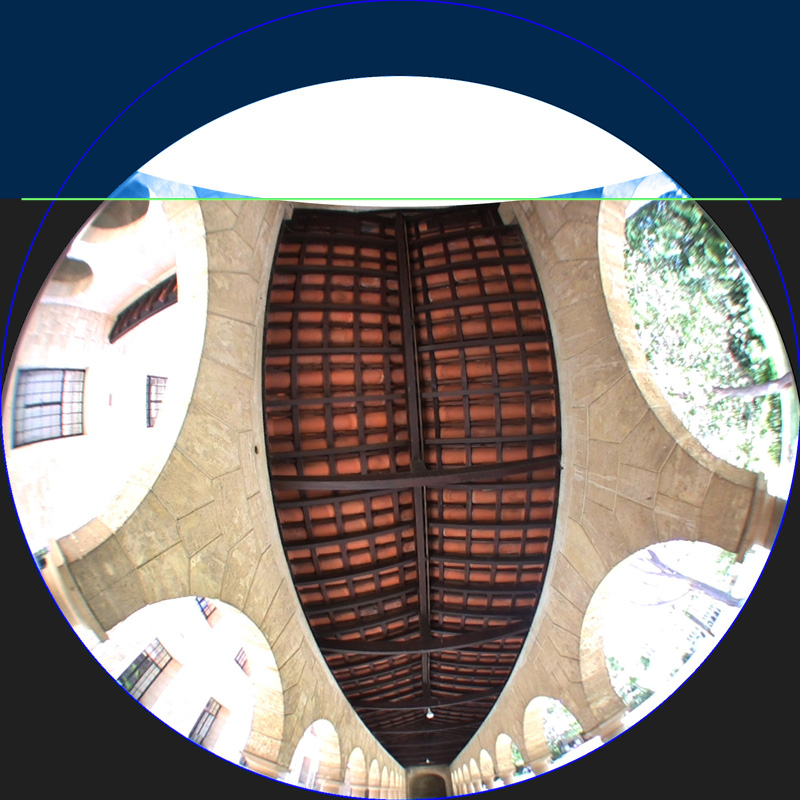
One solution to this is to digitally tilt the fisheye so as to remove the truncation at the bottom of the fisheye image. This technique applied to the image above is shown below, the green line shows the truncated region employed by many fisheye projection systems. Note that the image in the top half of the fisheye now does not fill the circular fisheye area, blue circle outline. This too can be corrected although unlike the tilting of the fisheye, this additional correction introduces distortion to the the upper half of the image which may or may not be objectionable, remembering that it is behind the viewer (at least in a directional dome).
Complete example
Original frame off the Canon HV20 (movie sequence)
Centered in a circular frame
fishtilt -cf 940 590 -r 724 724 -w 1280 -a 3 sample2.tga
Tilted to remove the missing front part of the fisheye
fishtilt -cf 940 590 -r 724 724 -w 1280 -a 3 -t 17 sample2.tga
Non circular correction for top half of image (cheat)
fishtilt -cf 940 590 -r 724 724 -w 1280 -a 3 -t 17 -b 20 sample2.tga
Truncated for offset, truncated fisheye projection
fishtilt -cf 940 590 -r 724 724 -w 1280 -a 3 -t 17 -b 20 -bb sample2.tga
Further examples
Two further examples are shown below, single frames extracted from a movie. These are rendered at XGA resolution (1024x768), that is, the lowest resolution fulldome projection employing a fisheye lens. It is my estimation that the quality in this case is limited by the the projection system as much as by the footage. By comparison, the quality on a HD projection system employing a spherical mirror is clearly limited by the quality of the footage. I suspect carefully captured, processed footage would be a good match for a SXGA+ based system.
|

|
Upright dome
It turns out that the camera and fisheye position is more suited to truncated style upright domes. When the camera is operated upsidedown the larger part of the fisheye image missing isn't required anyway since it is below the hemisphere truncation. The smaller missing piece at the other end of the fisheye results in a small section of missing image at the very top of the dome, or it may be filled by using the same fisheye tilting procedure discussed above.
Original frame off the Canon HV20 (movie sequence)
Centered in a circular frame

Warped image for fulldome projection using a spherical mirror
Examples in the upright dome
Other lenses on the same camera
Nikon FC-E8:
This gives a similar circle but doesn't focus towards the rim where
the image fades to black. Also seems the field of view is somewhat less than 180 degrees.
Phoenix Super Fisheye Lens 0.25X:
This gives a smaller circle than the
Nikon FC-E9 and results in a field of view I suspect between 160 and 170 degrees.
Sample image below.
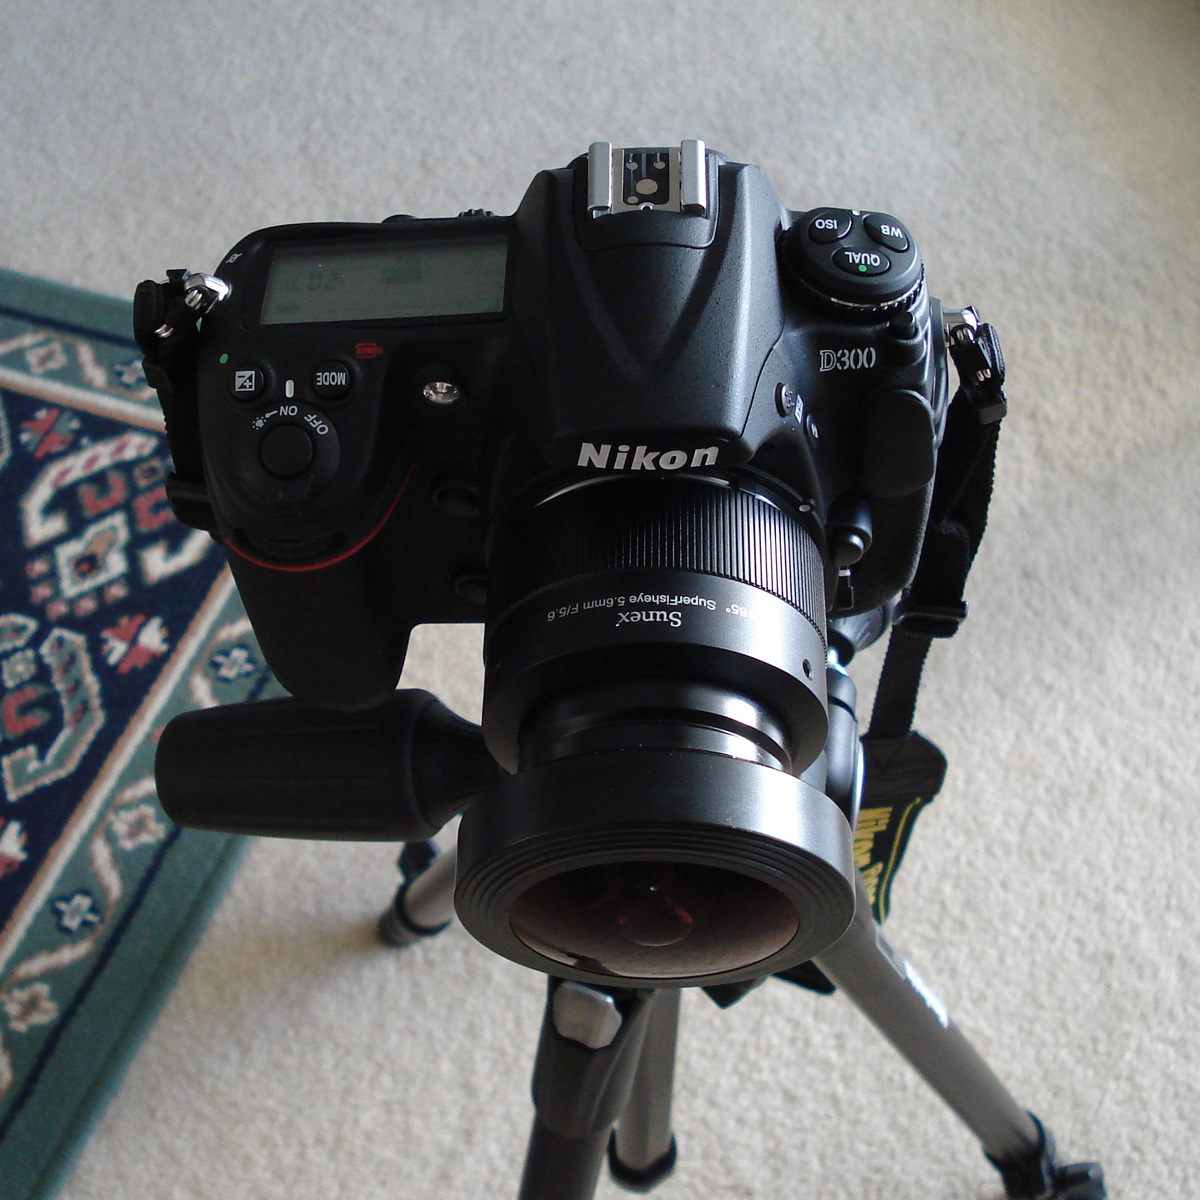
Nikon D300 and Sunex 185 degree fisheye lens
May 2008
This combination, Nikon D300 and Sunex 185 degree (5.6mm) fisheye lens, gives a full 180 degree fisheye image using more of the full frame than most other fisheye lens tested (notably Sigma lens). After cropping to 180 degree the resulting fisheye is in the order of 2580 pixels square.
|
|
The lens is certainly very solid. Extremely good focus, no manual focus required since it is fixed. I experienced very few problems even when shooting into the sun. It is not a perfect f theta lens, but then what fisheye lens is.
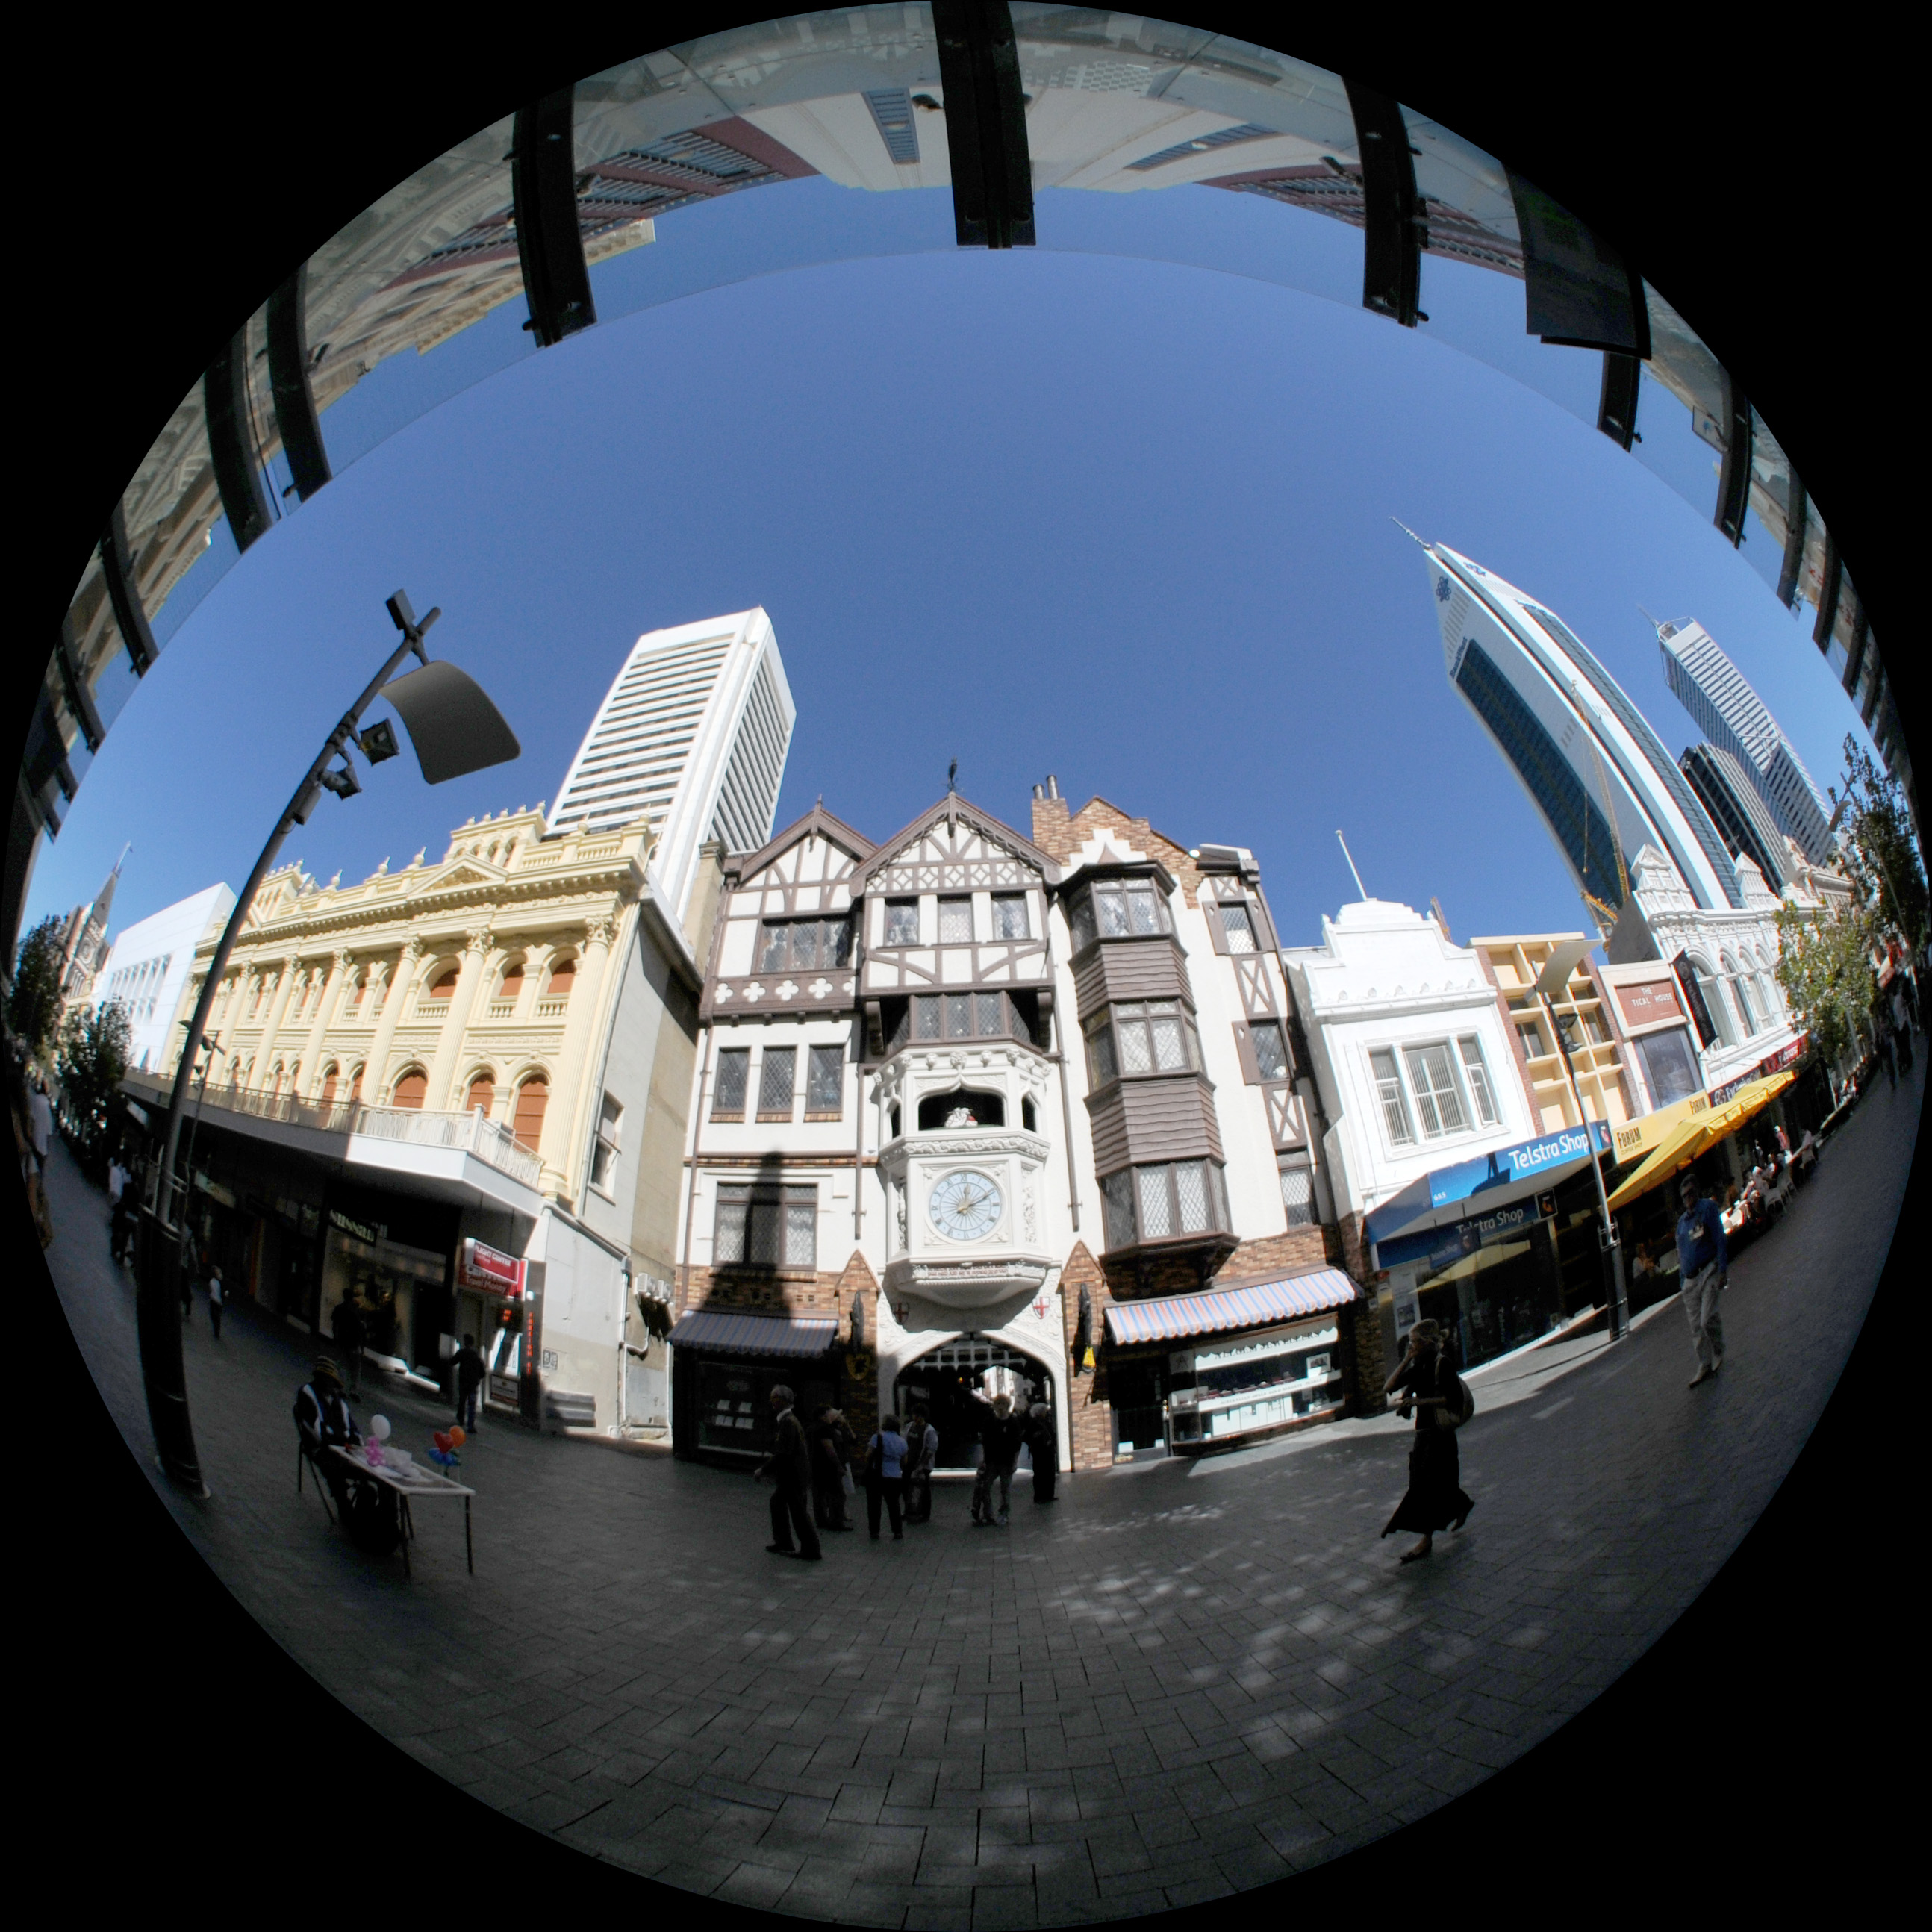
Perth city centre
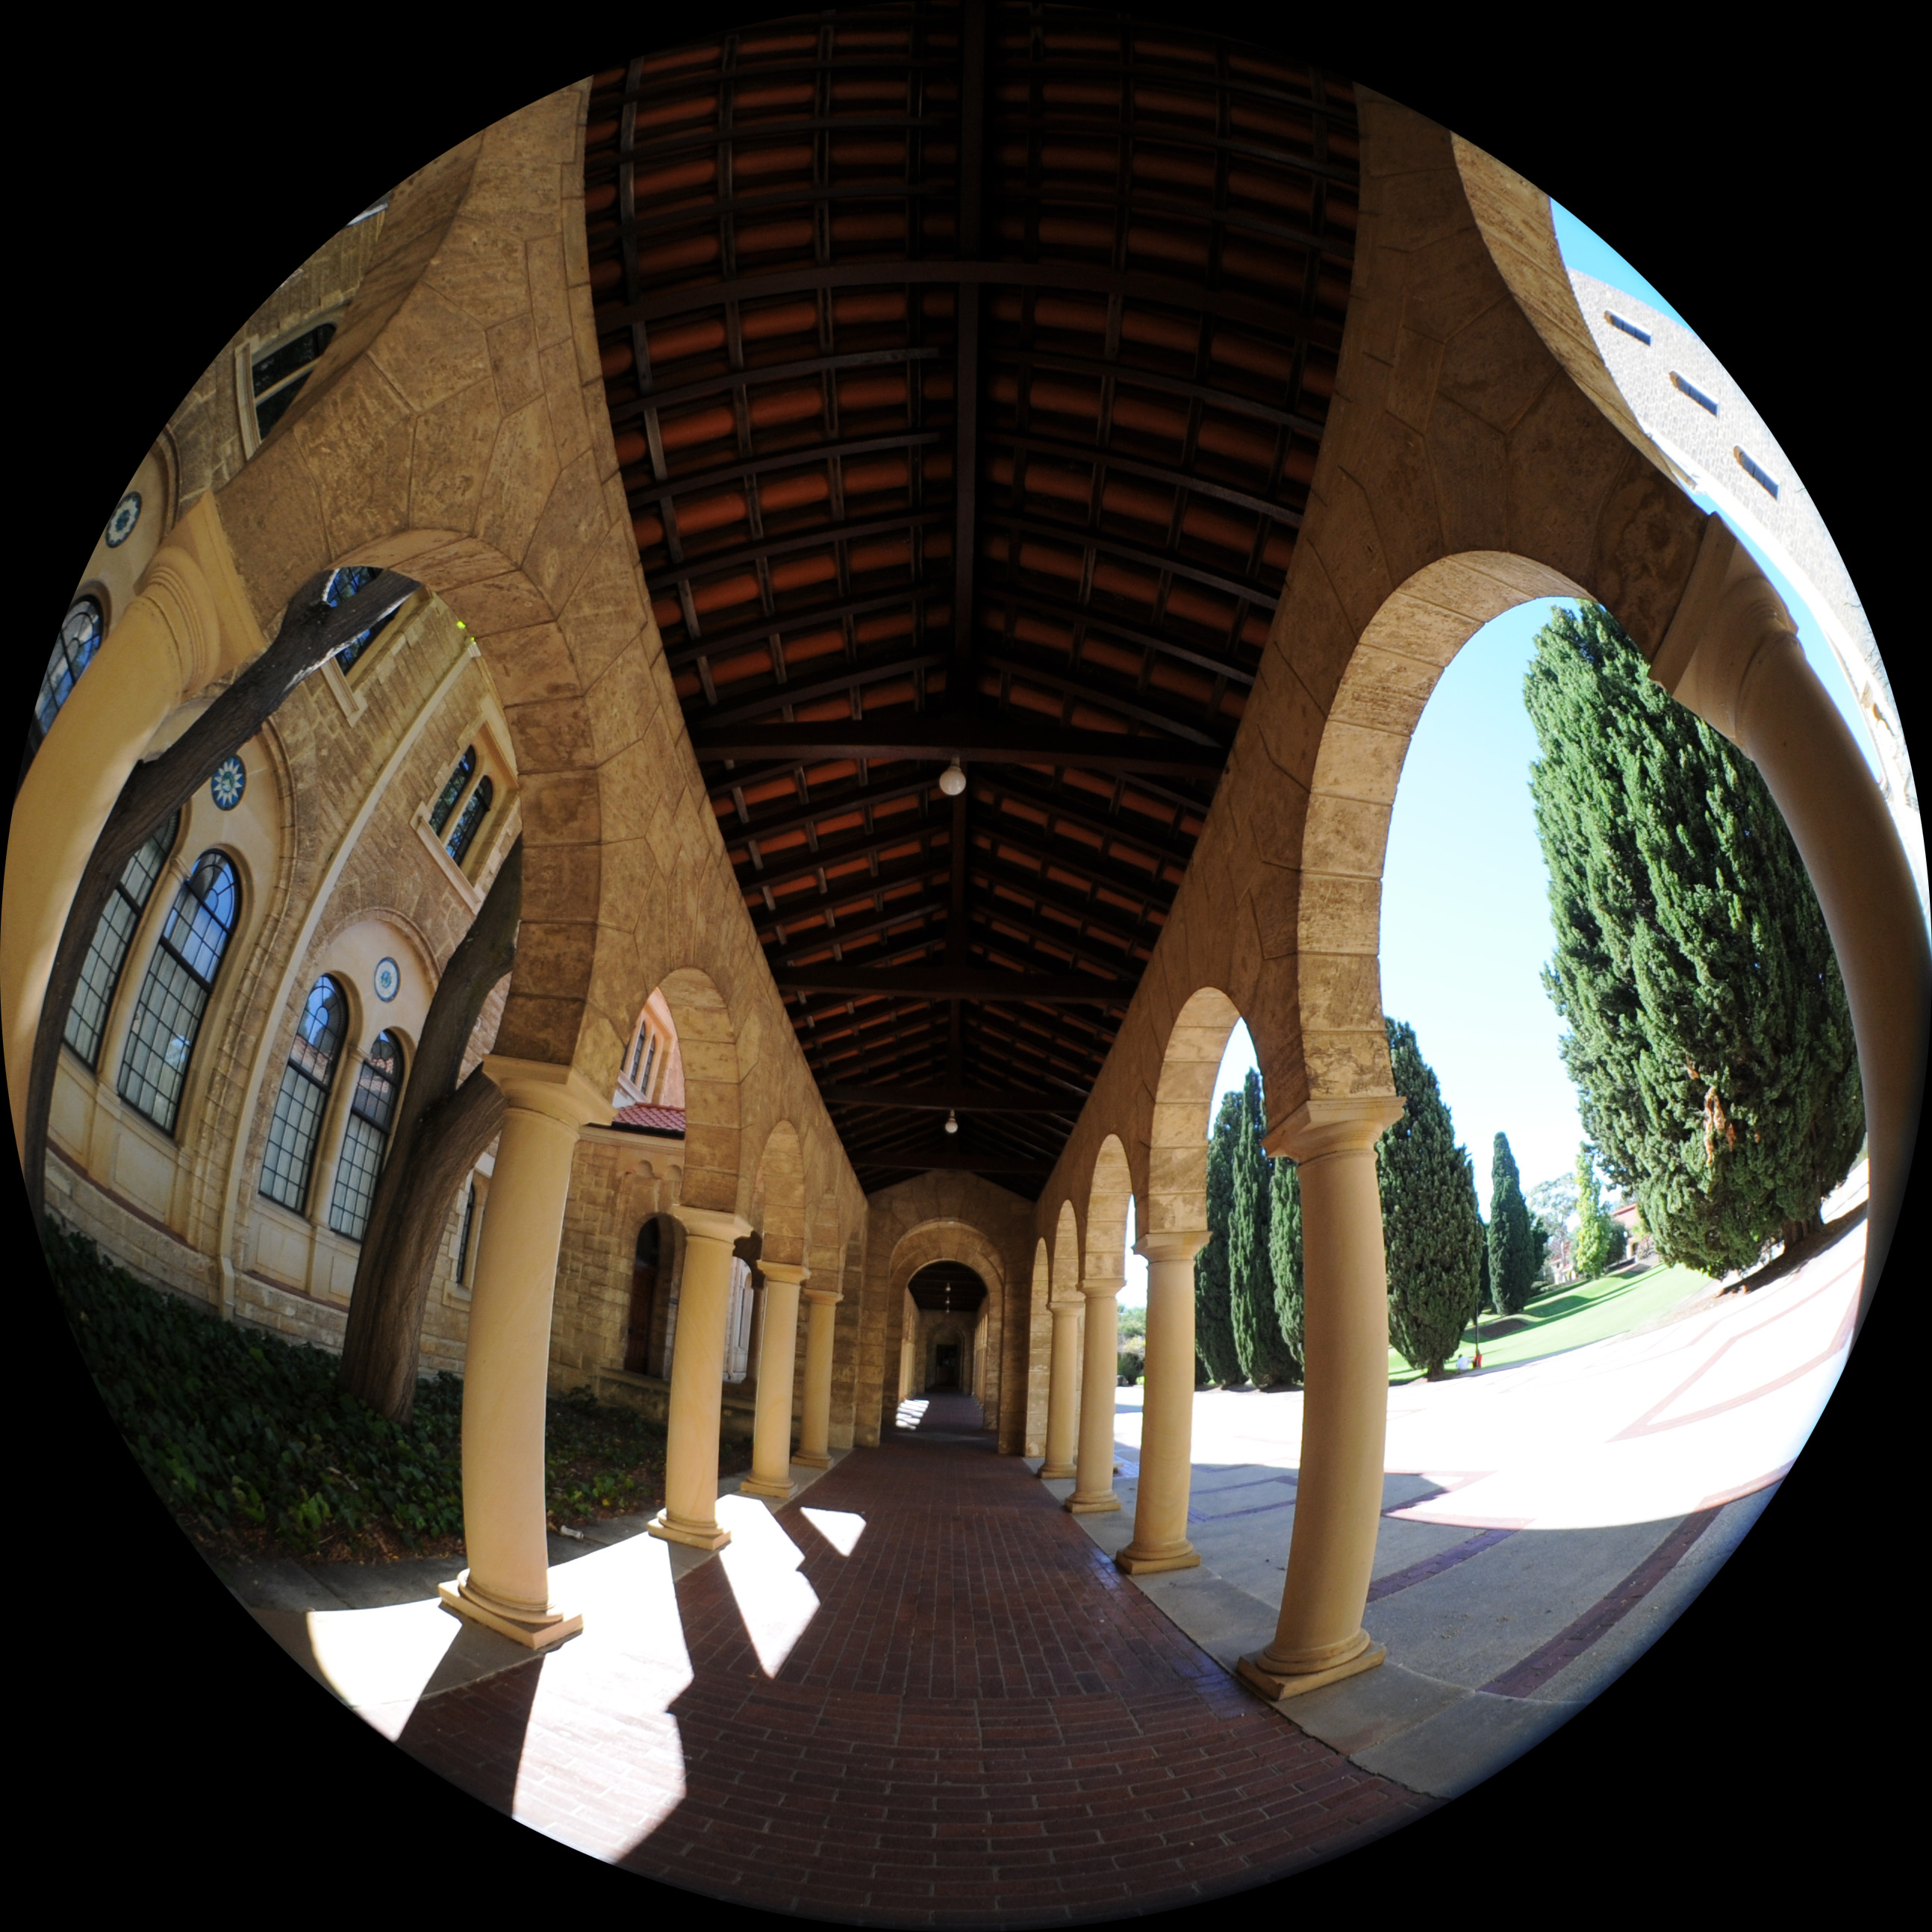
University of Western Australia
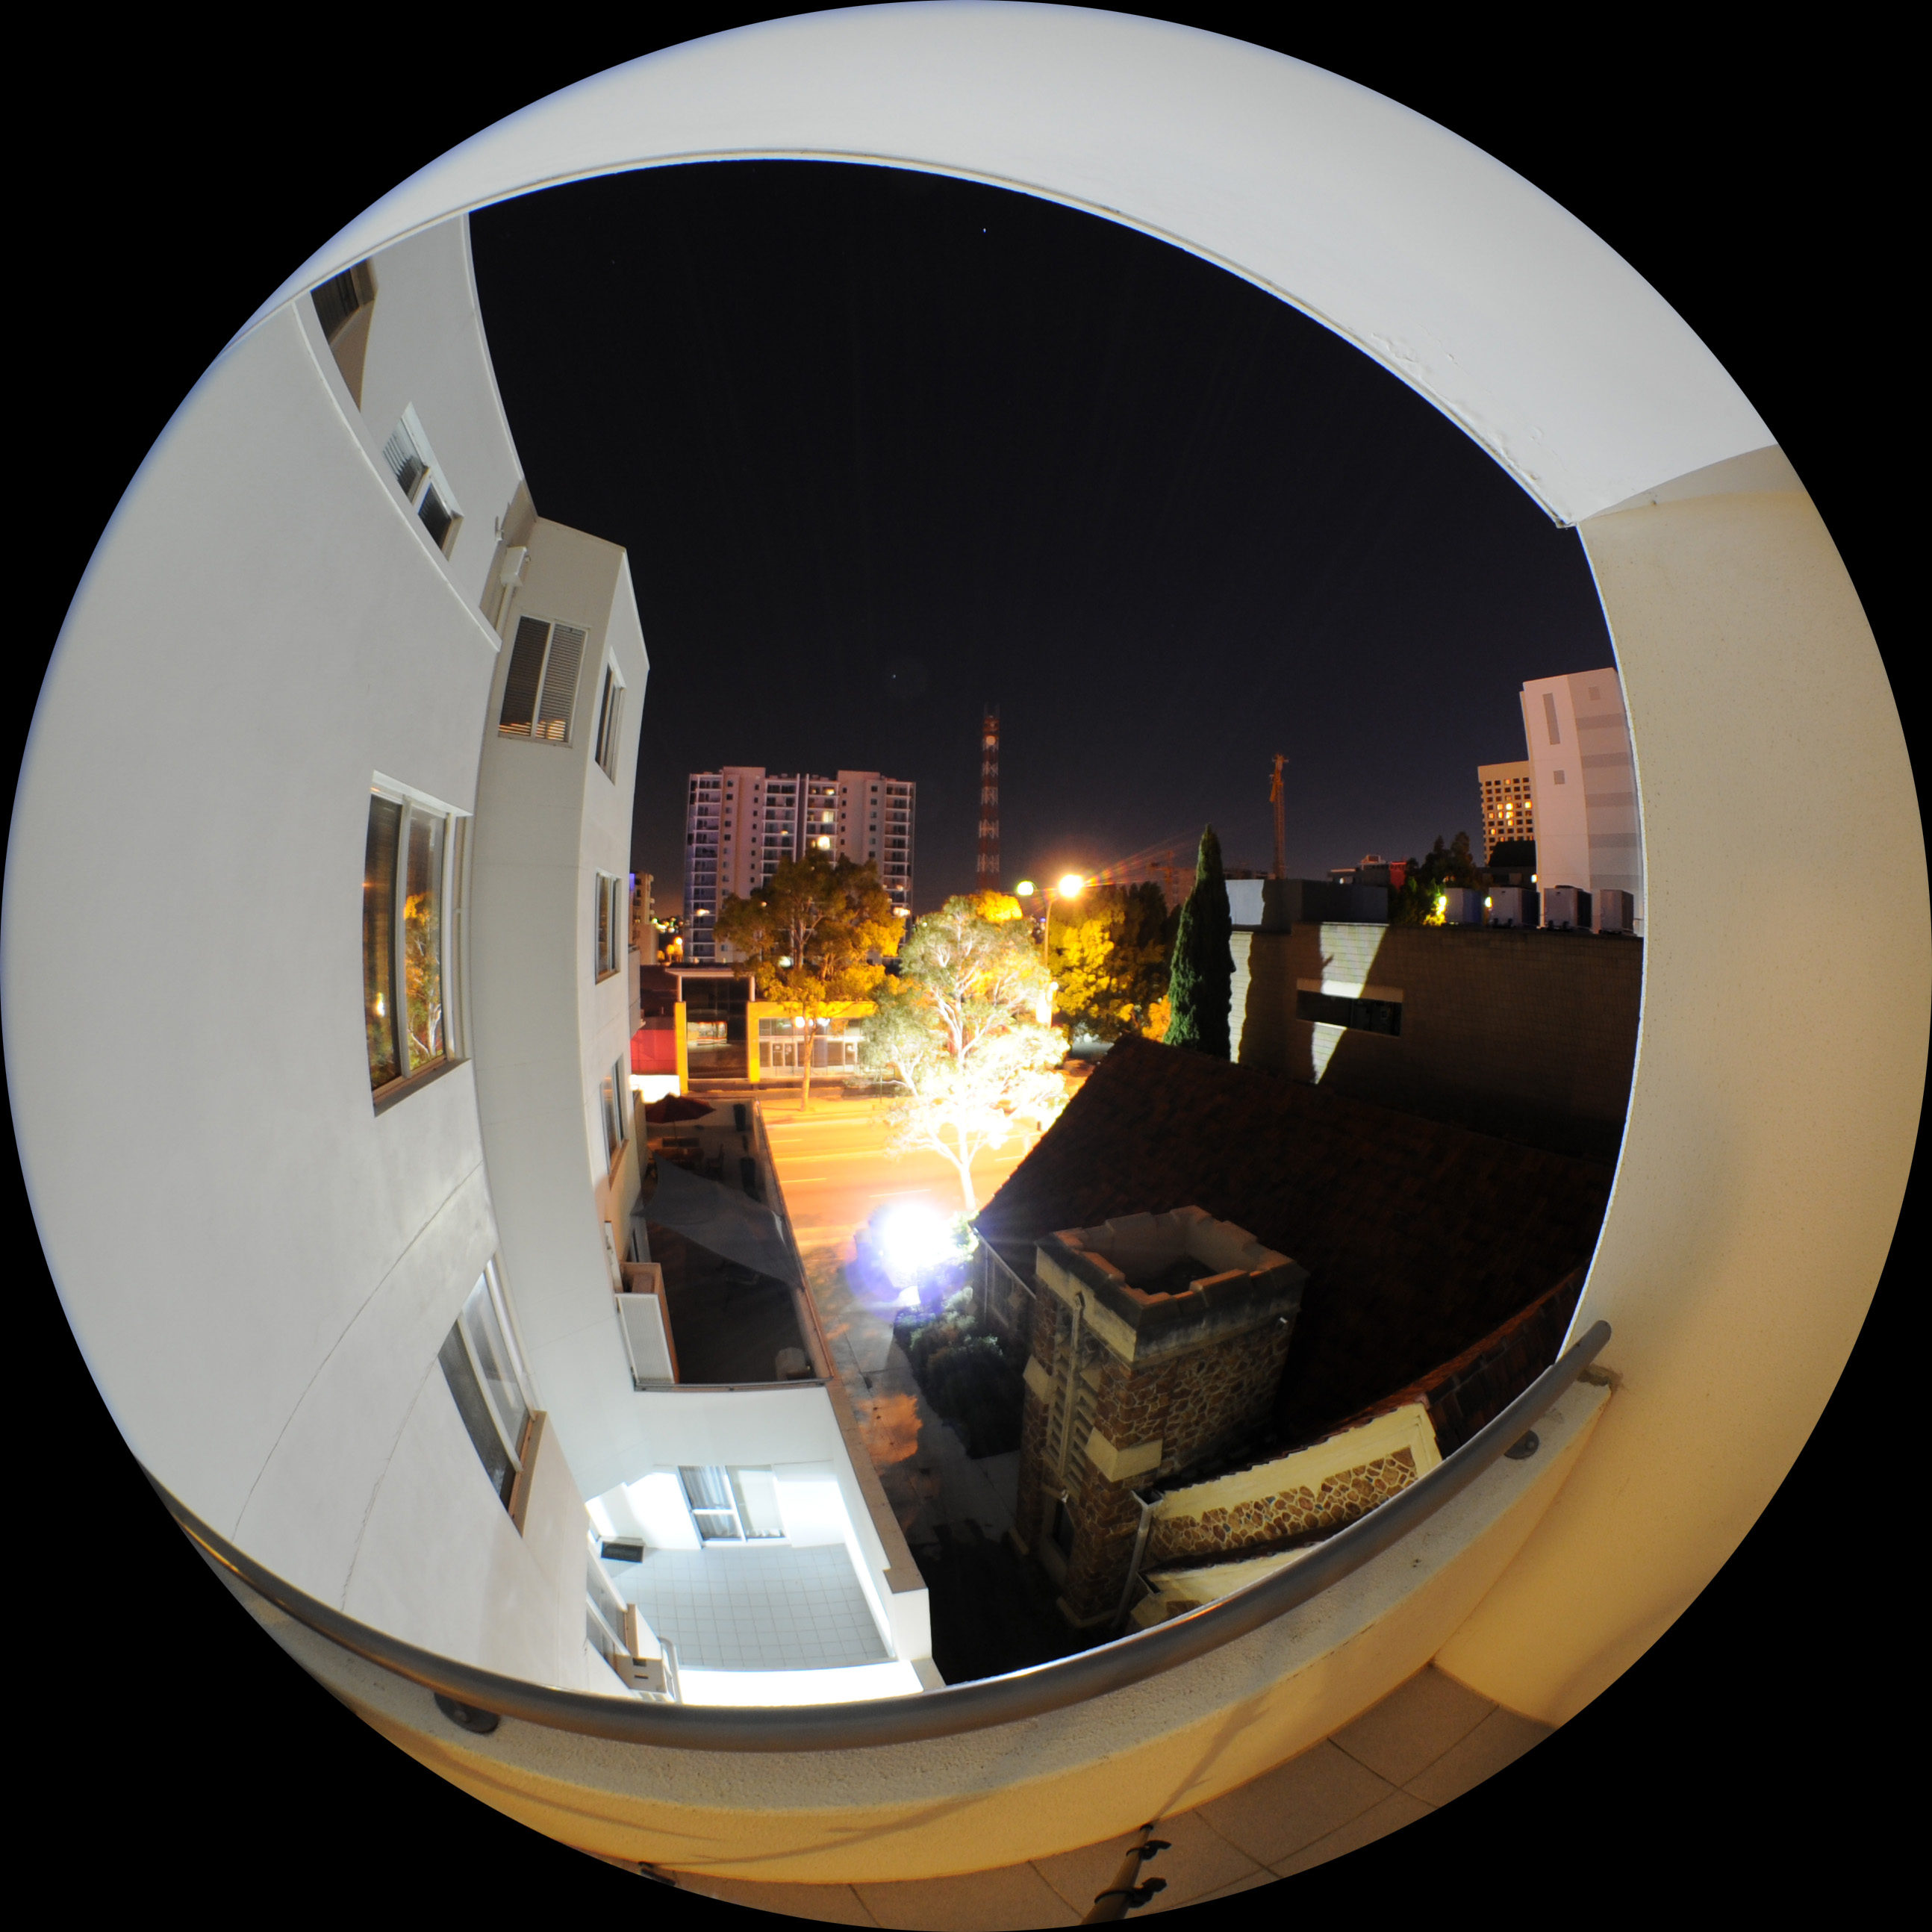
20 second exposure
Contribution by Alexander Mitchell
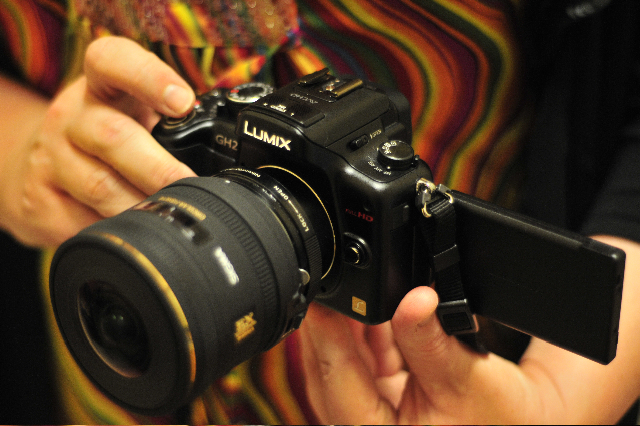
A low cost option using a Lumix camera and fisheye lens results in a 1080 square fisheye at a very low price point. Of particular note is the high bit rate of 176mb/s by changing the camera firmware (by donation). Total cost is around $600 for the camera, $800 for the lens, and $20 for the Nikon m43 adaptor.
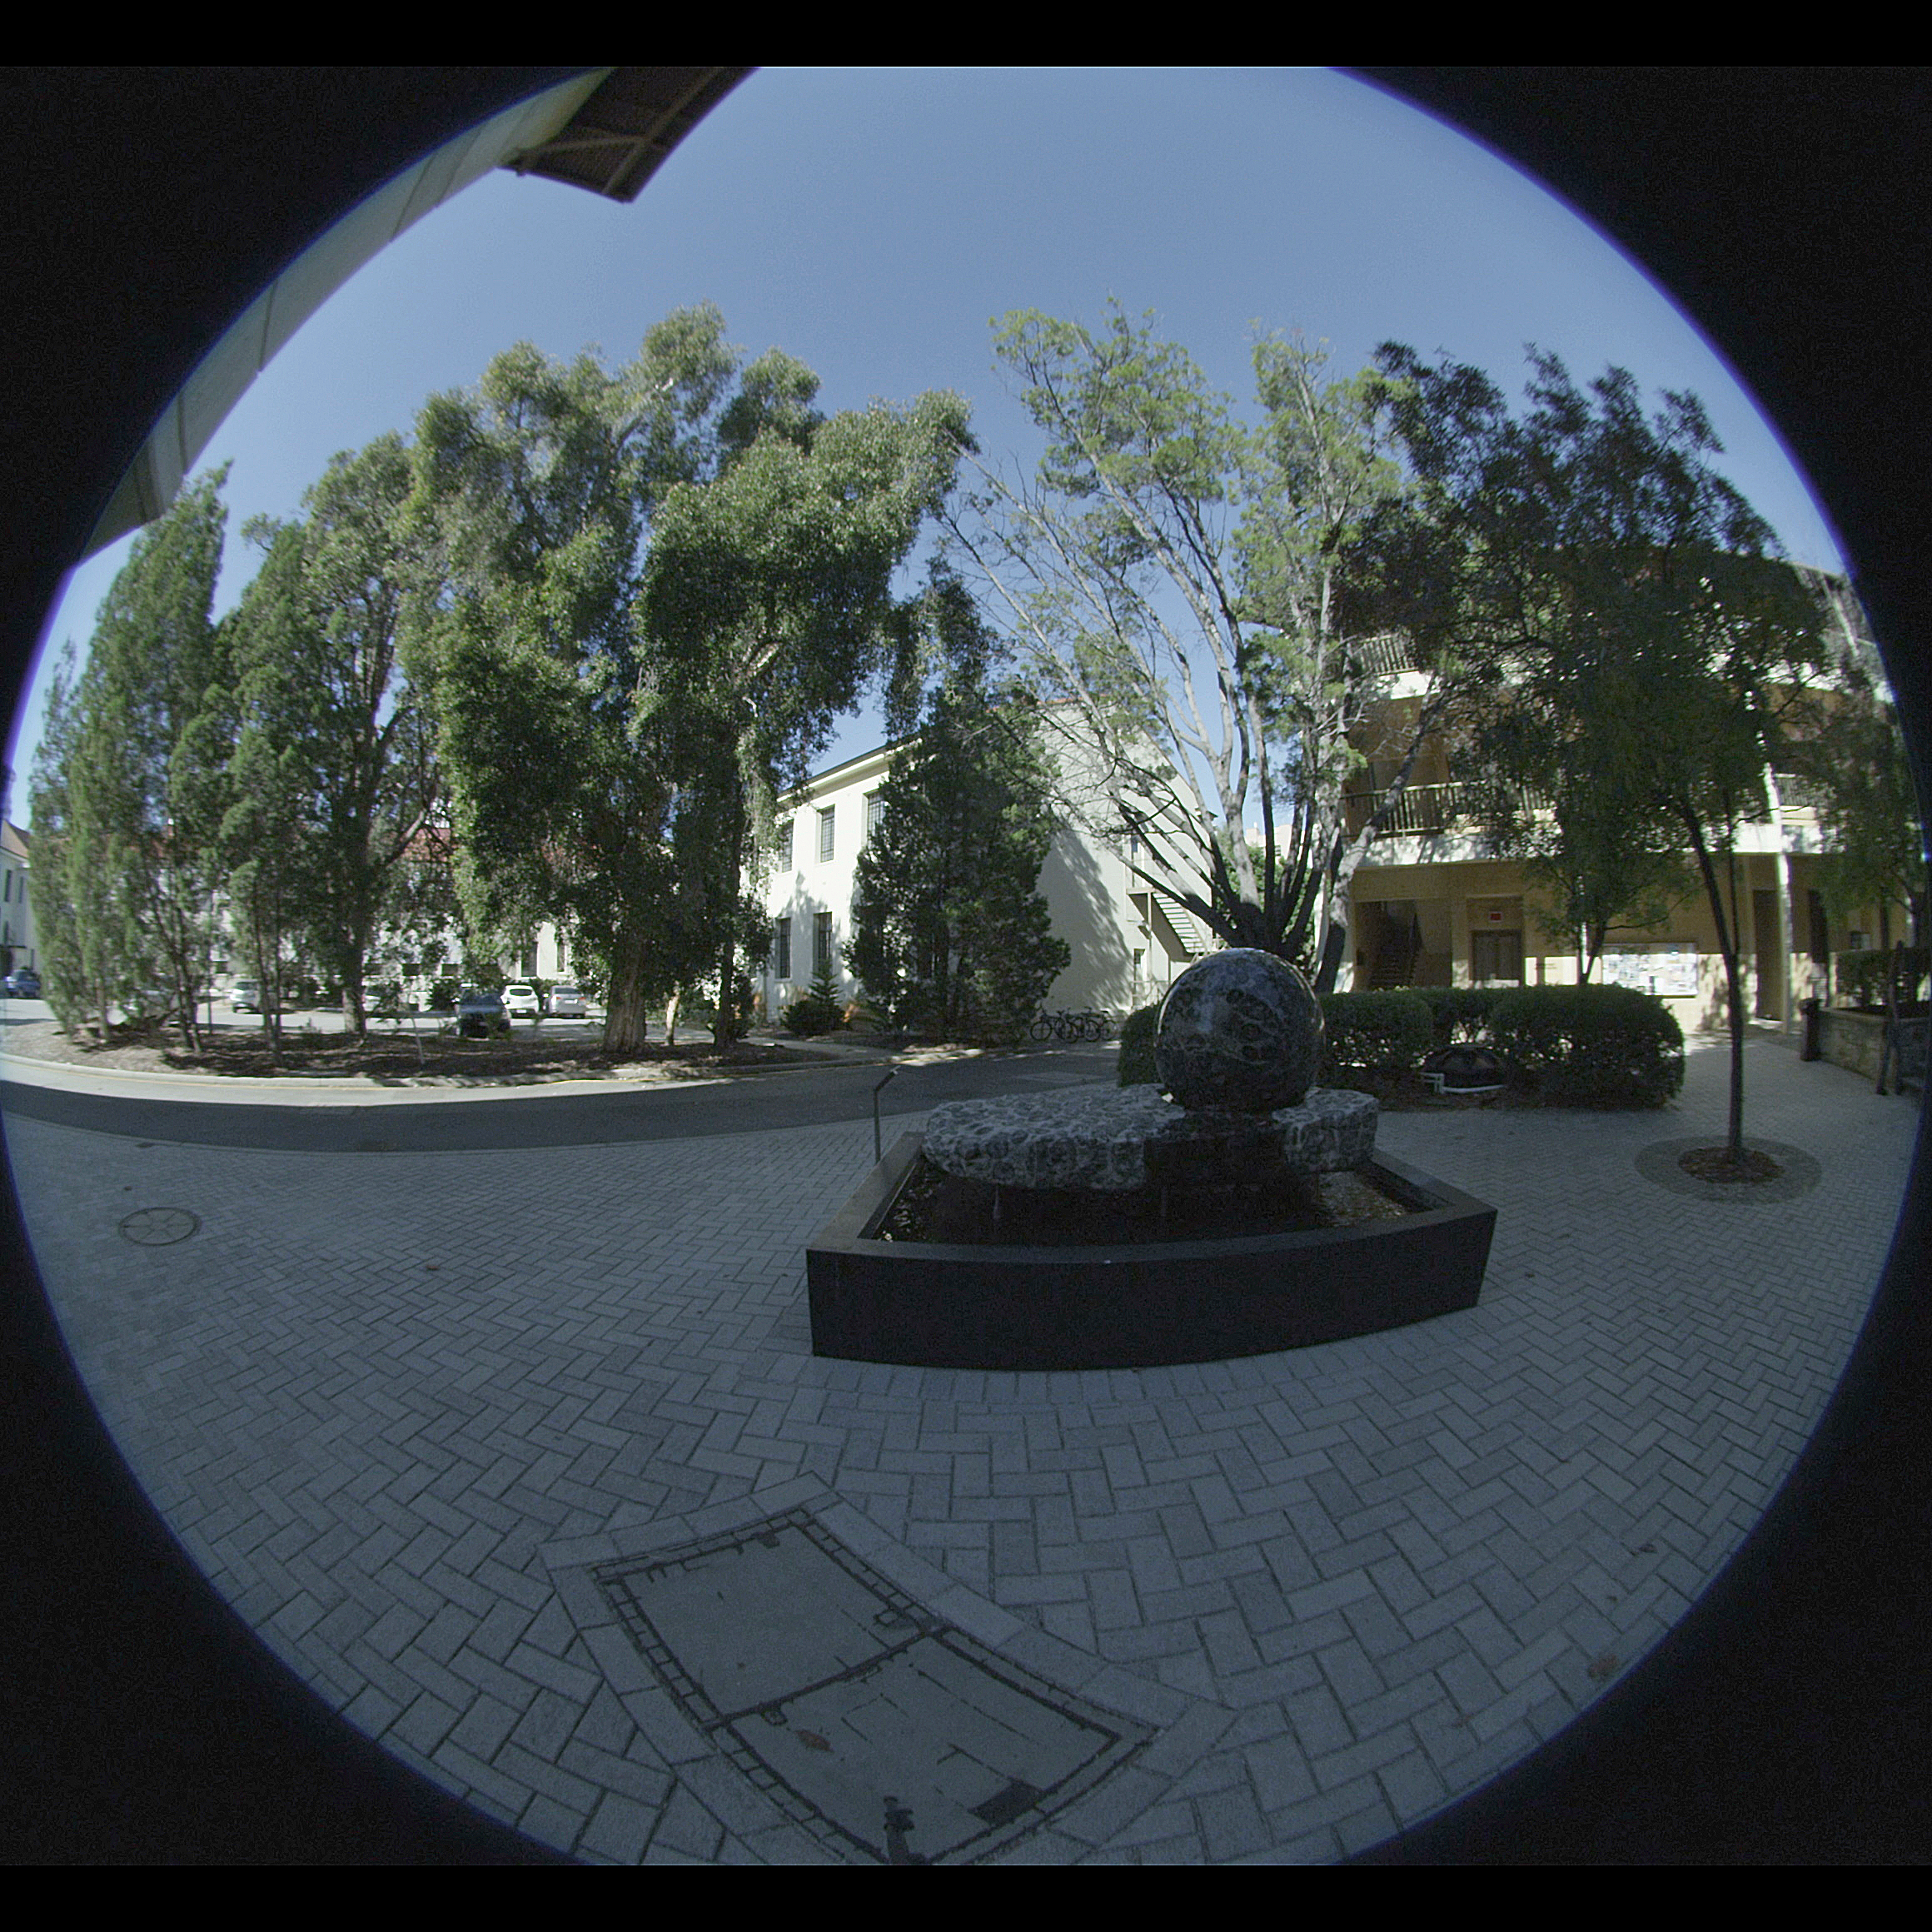
Canon 5D MkII and Canon 8-15mm zoomable fisheye lens
May 2012
Example of the Canon 5D and Canon EF8-15mm fisheye lens
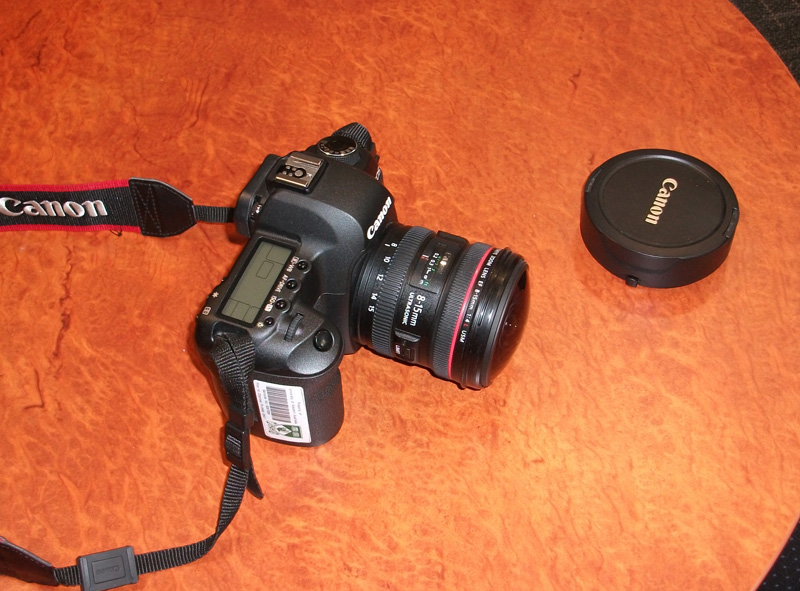
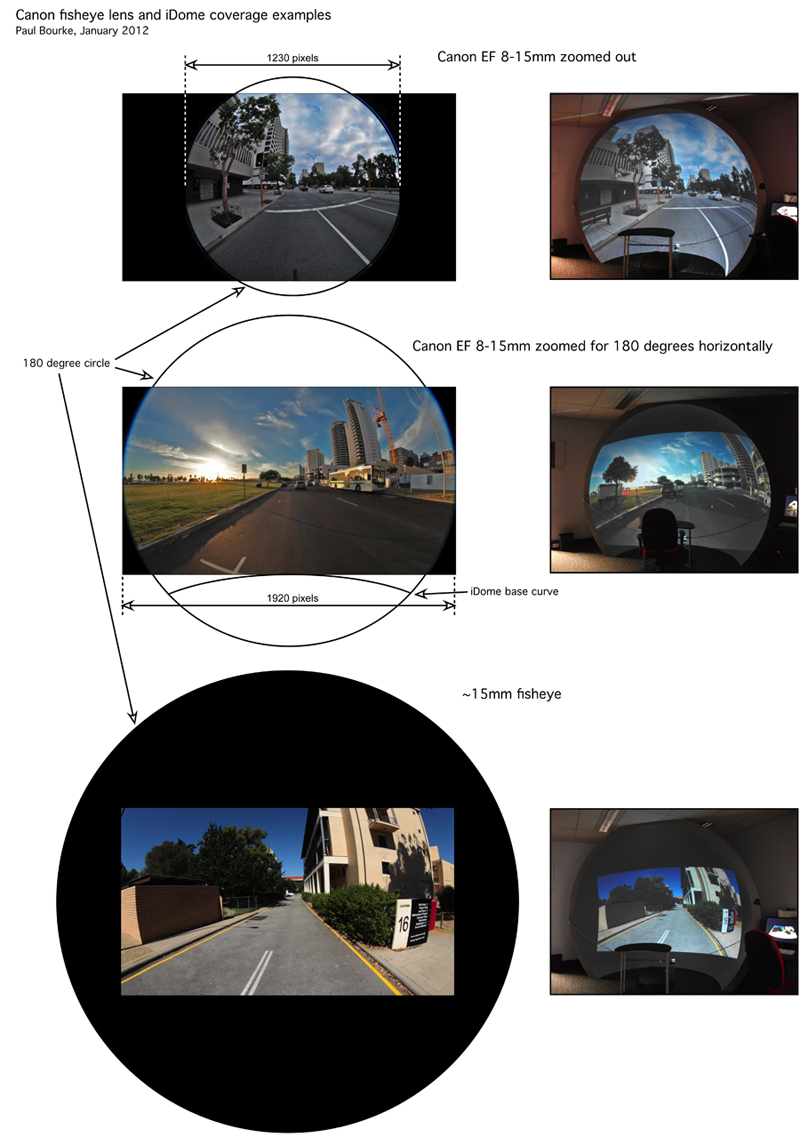
Results in almost a 3600 pixel square fisheye. On a full frame sensor the zoom allows a full fisheye, a partial fisheye with 180 degrees horizontally, or zoomed all the way in approximately a 170 degree diagonal.

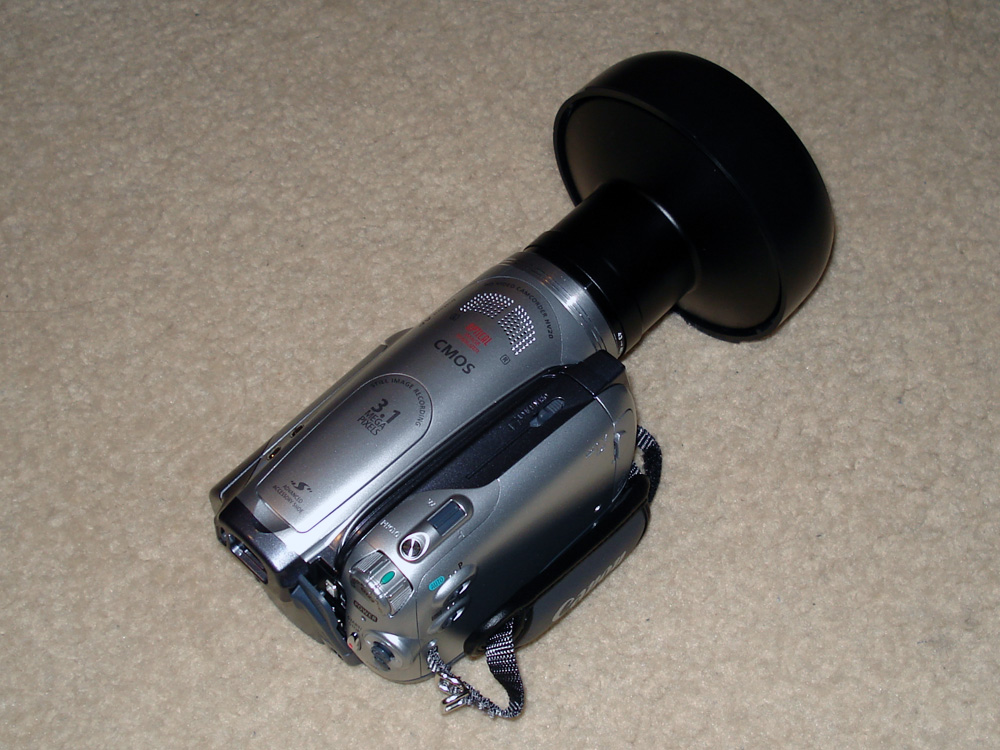
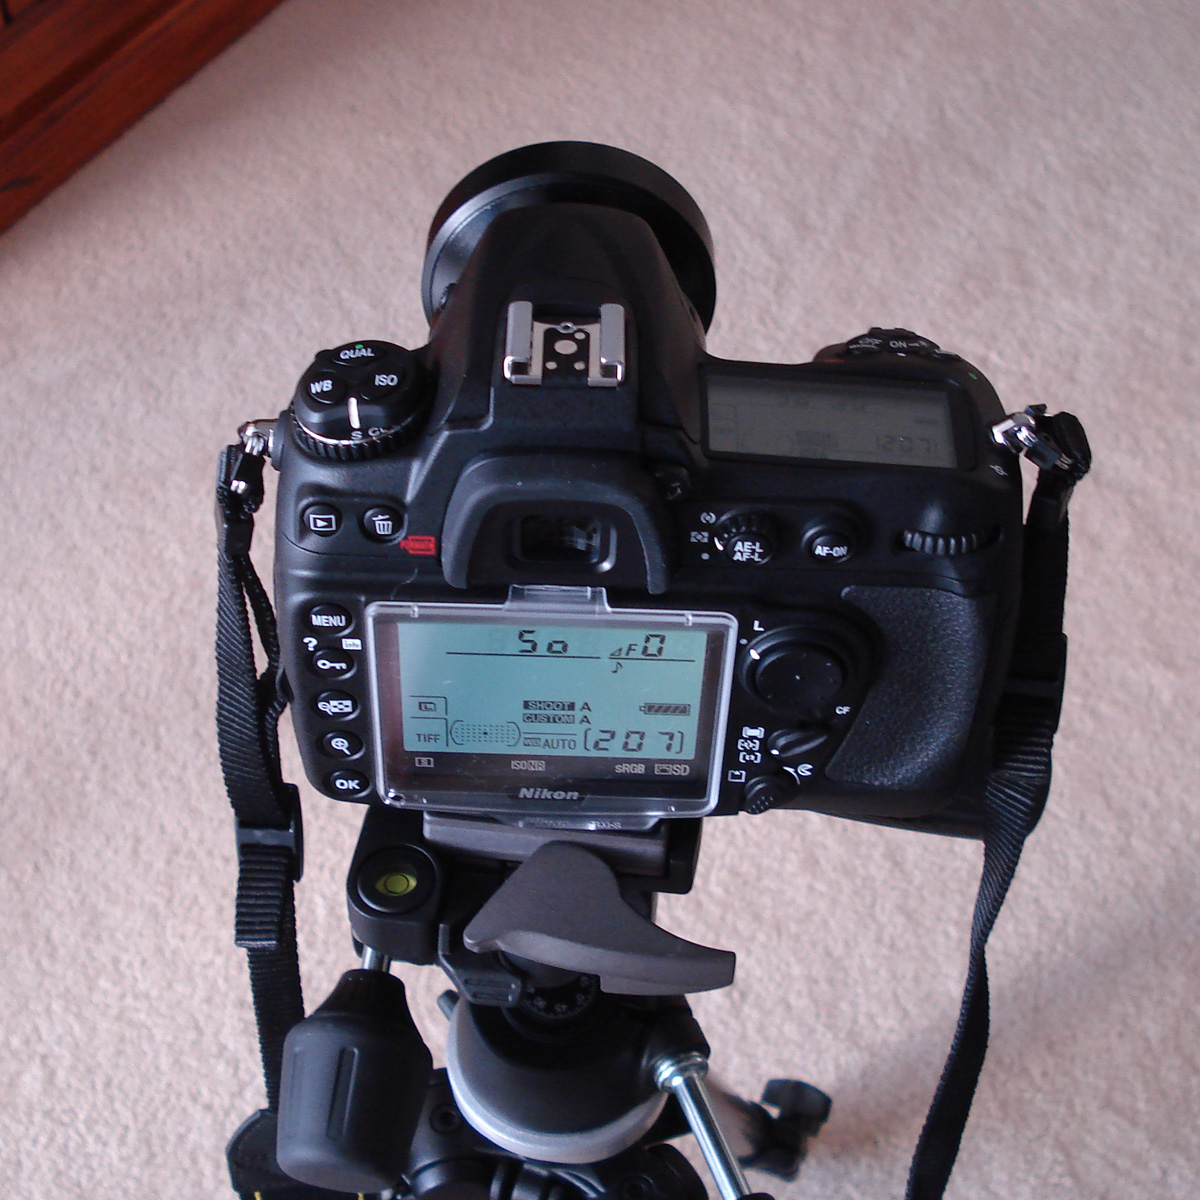
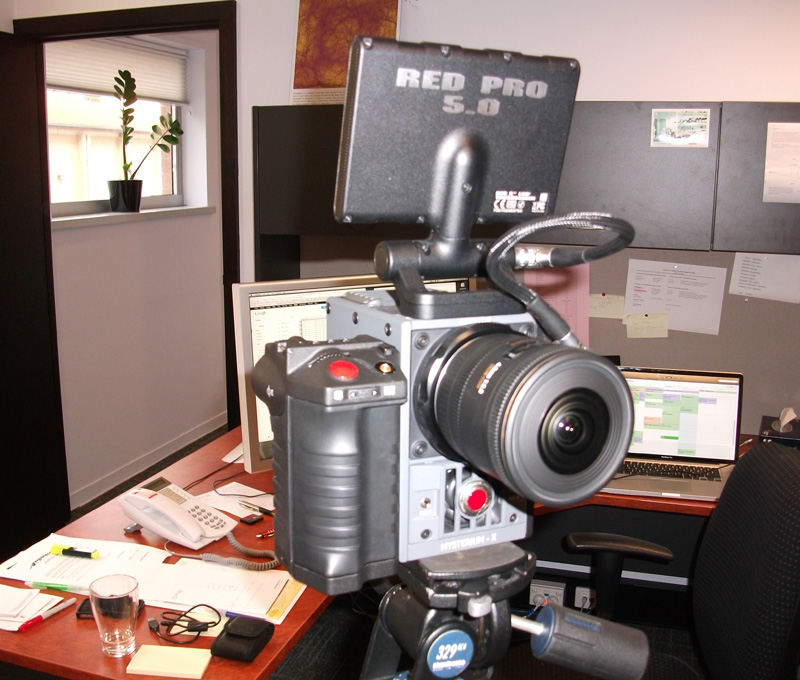
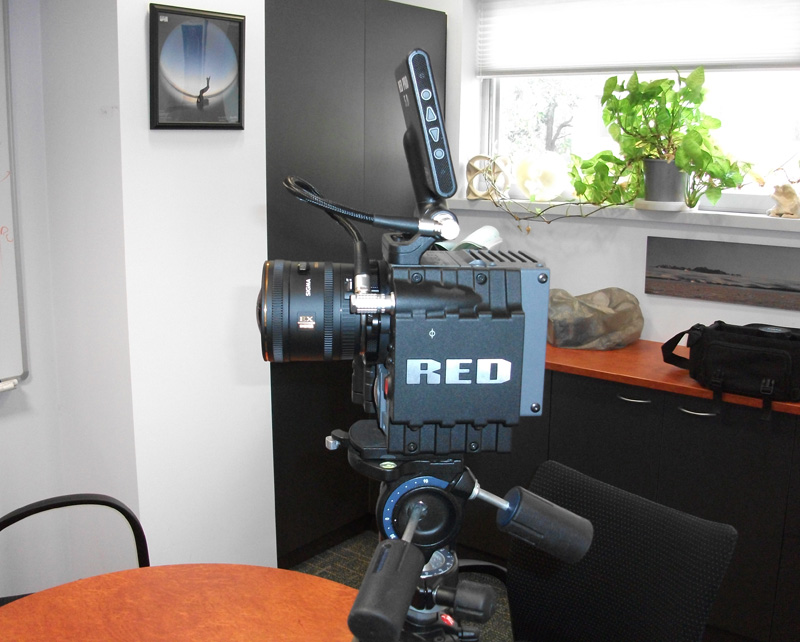
Red Scarlet camera and Sigma 4.5mm fisheye lens
June 2012
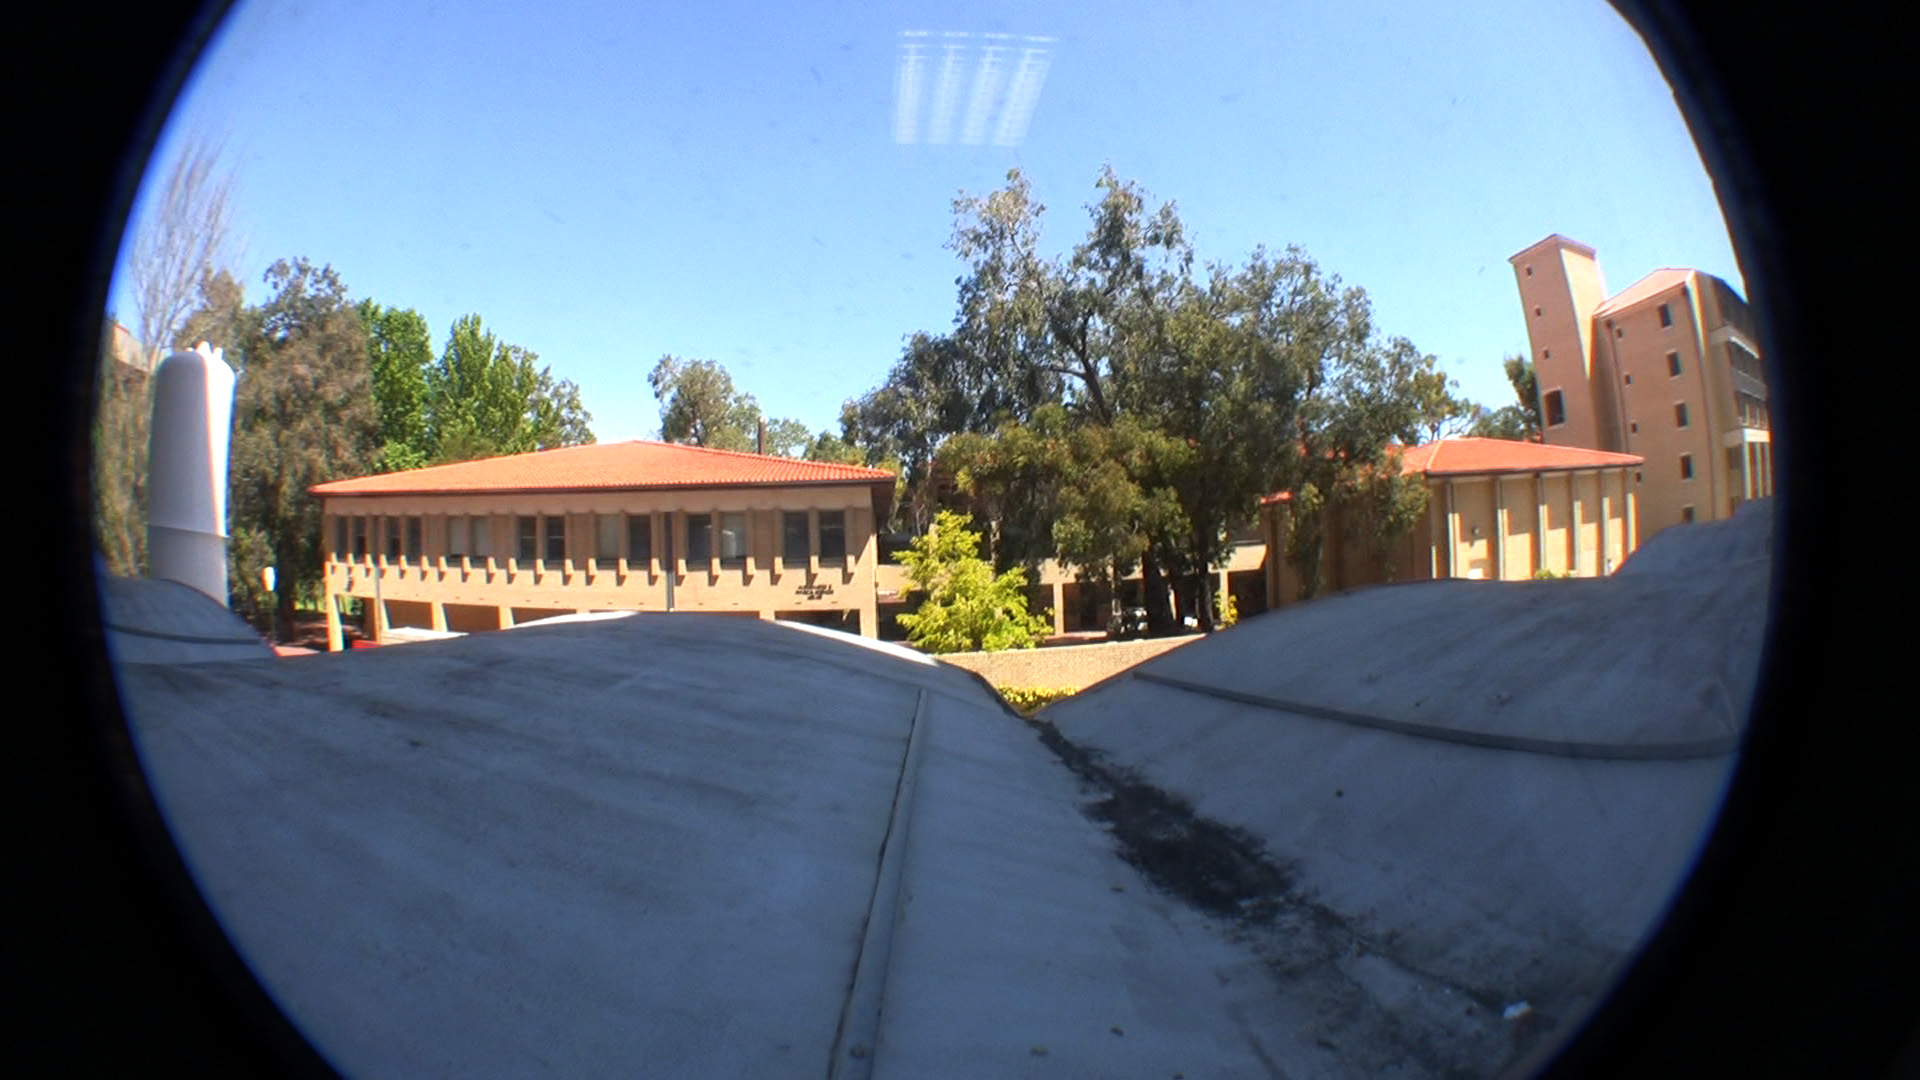
When recording at 4K there is a slight clipping of the fisheye at top and bottom. Resulting fisheye video is in a 2320 circle.

Two sample frames from the video are shown below, each recorded at 4K at 30fps and 8:1 compression ratio.

Fisheye filming experiments
Paul BourkeJune 2012
The following outlines some photography and filming options I have been experimenting with. They generally involve a camera (still or video) along with a fisheye lens. This is certainly not intended to be an exhaustive survey, only the combinations I have recently employed. The date above should be noted, as with most technology reviews they can become out of date as time progresses.
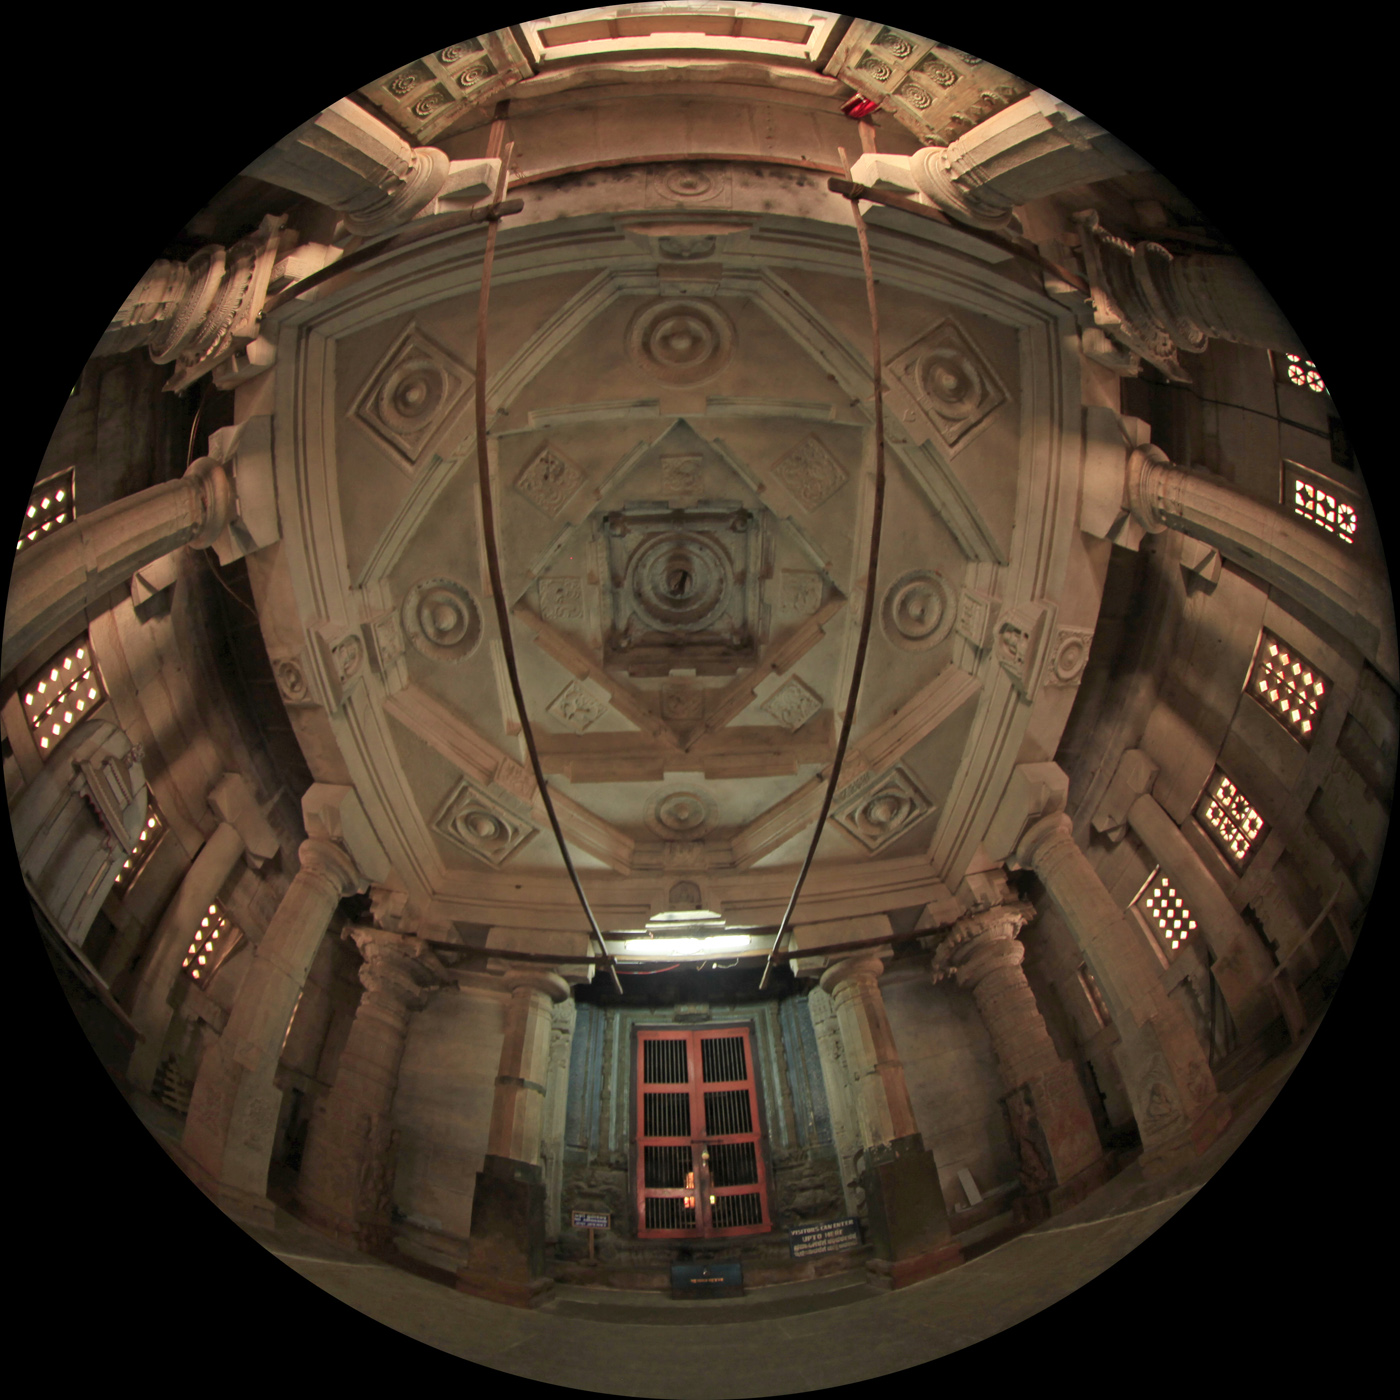
The easiest is stills, there are a number of fisheye lens options for SLR cameras but many lenses are out of productions leaving one to troll through ebay. Sunex have a 185 degree fisheye for Nikon and Canon APS-C sensors, they are fairly "soft" and it seems the quality also varies on a per lens basis. My favourite lens at the moment is the (newish) Canon 8-15mm fisheye for a full frame sensor. It is unusual for a fisheye to be able to zoom, this lens goes from a full fisheye to about 170 degree diagonal (similar to the GoPro lens). Example from the Moodabidri temple near Manipal, fisheye diameter is about 3600 pixels.
I use a Canon 5D MKII and in combination with this lens it is ideal for capturing 360 full spherical panoramas, some examples in a virtual environment related to rock art in the Pilbara can be found here.
The Canon 5D (and other) can record HD video but since they use only a portion of the sensor the image is truncated top and bottom, and of course the fisheye result is only around 1K diameter.
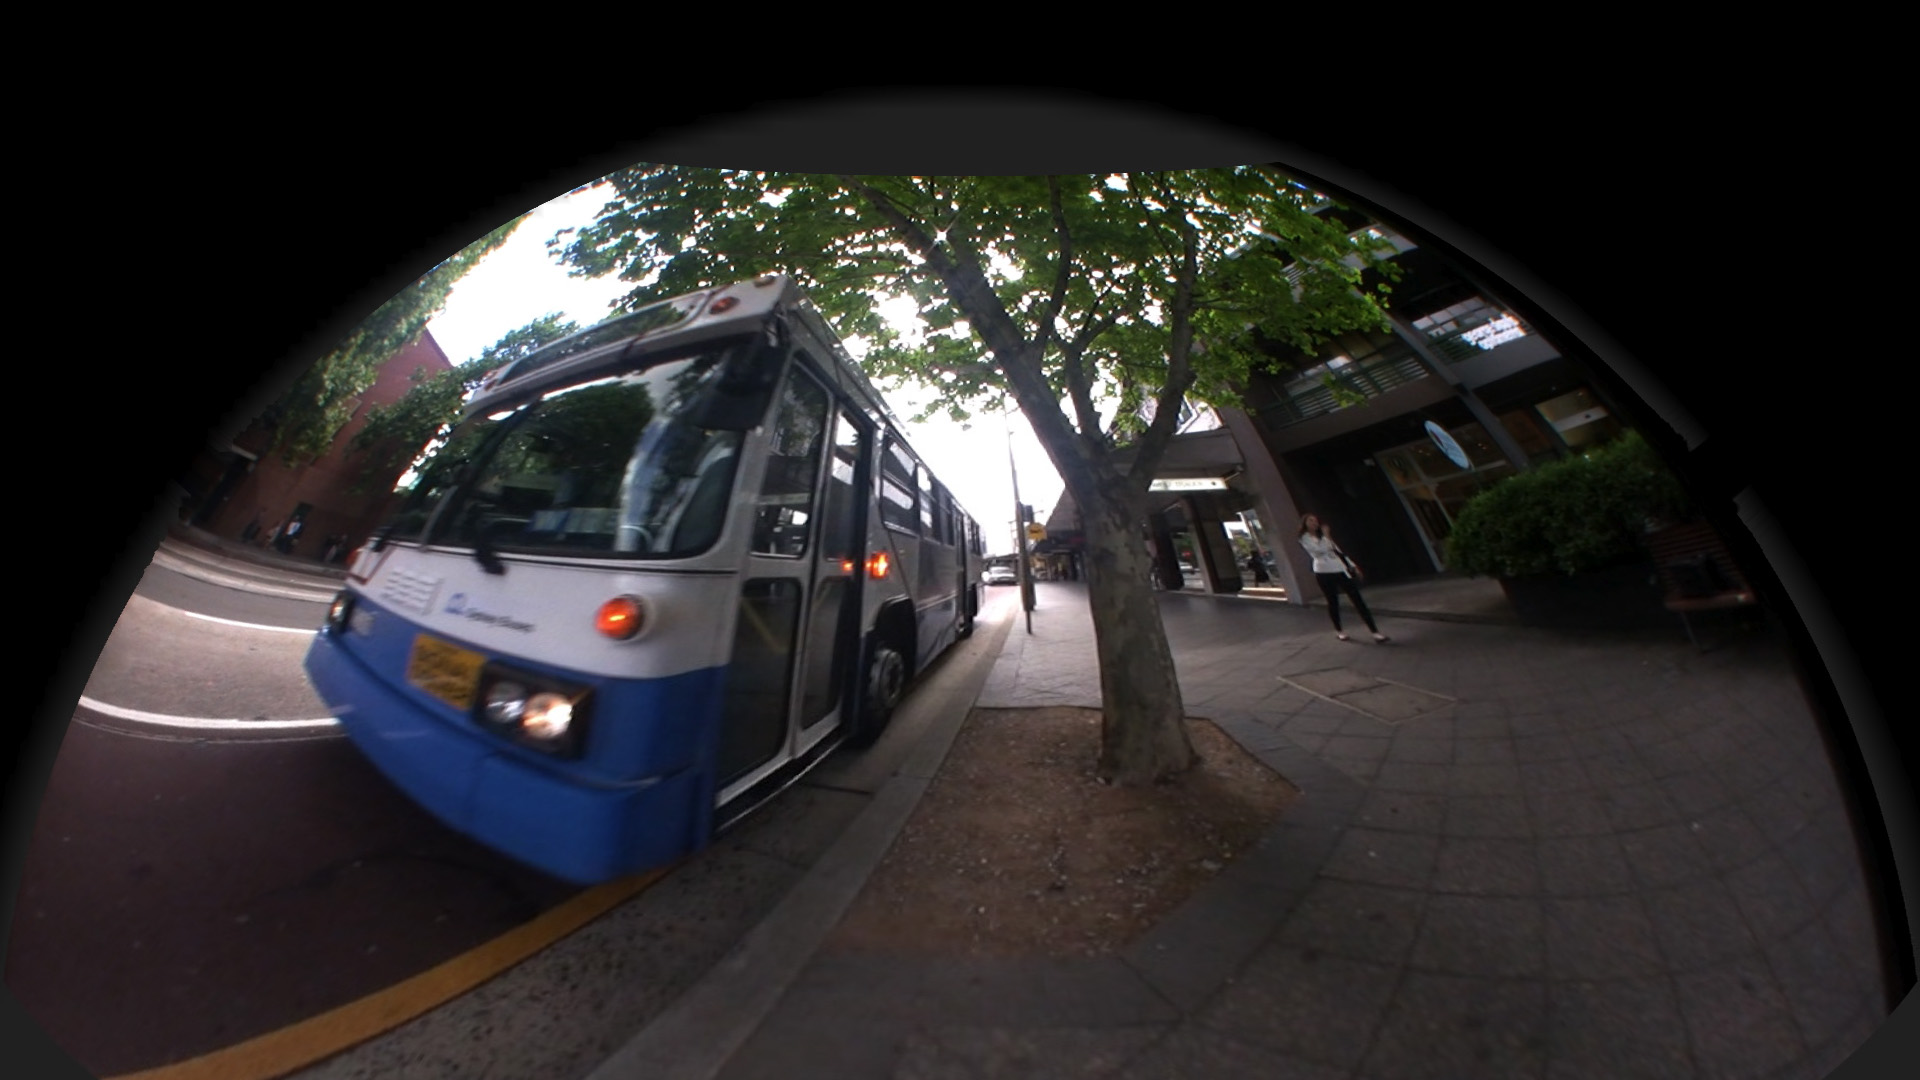
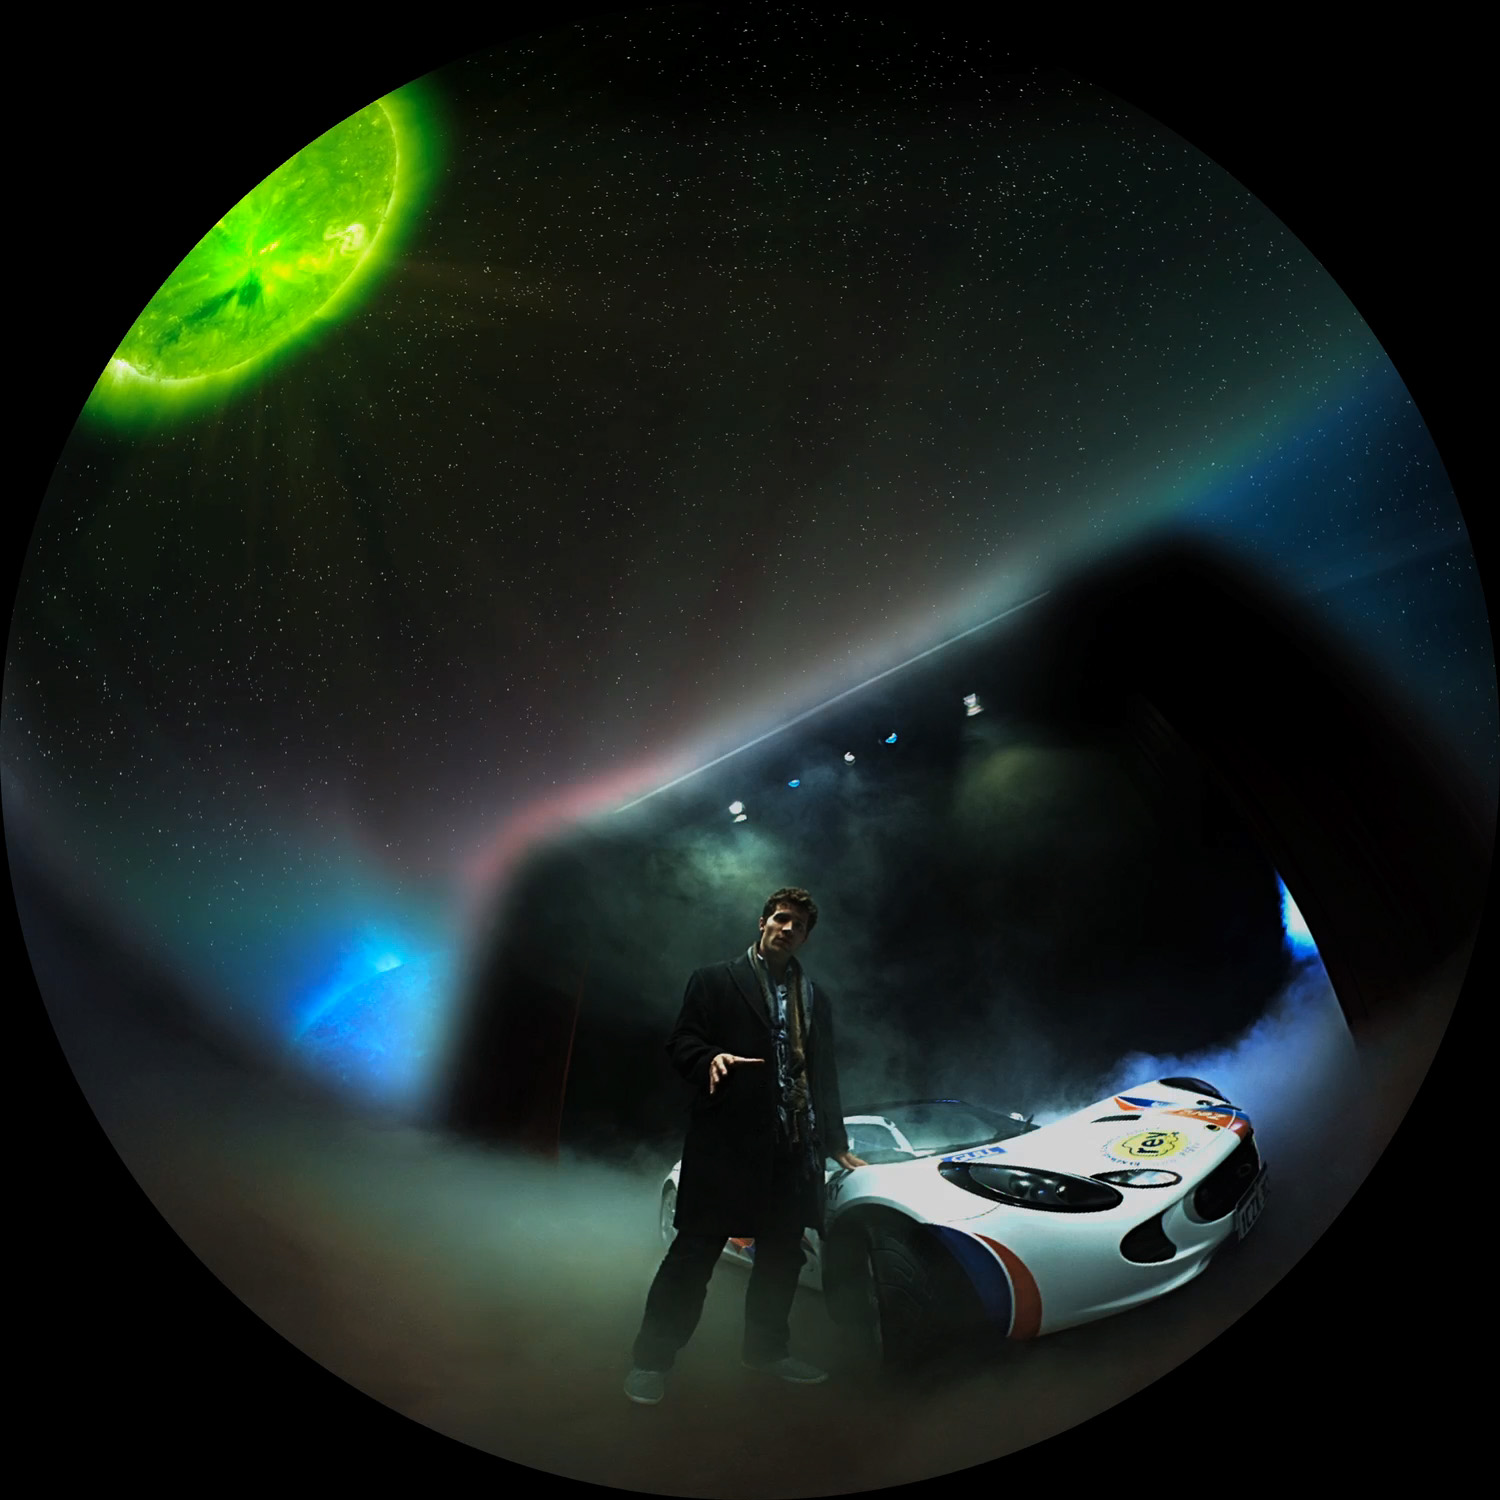
Another option is the LadyBug-3 video camera. This was used in the production of "Dark", see example frame below. The result is about 2.4K fisheye but of course it (like most video cameras) uses a lossy video compression so the effective resolution is somewhat less. One of the nice things about the LadyBug-3 is that it captures 360 degrees horizontally by about 150 degrees vertically, this means the exact angle of the fisheye can be adjusted in post production.
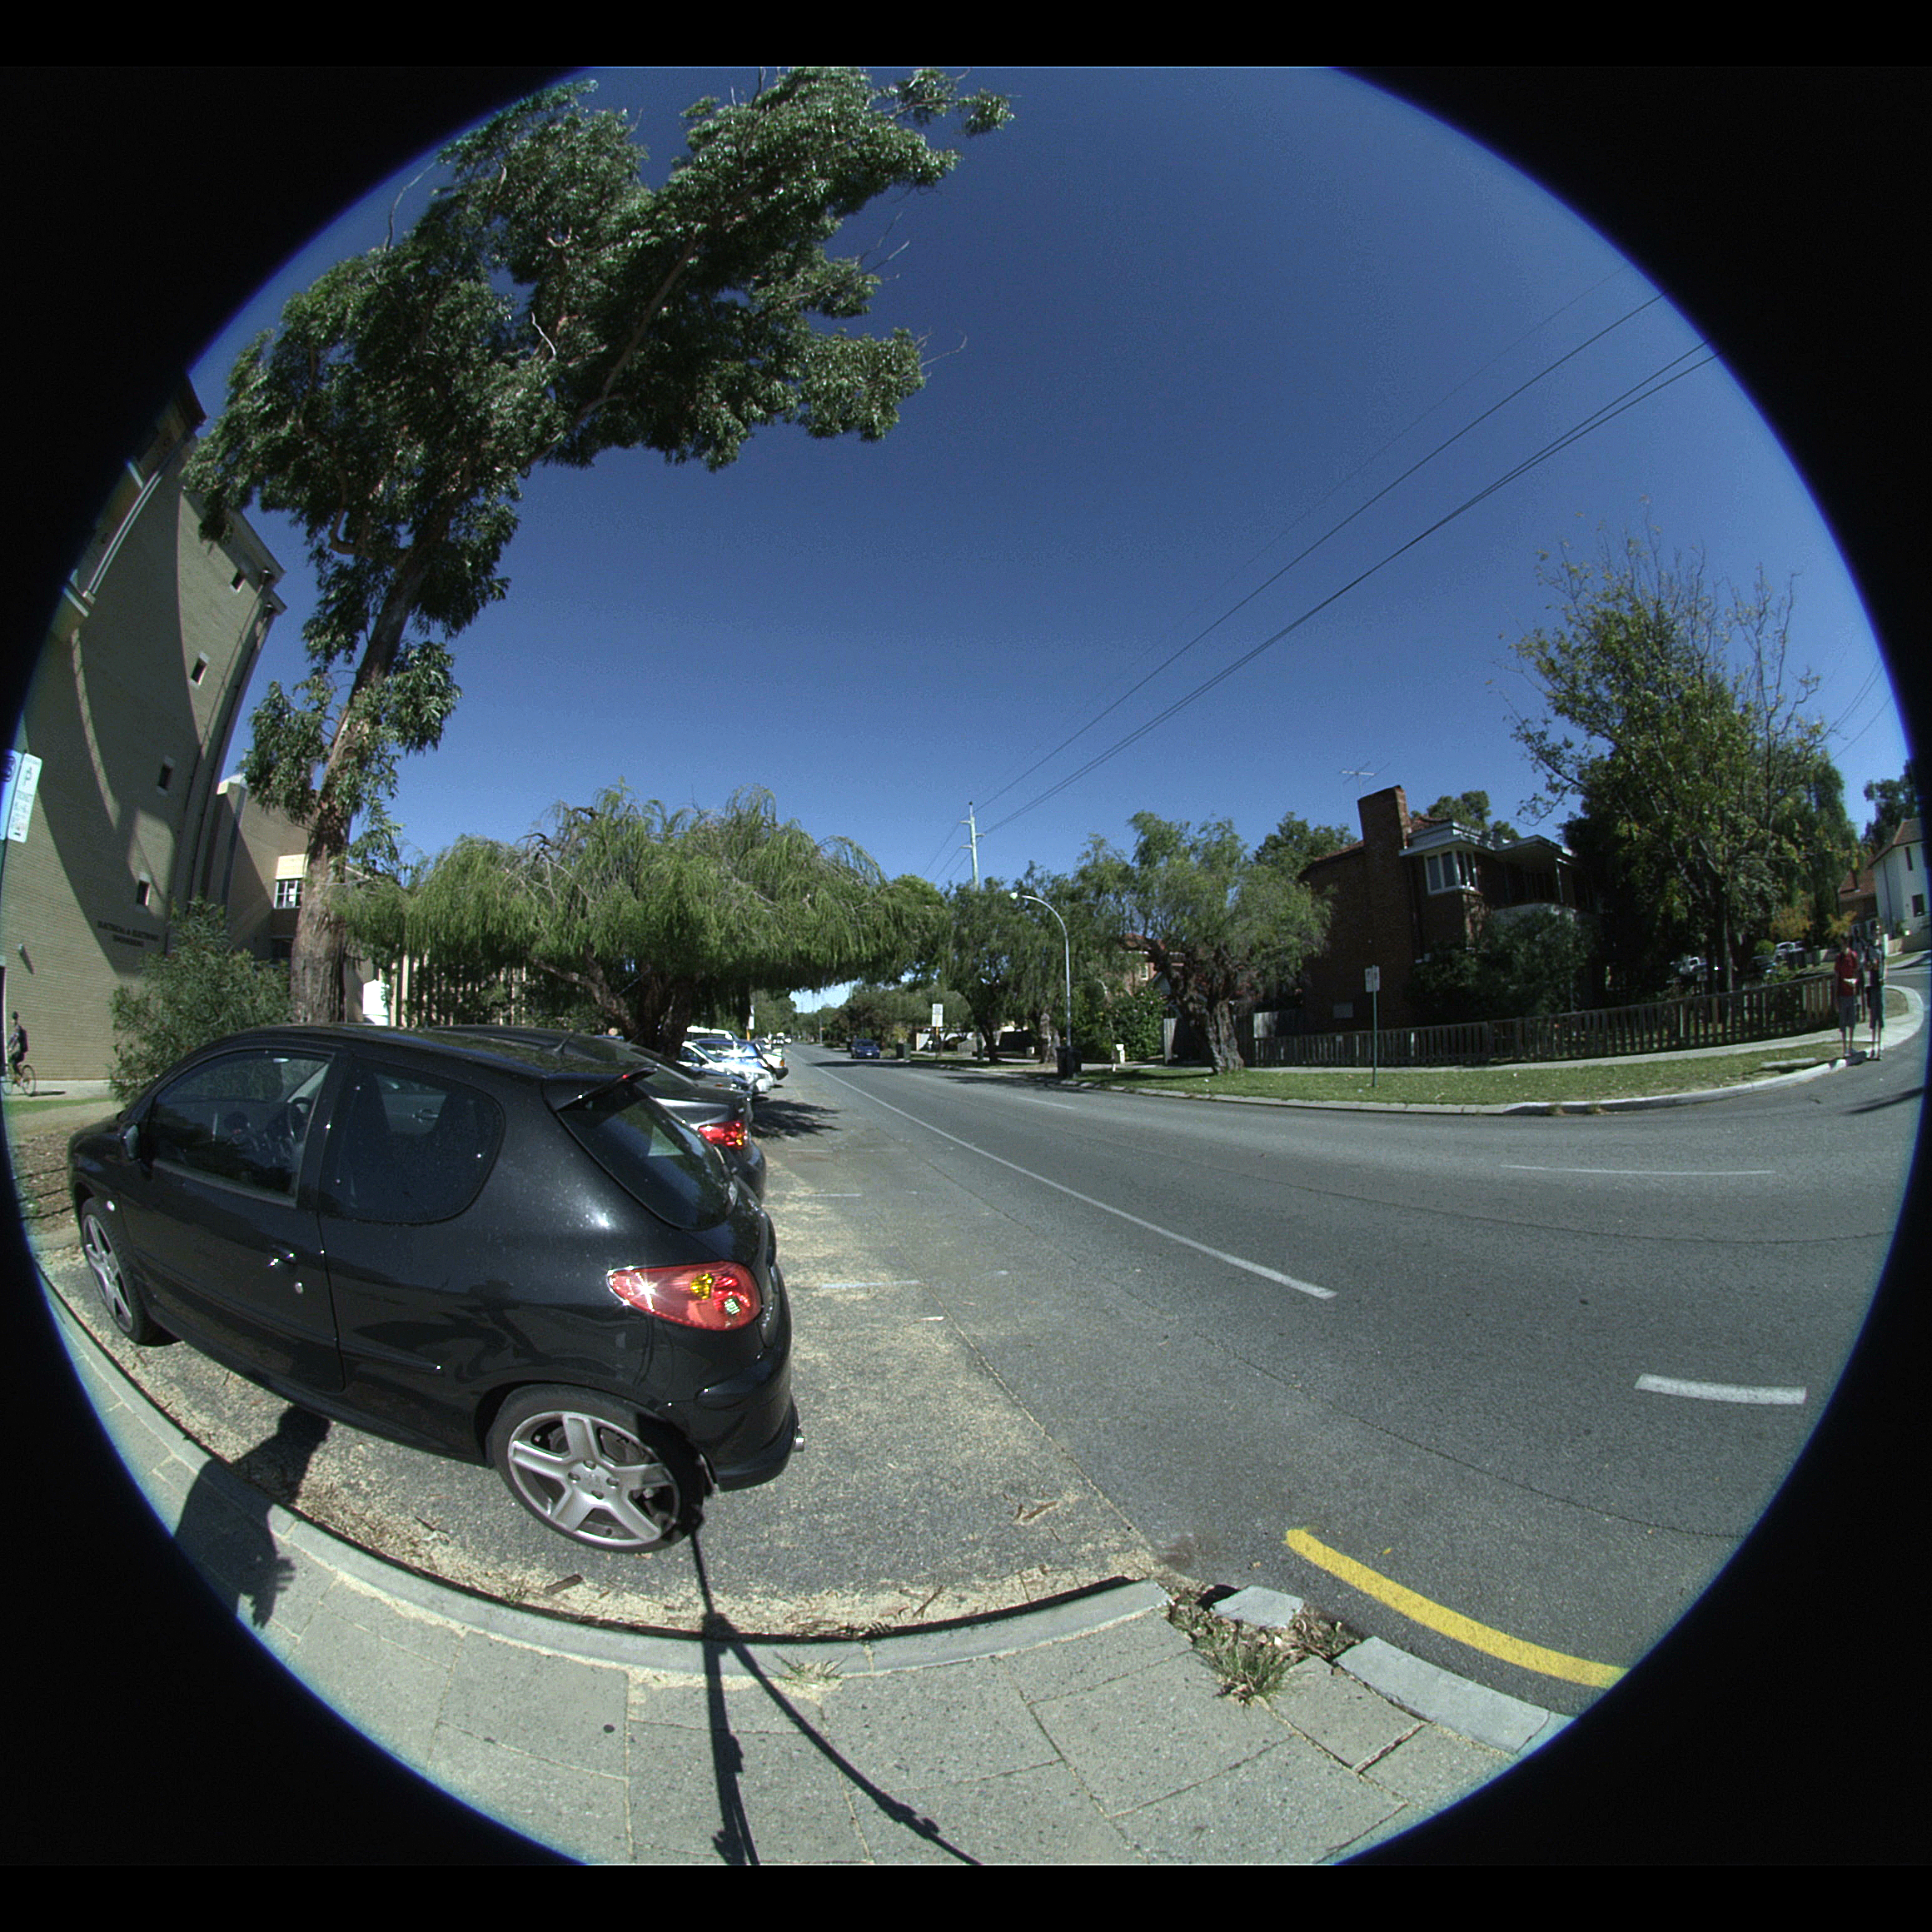
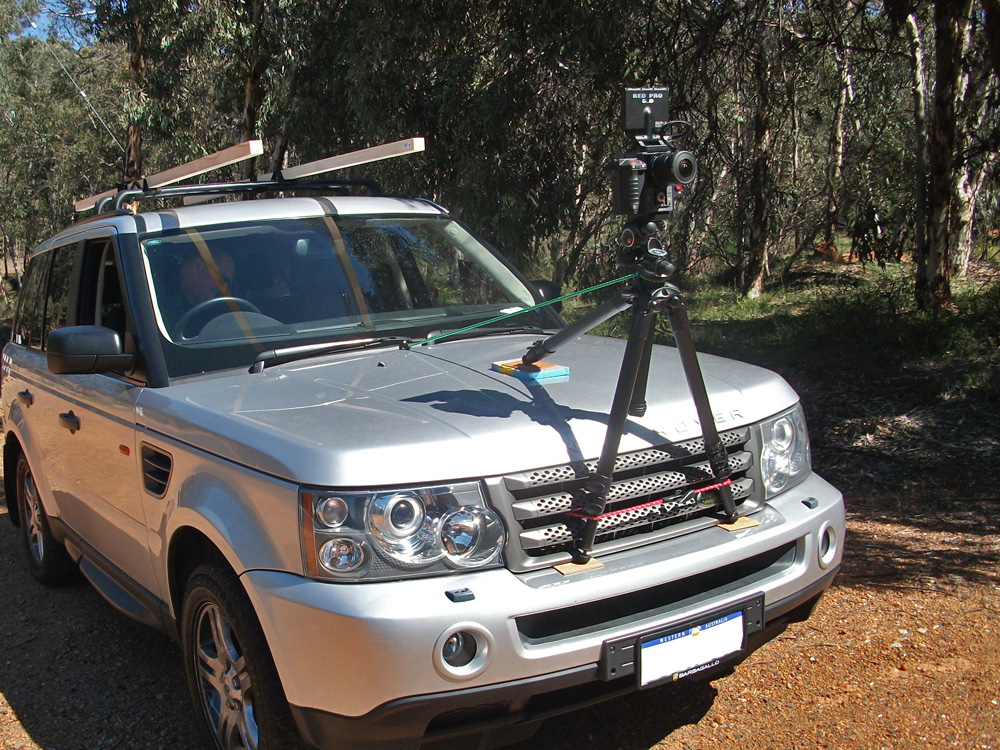
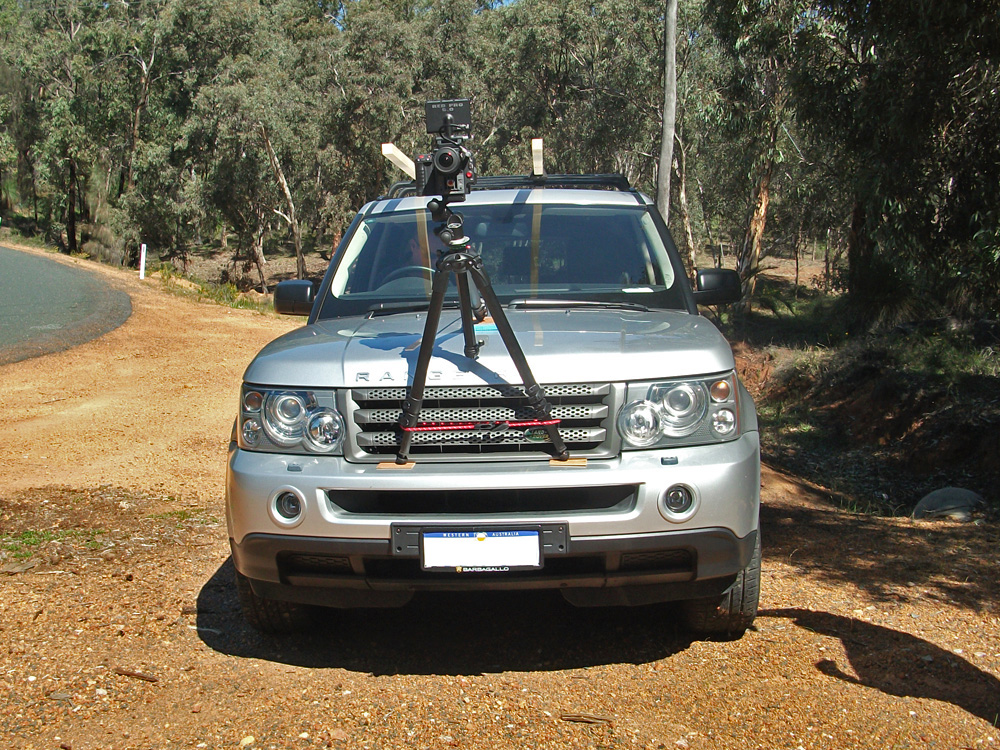
And finally there is the Red series of cameras, I am currently exploring the Red Scarlet and the Sigma 4.5mm fisheye. The Scarlet has an APS-C sensor as does the Sigma lens but the full sensor size is only available at 5K recording mode which is limited to 12fps. At 30fps the highest resolution is 4Kx2K pixels and since it uses a portion of the sensor there is a slight truncation top and bottom of the fisheye. There are of course ways around this, slightly rotating the fisheye in post or using the camera on the side, or cheating and just cropping to the largest inscribed fisheye. Camera and fisheye shown below.
A sample frame from the video is given below to illustrate the degree of clipping, please note this is a single frame from a video, not a still shot. The fisheye circle is 2320 pixels in diameter.
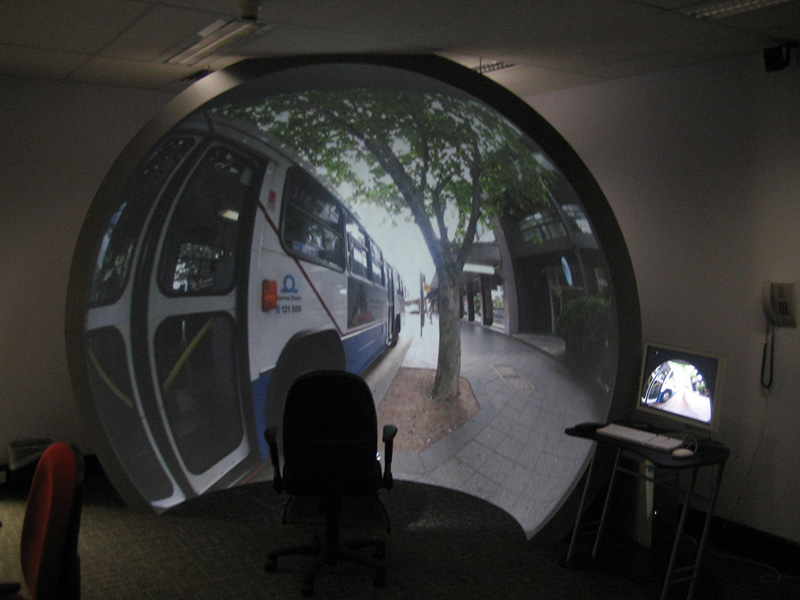
Hope some of this is of interest. Filming for fulldome is certainly still a challenge. In my case much of this is for the iDome so fisheye resolutions around the 2K range are adequate. The next test is with the Coastal Optics fisheye lens, but it priced such that purchasing for testing is a little tricky, doesn't anyone have one they would consider loaning?

|

|
|
|