Tilting fisheye images for
variable dome orientations
Paul Bourke
February 2005
See other applications here
Not all dome environments have the hemisphere surface orientated the same,
for example a VisionStation and a planetarium typically have their hemispheres
at 90 degrees to each other. Many planetariums have seating arranged so that
the center of attention of the audience is 30 or 40 degrees above the
horizon, still other planetarium domes are tilted placing the center of
attention higher above the horizon.

Single frame from video camera.
When creating synthetic fisheyes using computer graphics the different
dome orientations can be catered for by simply rendering the models/animation
again.
However for filmed fisheye material it isn't always possible to repeat
the filming, for example it may be of a remote location or a recording of
a once only event. This document describes how one might create fisheye
images at different angles to the angle the original fisheye was captured
at.
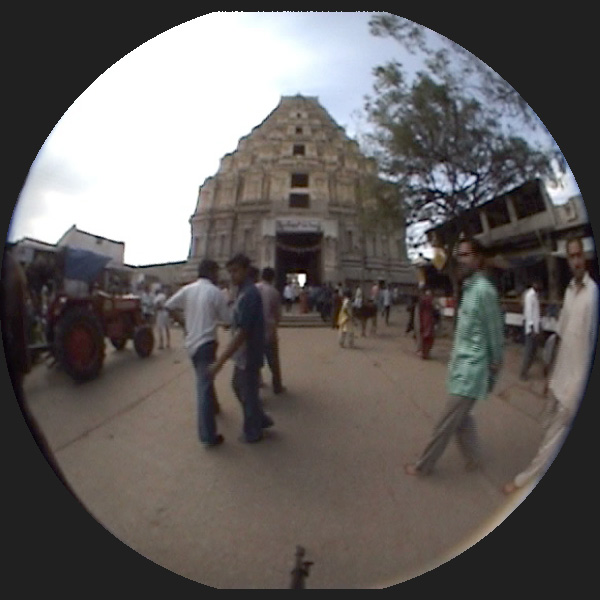
Corrected fisheye, 0 degree tilt angle.
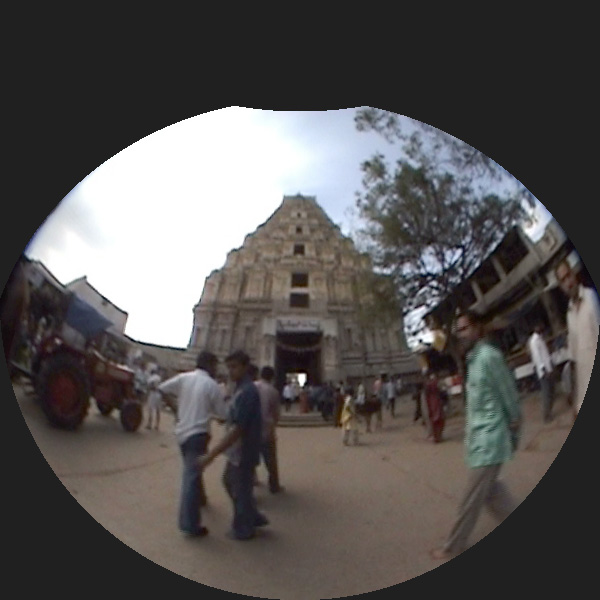
Tilted 30 degrees.
The example shown here converts a movie that was captured with the fisheye
pointed "forwards", suitable for an environment such as the VisionStation.
The new intended viewing dome was a small inflatable where the center of
attention is perhaps half way between the horizon and the pole. The image
above shows the new fisheye as if it was tilted 30 degrees, and below
a 60 degree tilt.
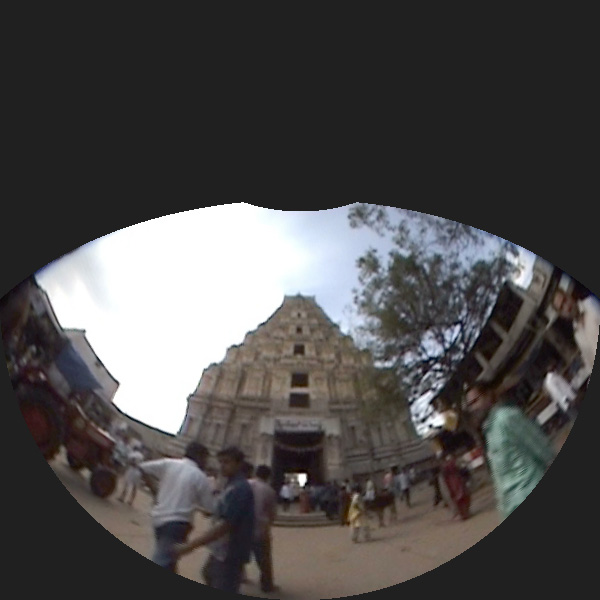
Tilted 60 degrees.
Note that these are obviously no longer full fisheye images because there
is information that simply isn't captured in the new fisheye orientation.
This is somewhat helped if the projection system employs the common
truncated fisheye image/lens arrangement which crops parts of the
fisheye anyway, in this case it is just cropping unavailable portions.
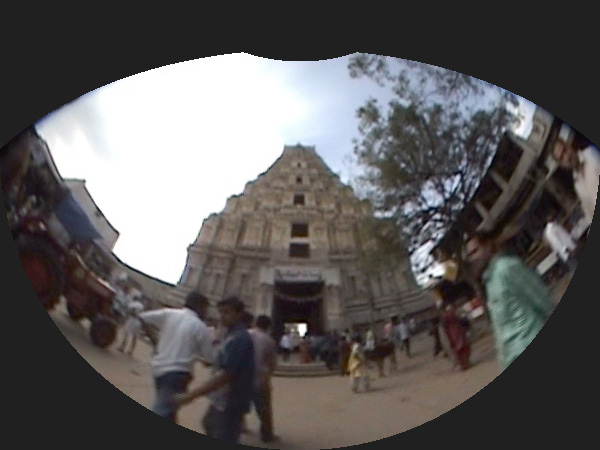
Tilted by 60 degrees and cropped for truncated fisheye projection.
Application
An application called "fishtilt" implements the fisheye rotation
described here. It is designed to work on a single image but obviously
can be applied to each frame of an animation. Antialiasing is
implemented as a straightforward supersampling of 2x2, 3x3, etc. The
performance is dictated by the dimensions of the output image and
the level of antialiasing, it is independent of the size of
the input image.
Usage: fishtilt [options] fisheyeimage
Options
   -w n     output image width, default = 600
  -af n     field of view of fisheye (degrees), default = 180
  -cf x y   center of the fisheye image, default is image center
   -r n n   horizontal and vertical radius of fisheye
  -tx n     tilt by n degrees about right vector, default = 0
  -tz n     tilt by n degrees about up vector, default = 0
   -a n     antialiasing level, default = 1 (no antialising)
   -b n     reduce field of view towards back - eperimental, units: degrees
  -bb       clip top of fisheye for truncated fisheye
Geometric conventions
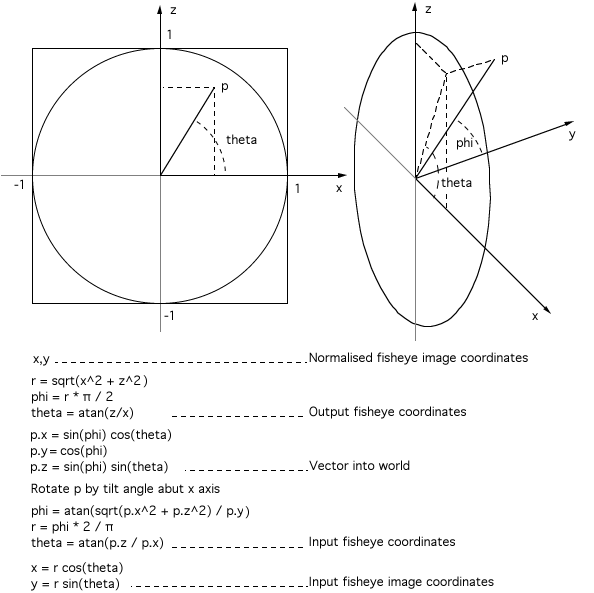
Rotating a fisheye image left/right
Written by Paul Bourke
December 2008
Similarly a fisheye can be "panned" (rotated) left and right.


0 degrees, original image
|

10 degrees
|

20 degrees
|

30 degrees
|

40 degrees
|

50 degrees
|

60 degrees
|

70 degrees
|

80 degrees
|

90 degrees
|

100 degrees
|

110 degrees
|

120 degrees
|

130 degrees
|
Usage: fishrotate [options] fisheyeimage
Options
   -w n     output image width, default = 600
  -cf x y   center of the fisheye image, default is image center
   -r n n   horizontal and vertical radius of fisheye
   -t n     rotate by n degrees about right vector, default = 0
   -a n     antialiasing level, default = 1 (no antialising)
  -bb       clip top of fisheye for truncated fisheye
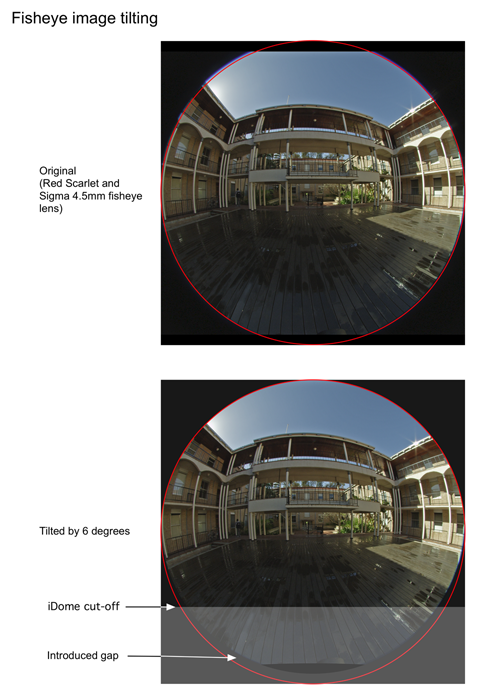
A further example with the Red Scarlet camera and Sigam 4.5mm fisheye lens.
The tilting is designed for the iDome in which case the loss of image at the bottom
is not a problem although there are also thin wedges introduced on the sides.
| 


