An evaluation of a user controlled exploration of a 3D environmentWritten by Paul BourkeOctober 1992
There are number of levels at which a user can 'experience' 3 dimensional scenes by using computer renderings. One method is simply to generate a number of images from different view points or camera positions. Another alternative is to create an animation, a sequence of renderings showing what would be seen if the camera were moved along a path through the 3D model. The one characteristic of both these techniques is that they do not allow the viewer to interactively choose the position from which to view the scene. This project investigates and attempts to implement a scheme by which the user can choose to go anywhere and look in any direction within the computer based model. This is a similar approach that virtual reality applications take except that in that case the rendering is much simpler in order to achieve real time response. There are some constraints that do now allow the ideal user controlled walk through experience. The more important of these constraints are described below along with their effect on this project.
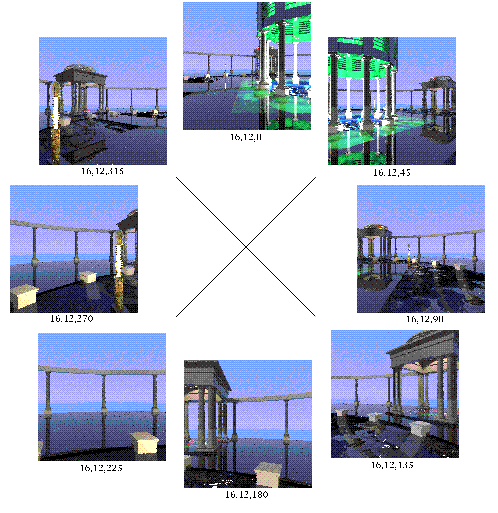
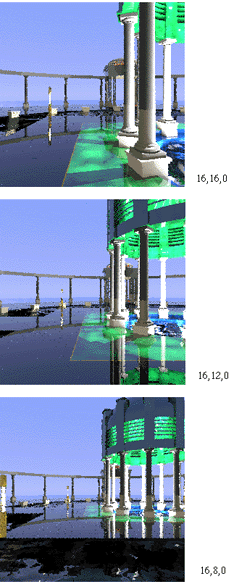
An application called UVIEW was written for the Macintosh. It takes the image database and allows the user to traverse through it in discrete steps. The user is restricted to only two operations, the first is to move forward or backward, the second is to turn left or right. Moving forward or backward is simply moving from one node to the next while retaining the same view direction. Turning left or right is just changing the view direction appropriately while remaining at the same node. See figure 2 and 3 for examples of the view rotation and position change. The user chose these two movements with the four arrow keys. For any user movement or view change the software determines the next image file, loads it from the disk, decompresses it, and then displays it. In order to avoid a "map" relating positions and views to files, the file names contain the necessary information. Each file name contains three numbers, the x and y position and the view angle. For example the file called 20,8,45 is the image at position (20,8) looking 45 degrees from north. The software searches for all legal image file names in a directory and uses the file name information to create the mapping of images to positions and views. 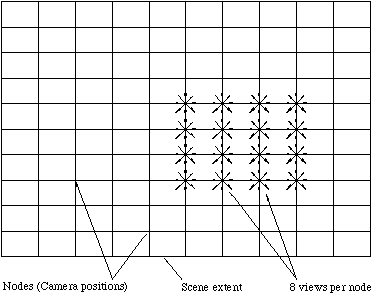 Figure 1. Camera nodes and views.
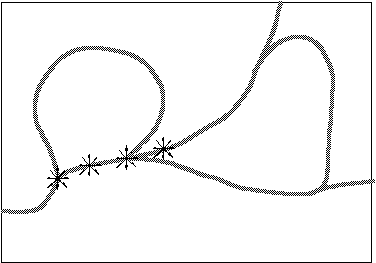
One conclusion from this project was that the mesh spacing and number of views per node were too low. A great improvement is noticed at 12 views per node, that is stepping the camera direction in 30 degree steps with about a 45 degree camera aperture for some view overlap. The mesh spacing should then be chosen as small as possible, constrained by the storage space available. For most scenes a 30x30 mesh would be ideal. The above would result in around 20,000 images, at 45Kb each this storage medium would most likely be removable read/write optical disks. An useful extension might be to define the mesh at more precision for the more interesting parts of a scene, see figure 4. A possibility that proved unsuccessful was to define various paths through the scene. This had the advantage in providing a more intelligent route through the model but the restriction on the users viewing choices didn't satisfy the aims of this project. An example of the path concept can be seen in figure 5. Another problem with this approach is the high human input required to design the paths through the scene. The mesh method chosen can easily be made an entirely automated process given a 3D model. 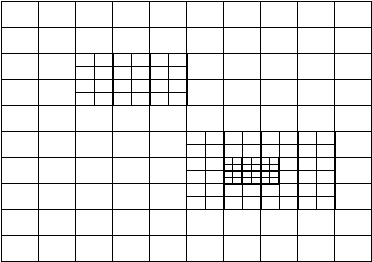 Figure 4. Variable mesh density.
|