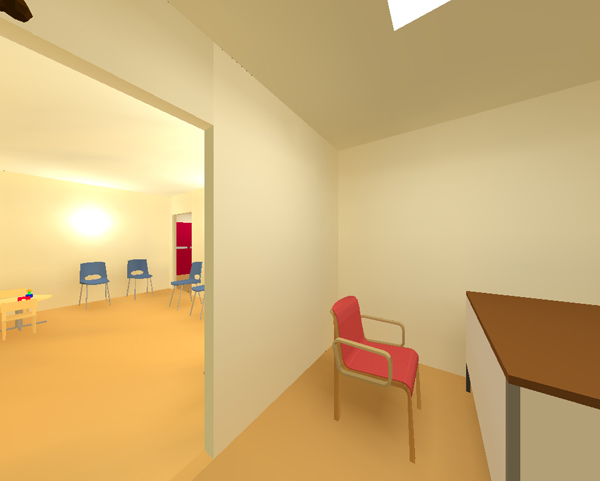
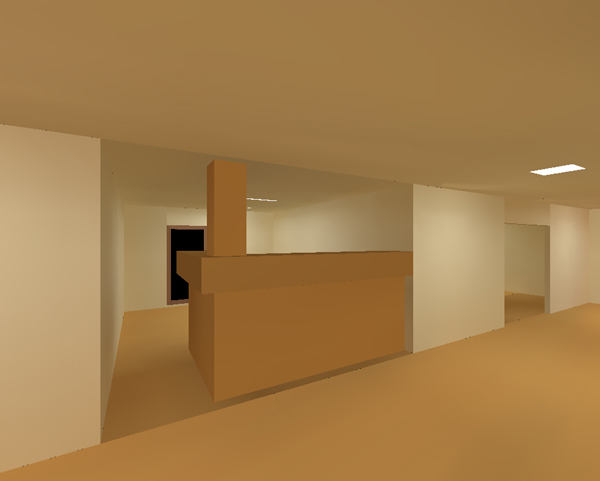
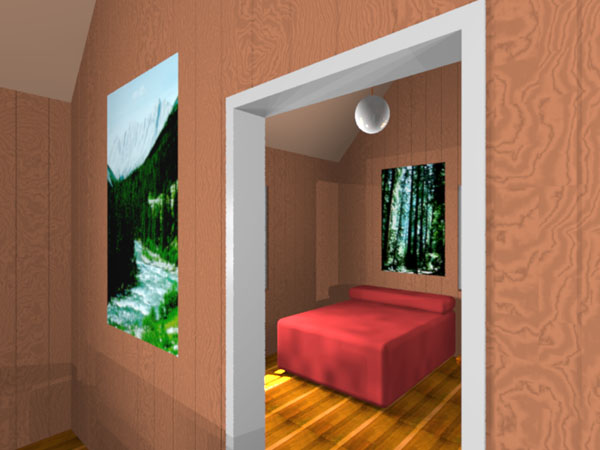
Computer Rendering and Visualisation Techniques for ArchitectureCompiled by Paul BourkeNovember 1992 The following are a collection of computer generated images compiled to illustrate various rendering and visualisation techniques.
Wireframe 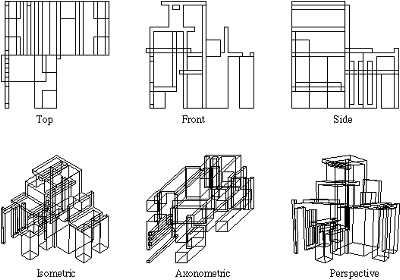
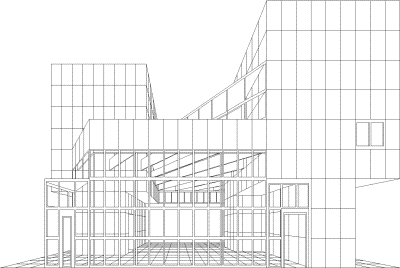
Visible lines (Hidden line removal) 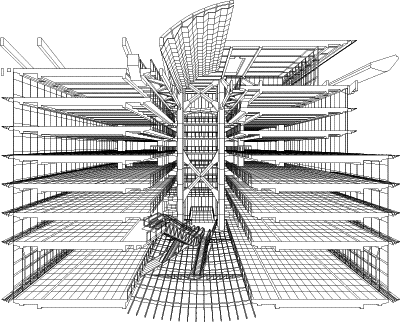
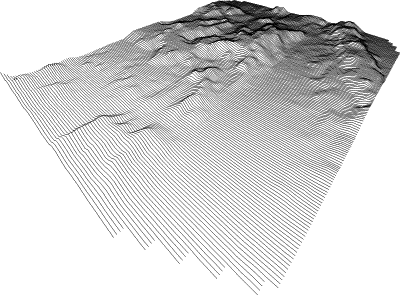
Mesh Density Shading/Contouring 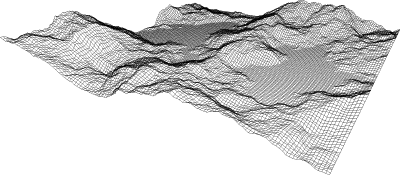
Sketching 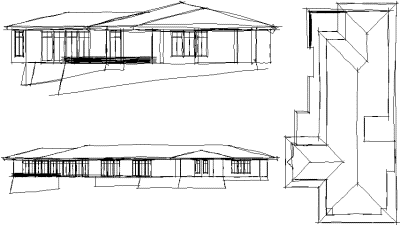
Manual shading 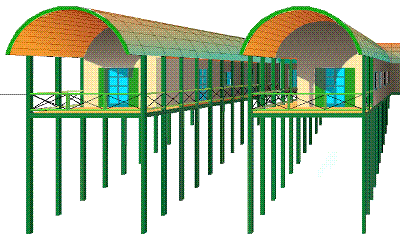
Simple Shading 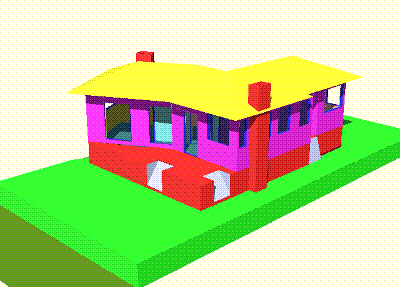
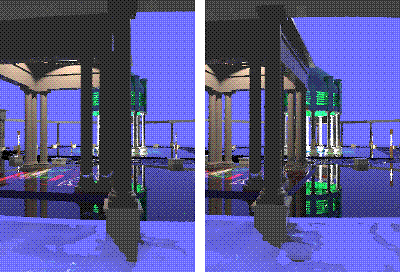
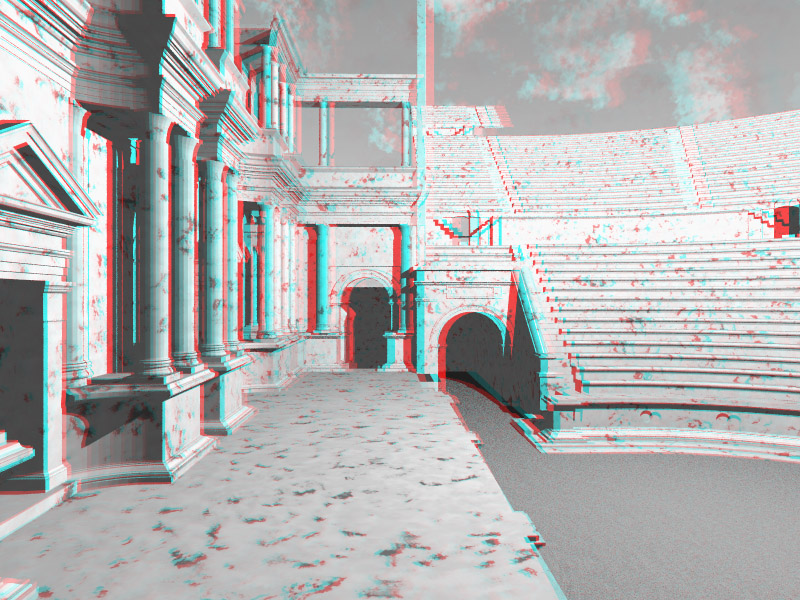
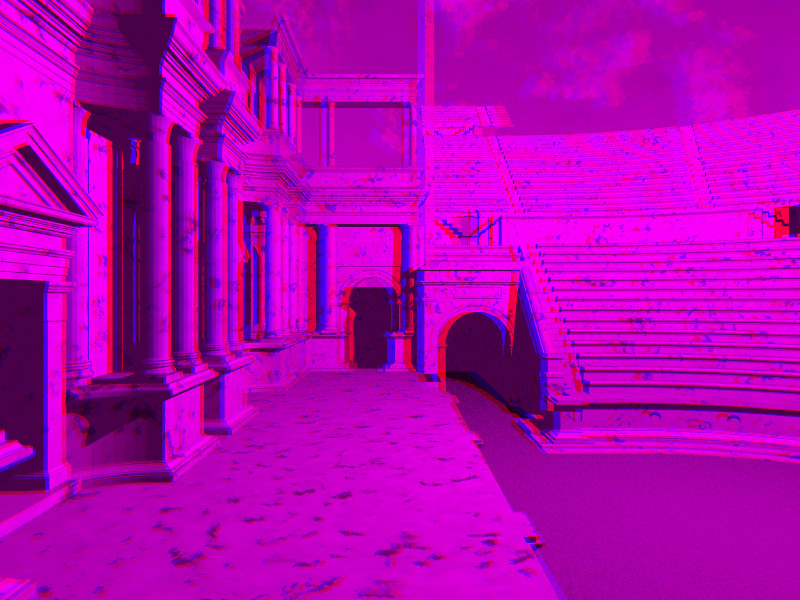
Stereo Pairs 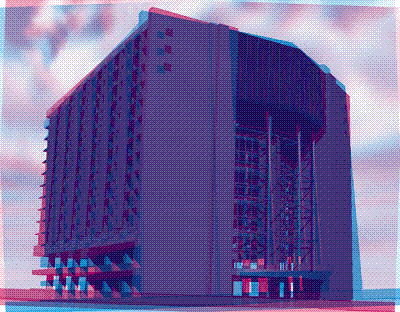
Texture Mapping 
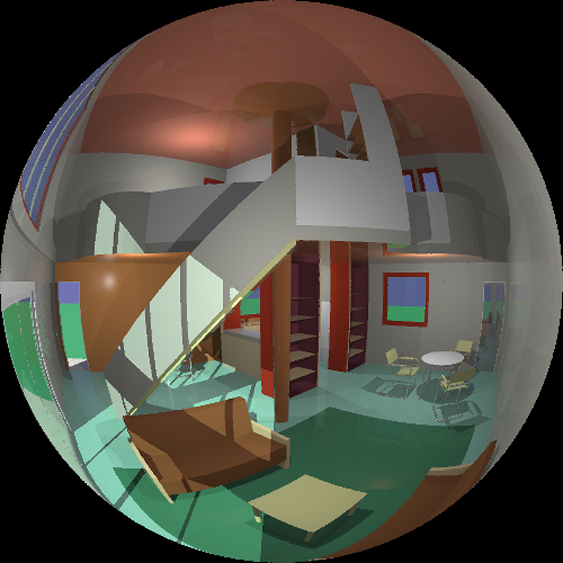
Environment Mapping 
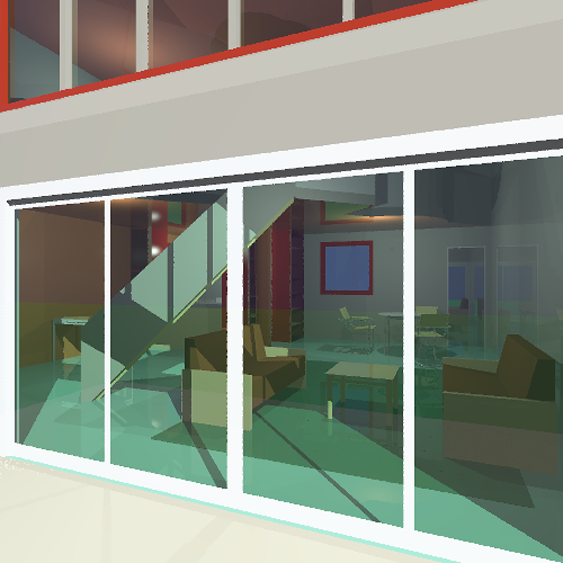
Transparency/Reflection 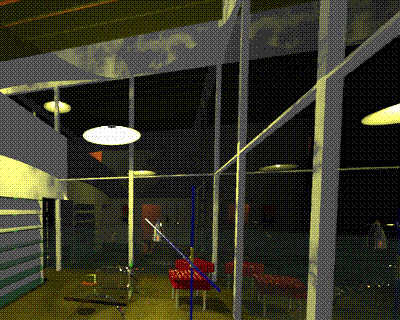
Lens distortion 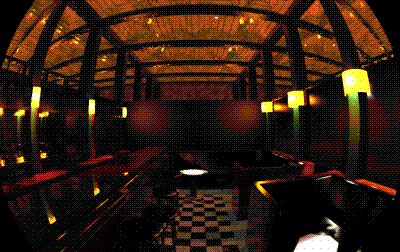
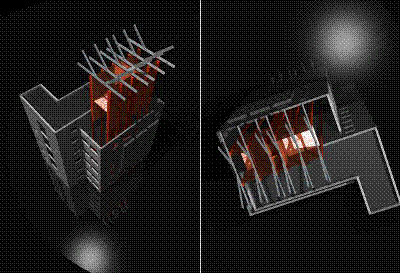
Cross Sections 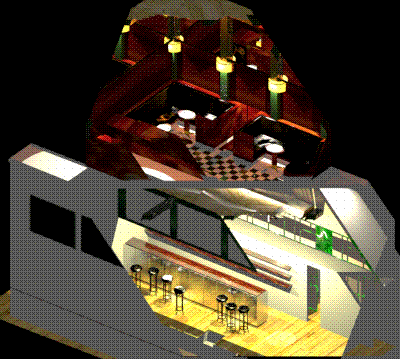
Raytracing 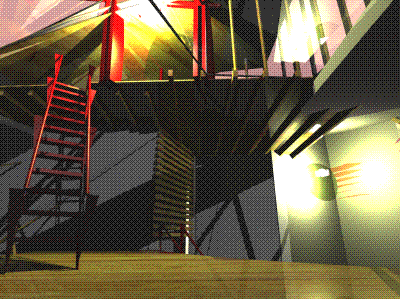
Radiosity 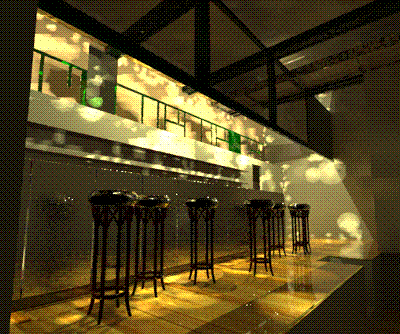
Animation 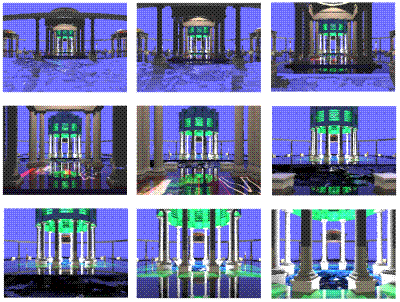 Acknowledgements The examples shown here were all created by students at the Auckland University School of Architecture.
Particular credit should be given to:
Software used:
RenderparkModel by Frank-Suykens de Laet and Philippe Bekaert.
Software: Renderpark
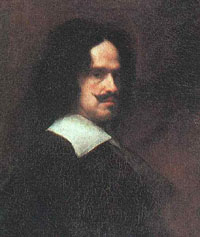
Diego Rodreguez de Silva y Velazquez was a Spanish painter who is considered to have been the country's greatest baroque artist. He, with Francisco de Goya and El Greco, forms the great triumvirate of Spanish painting. Velazquez was born in Seville on June 6, 1599, the oldest of six children; both his parents were from the minor nobility. Between 1611 and 1617 the young Velazquez worked as an apprentice to Francisco Pacheco, a Sevillian Mannerist painter who was also the author of an important treatise, El arte de la pintura (The Art of Painting, 1649), and who became Velazquez's father-in-law. During his student years Velazquez absorbed the most popular contemporaneous styles of painting, derived, in part, from both Flemish and Italian realism. Youthful WorksMany of his earliest paintings show a strong naturalist bias, as does The Breakfast (circa 1618, Hermitage, Saint Petersburg), which may have been his first work as an independent master after passing the examination of the Guild of Saint Luke. This painting belongs to the first of three categories, the bodeg, or kitchen piece, along with portraits and religious scenes into which his youthful works, executed between about 1617 and 1623, may be placed. In his kitchen pieces, a few figures are combined with studied still-life objects, as in Water Seller of Seville (circa 1619-20, Wellington Museum, London). The masterly effects of light and shadow, as well as the direct observation of nature, make inevitable a comparison with the work of the Italian painter Caravaggio. Velazquez's religious paintings, images of simple piety, portray models drawn from the streets of Seville, as Pacheco states in his biography of Velazquez. In Adoration of the Magi (1619, Museo del Prado, Madrid), for example, the artist painted his own family in the guise of biblical figures, including a self-portrait as well. Velazquez was also well acquainted with members of the intellectual circles of Seville. Pacheco was the director of an informal humanist academy; at its meetings the young artist was introduced to such people as the great poet Luis de Gangora y Argote, whose portrait he executed in 1622 (Museum of Fine Arts, Boston). Such contact was important for Velazquez's later work on mythological and classical subjects. Appointment as Court PainterIn 1622 Velazquez made his first trip to Madrid, ostensibly to see (as Pacheco tells it) the royal painting collections, but more likely in an unsuccessful search for a position as court painter. In 1623, however, he returned to the capital and, after executing a portrait (1623, Museo del Prado) of the king, was named official painter to Philip IV. The portrait was the first among many such sober, direct renditions of the king, the royal family, and members of the court. Indeed, throughout the later 1620s, most of his efforts were dedicated to portraiture. Mythological subjects would at times occupy his attention, as in Bacchus or The Drinkers (1628-29, Museo del Prado). This scene of revelry in an open field, picturing the god of wine drinking with ruffian types, testifies to the artist's continued interest in realism. Trip to ItalyIn 1628 Peter Paul Rubens came to the court at Madrid on a diplomatic mission. Among the few painters with whom he associated was Velazquez. Although the great Flemish master did not have a direct impact on the style of the younger painter, their conversations almost certainly inspired Velazquez to visit the art collections in Italy that were so much admired by Rubens. In August 1629 Velazquez departed from Barcelona for Genoa and spent most of the next two years travelling in Italy. From Genoa he proceeded to Milan, Venice, Florence, and Rome, returning to Spain from Naples in January 1631. In the course of his journey he closely studied both the art of the Renaissance and contemporaneous painting. Several of the works executed during his travels attest to his absorption of these styles; a notable example is Joseph and His Brothers (1630, El Escorial, near Madrid), which combines a Michelangelesque sculptural quality with the chiaroscuro (light-and-shadow techniques) of such Italian masters as Guercino and Giovanni Lanfranco. Return to SpainOn his return to Madrid, Velazquez resumed his duties as court portraitist with the sensitive rendition Prince Balthasar Carlos with a Dwarf (1631, Museum of Fine Arts, Boston), an image made poignant by the young prince's death before reaching adulthood. From the 1630s on, relatively few facts are known about the artist's personal life, although his rise to prominence in court circles is well documented. In 1634 Velazquez organized the decoration of the throne room in the new royal palace of Buen Retiro; this scheme consisted of 12 scenes of battles in which Spanish troops had been victorious, painted by the most prestigious artists of the day, including Velazquez himself, and royal equestrian portraits. Velazquez's contribution to the cycle of battle pictures included the Surrender of Breda (1634, Museo del Prado), portraying a magnanimous Spanish general receiving the leader of defeated Flemish troops after the siege of that northern town in 1624. The delicacy of handling and astonishing range of emotions captured in a single painting make this the most celebrated historical composition of the Spanish baroque. The second major series of paintings of the 1630s by Velazquez was a group of hunting portraits of the royal family for the Torre de la Parada, a hunting lodge near Madrid. Dating from the late 1630s and early '40s are the famous depictions of court dwarfs in which, unlike court-jester portraits by earlier artists, the sitters are treated with respect and sympathy. Velazquez painted few religious pictures after entering the king's employ; Saints Anthony and Paul (late 1630s, Museo del Prado) and Immaculate Conception (circa 1644, Museo del Prado) are notable exceptions. Late WorksDuring the last 20 years of his life Velazquez's work as court official and architect assumed prime importance. He was responsible for the decoration of many new rooms in the royal palaces. In 1649 he again went to Italy, this time to buy works of art for the king's collection. During his year's stay in Rome (1649-50) he painted the magnificent portraits Juan de Pareja (Metropolitan Museum, New York City) and Pope Innocent X (Palazzo Doria-Pamphili, Rome). At this time he was also admitted into Rome's Academy of Saint Luke. The elegant Venus at Her Toilette (National Gallery, London) probably dates from this time also. The key works of the painter's last two decades are Fable of Arachne (1644-48, Museo del Prado), an image of sophisticated mythological symbolism, and his masterwork, Las meninas (The Maids of Honor, 1656, Museo del Prado), a stunning group portrait of the royal family and Velazquez himself in the act of painting. Velazquez continued to serve Philip IV as painter, courtier, and faithful friend until the artist's death in Madrid on August 6, 1660. His work had a subtle impact a century later on his greatest successor, Francisco de Goya.
The Radiance CabinModel by Greg WardAnimation by Paul Bourke
Software: Radiance and MPI
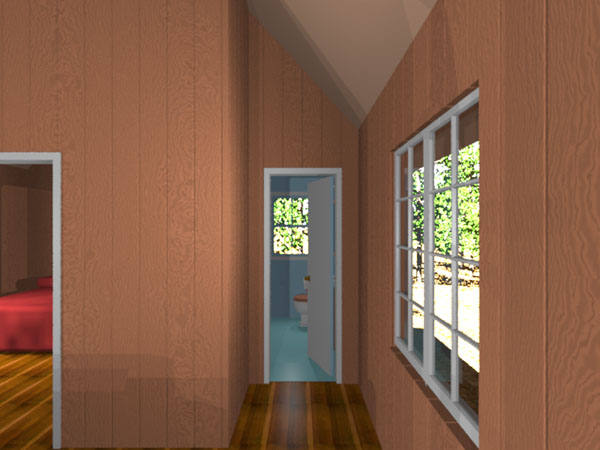
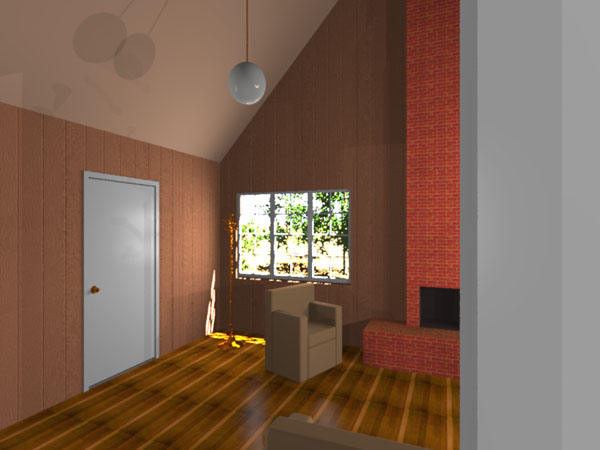
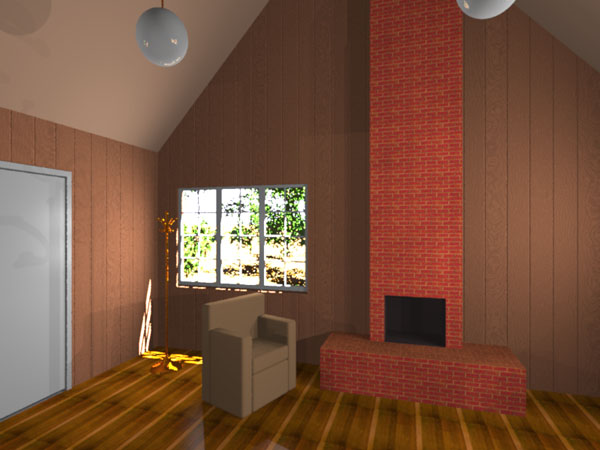
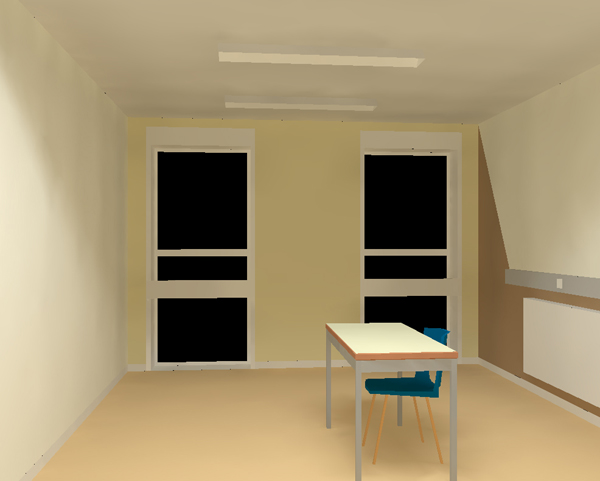
Architectural Rendering ExampleModelling and Rendering by Bill RattenburyRendering by Paul Bourke January 1994

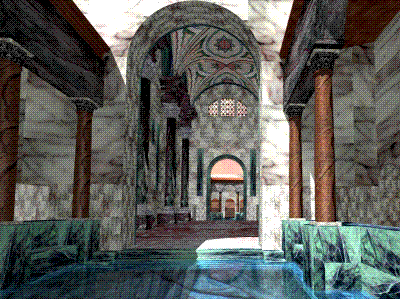
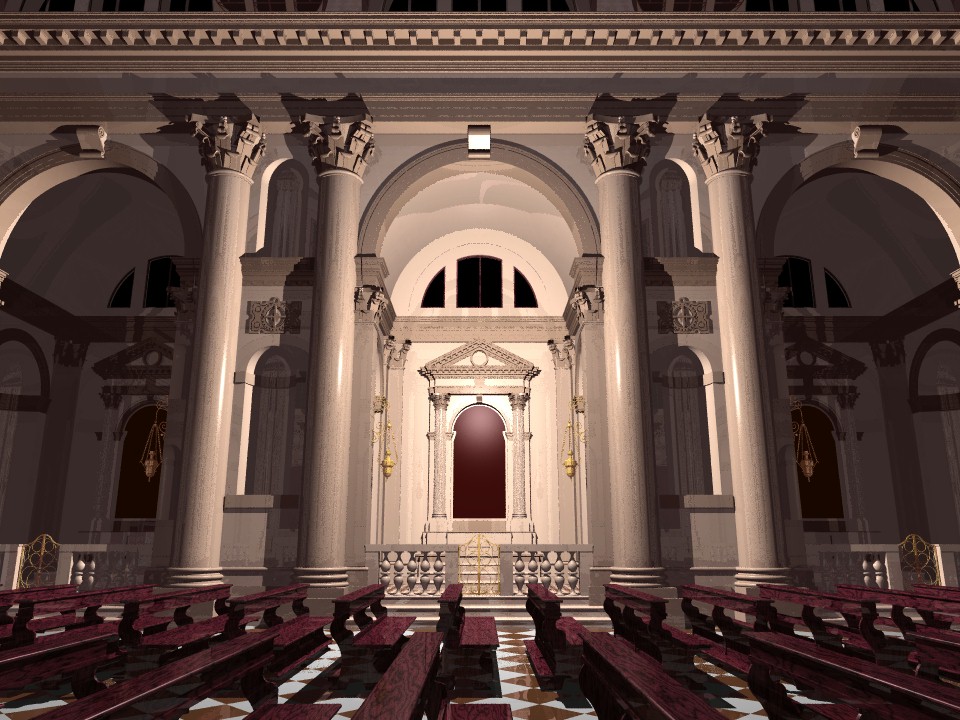
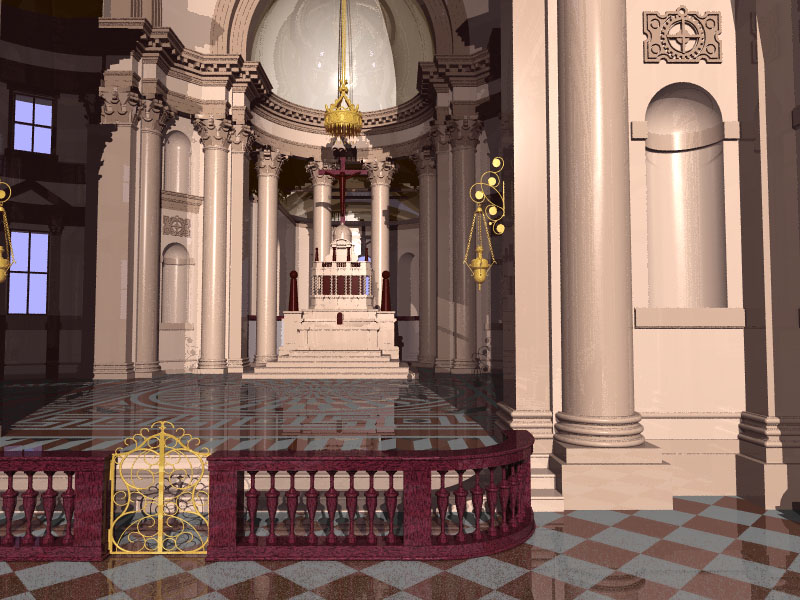
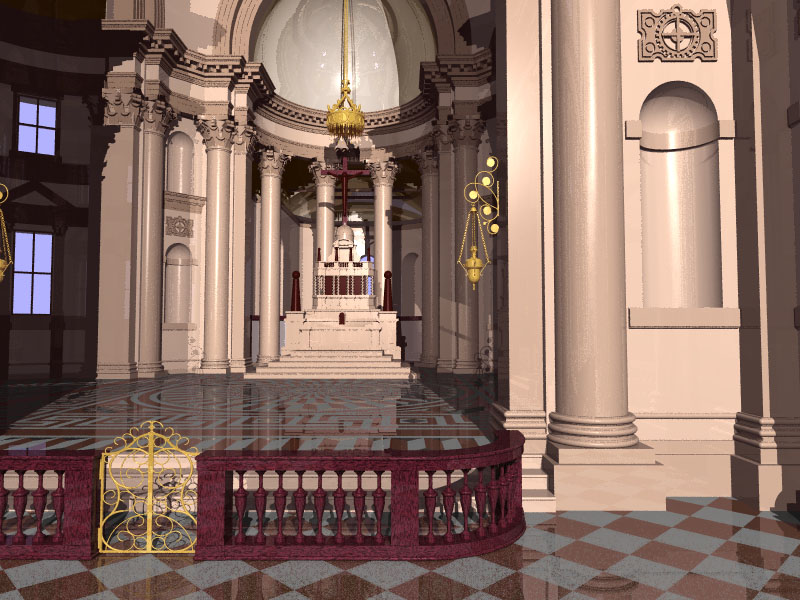
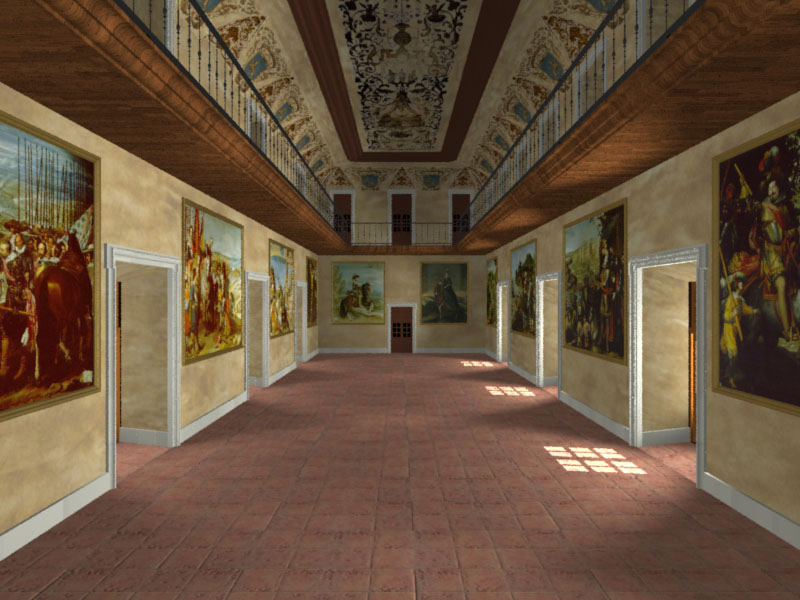
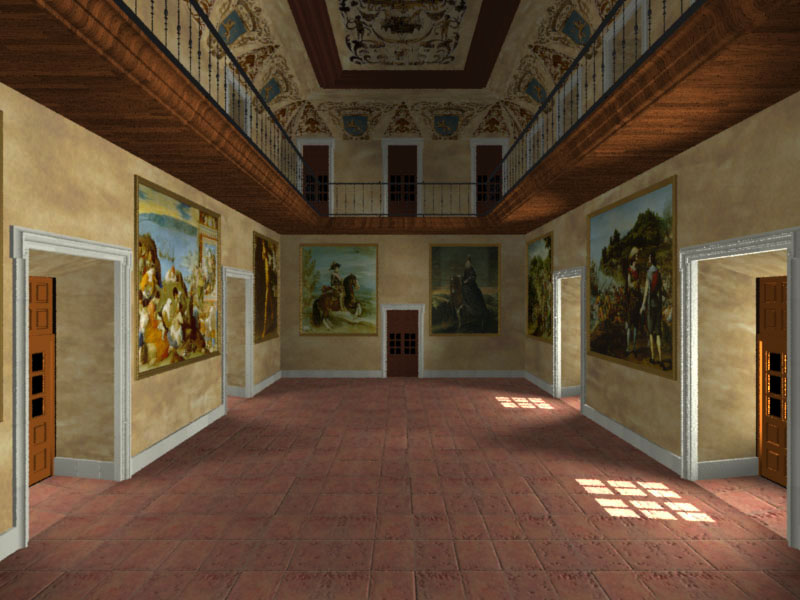
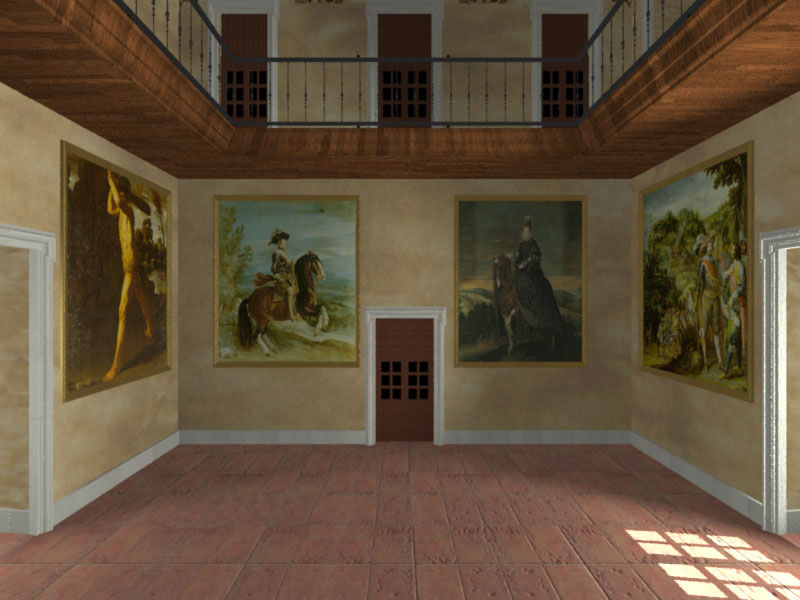
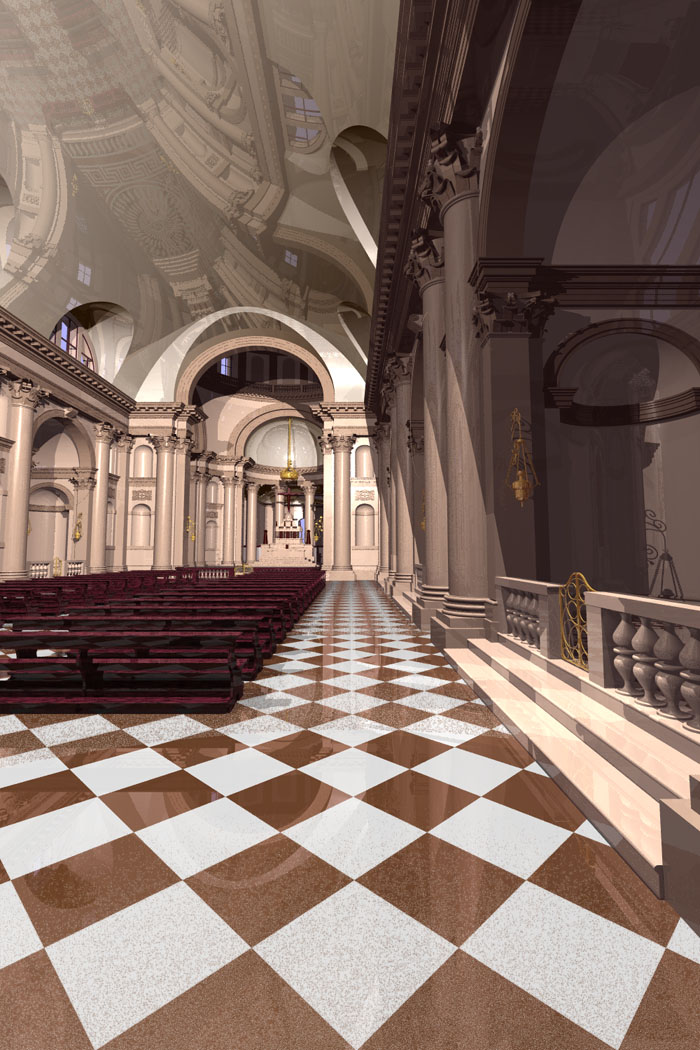
Palladio's Il RedentoreModel by Nathan O'Brien
Model of the interior of Palladio's Il Redentore church on the island Chiesa del Redentore in Venice, The building was designed by the Renaissance Architect Andrea Palladio (in 1577) and was completed in 1592. Created by Nathan G B O'Brien, for his undergraduate dissertation "Building Preservation and Three Dimensional Computer Modelling". Copyright © Nathan G. B. O'Brien and School of Architecture, The University of New South Wales, Australia. Custom distributed rendering tools by Paul Bourke CPU cycles from a 64 node Dec Alpha farm Astrophysics and Supercomputing, Swinburne University of Technology September 1999
Rendering on the MacintoshFeaturing StrataVisionAustralasian Wheels for the Mind, April 1991Written by Paul BourkeProvided as an historical document on state of the art of Macintosh rendering at the time. Introduction This article will discuss the techniques available for creating realistic computer generated images of three dimensional scenes. While the discussion is general examples will be taken from a Macintosh package called StrataVision from Strata Inc. StrataVision provides considerable power usually associated only with the high-end workstation products but most importantly it adds an exceptional user interface. Hardware requirementsIt would be misleading to suggest that quality rendering is possible on the whole range of Macintosh platforms. The resources needed such as processing power and colour requirements mean that only the machines at middle to upper end of the Apple product line are suitable. OverviewThe aim in rendering is to create a realistic digital image of a scene by computer. Ultimately it is hoped to create an image where an observer cannot tell if it is computer generated or a photograph of something real, this is the aim of photorealism. There are a number of stages that can be identified in the process that leads to the final rendered image, each of these stages are described below. Model generationA description of the geometry of the objects in the scene is the first requirement. This is the task of 3 dimensional modelling applications also known as CAD packages. Since modelling and rendering are both very difficult tasks in their own right it is unusual to encounter both within one package. Also, while rendering can be made discipline independent, modelling is usually very discipline dependent. The modelling requirements for desktop presentation, engineering, and architecture are all very different. It is therefore desirable for a rendering package to be able to read a number of 3D file formats so that it can import the geometry data from as wide a range of modellers as possible. StrataVision provides for the importing of DXF files as well as Super3D text files. The examples shown in this article will use the scene in figure 1 which was created using a general purpose CAD package called MicroStation.  Figure 1. Wire frame model Surface attributes Surface attributes specify how the surfaces that make up the objects in the scene react to light. They include such things as the colour, reflection coefficients, transparency, and texture. These are the most important contributions to the quality of the rendered image since the geometry of most objects is simple and the visual information comes from how the surfaces react to incident light. It has been suggested that the most geometrically complex object in a home is the telephone, the most visually appealing objects such as a wood grain tabletop are often nothing more than rectangular boxes. Some of the surface characteristics one would expect to be able to control are: the red, green, blue components of the colour; the reflection coefficients for ambient, diffuse and specular contributions; the transparency and the refractive index; the glossiness. Each of these parameters is usually normalized to vary between 0 and 1. While the above can be specified numerically for an entire surface it is often necessary to vary the parameter over the surface, this is called texture mapping. Colour is the simplest case of an attribute that usually changes across a surface, for example, a wood tabletop with a grain. With texture mapping a bitmap of the colour variation is pasted onto the surface. The texture can be scaled, positioned, and repeated with various types of tiling systems. For textures indicating reflection coefficients only grey scale images are used, the white areas being high reflection coefficients while the black areas represent a low reflection coefficients. An example of a texture map for specifying the colour variation across a surface is shown in figure 2. This is a grey scale scanned image subsequently coloured in with a colour painting application. Another common application of textures is called a bump maps which specifies the roughness of the surface. The classic example usually cited is for rendering oranges where the appearance of pinches in the skin can be simulated with a bump map. The efficient use of texture maps can greatly simplify the modelling process. If traditional modelling and hidden line rendering were being used to model a tile floor it would be usual to draw each tile as a separate rectangle which can then be coloured individually. The result is a model with a large number of objects which slows down future processing. If texture maps are possible then the floor is modelled as one rectangular plane and the tile effect is created with a bitmap picture representing the minimum tiling pattern. The example scene contains a number of texture maps. Two are shown in figure 2, the brick also has an associated bump map. Other textures include oak plank on the floor, the image in the picture frame, the wallpaper, the pattern on the rug, and the cloth for the lamp shade. 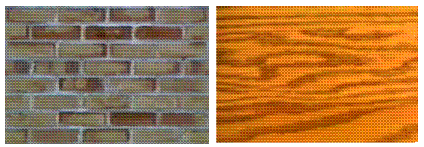 Figure 2. Texture map examples Light conditions This involves settings the position and attributes of the sources of light that affect the scene. Besides the ambient or background light level, there are generally four types of light source provided from which more complex sources can be made. They are: suns, point sources, directional sources, and luminous surfaces. Suns are considered to be an infinite distance away (wavefronts are parallel). Point light sources can be placed in the scene and radiate in all directions although they may have different distributions, circular and cylindrical say. Directional sources provide for such things as torches or spot lights. The angle or aperture of the cone is variable giving narrow or wide angle beams. Luminous surfaces cover such things as fluorescent surfaces, sometime referred to as the glow factor. All sources of course have an intensity attribute and often only white light is provided. Making coloured sources is accomplished by enclosing a white light source in a partially transparent coloured sphere. The sources can be positioned anywhere in the scene and made to point in some direction for directional sources. Usually the source itself will not render as anything geometrically (besides a source of light). If the structure of the source is required then it must be created as any other part of the scene. The example scene contains two sources and an ambient light setting. There is one point source on the ceiling slightly behind the camera and another point light source inside the lamp. View settingsThis is where the conceptual camera is positioned and aligned to dictate the contents of the image. The position is simply a 3 dimensional coordinate and the direction is specified with a pointing vector. Other camera attributes include the focal point and the depth of field. In a windowing environment the image "seen" by the camera is displayed within the window area. RenderingFinally the computer can be instructed to do its thing. There are details such as the image resolution and size, as well as any options that apply to the rendering algorithms. Since the time taken to compute the image as desired may be very great there are a number short cuts that can be used to check the status of the scene. For example the image in figure 3 took about 2 minutes while figure 4 took about 6 hours on a Mac IIci. Two of the most useful methods of previewing the image are:
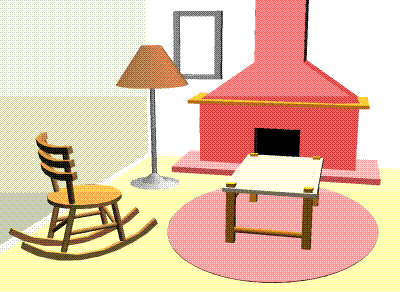 Figure 3. Gouraud shaded image
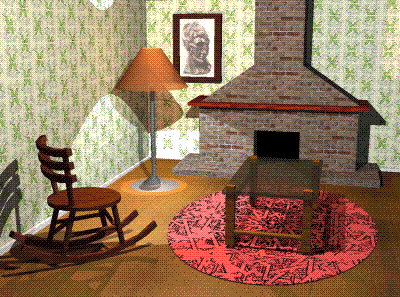 Figure 4. Ray traced image Conclusion The standard in user interface on the Macintosh makes it an ideal candidate for the two most important parts of the scene description process, that of modelling in three dimensions and the creating and assigning surface attributes. A big advance has been made with 32 bit Quickdraw and the way the operating system can provide tools to assist in the creation of high quality colour graphics environment. Products such as StrataVision and RenderMan are bringing very high quality rendering into this environment.
Images of this rendering for "cubeview" can be obtained from here as image set #9. 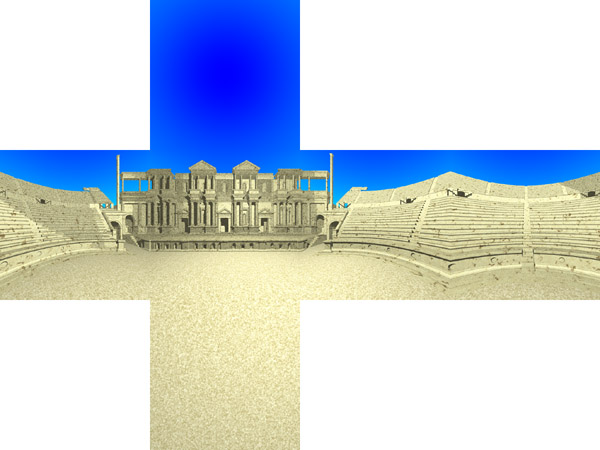
Anaglyphs
|