Producing hollow meshes for 3D printing from dla3dviewerUsing Meshlab and Blender
Written by Paul Bourke
The following describes tools one might use to create models from dla3dviewer and 3D print them. Actually the various OBJ options that include spheres at the branch end points should result in 3D printable models, but can be inefficient (large files) and some 3D printing services are fussier than others. The following also describes an option for creating hollow meshes which are generally much more cost effective in terms of materials than solid models. Create the desired form in dla3dviewer, taking note of overall radius and range of branch thicknesses. 
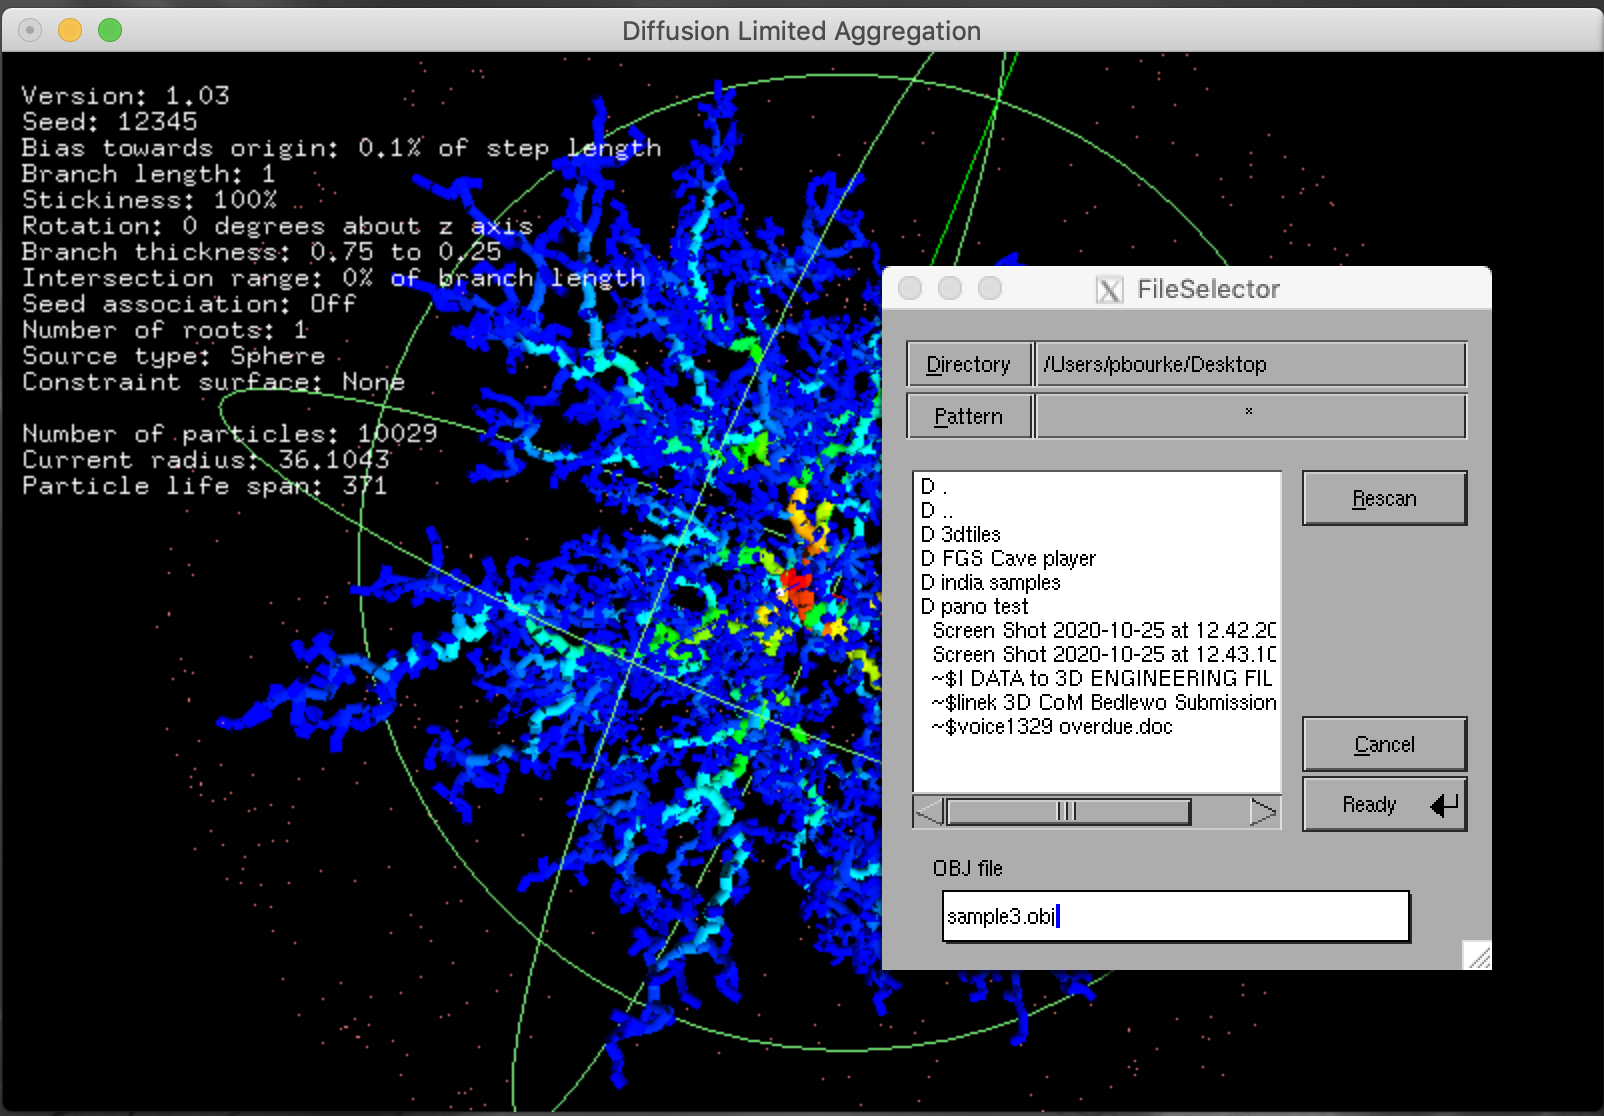
For the settings pane shown above, right mouse click on main window for pop-up menu with lots of other useful options. Export as OBJ. 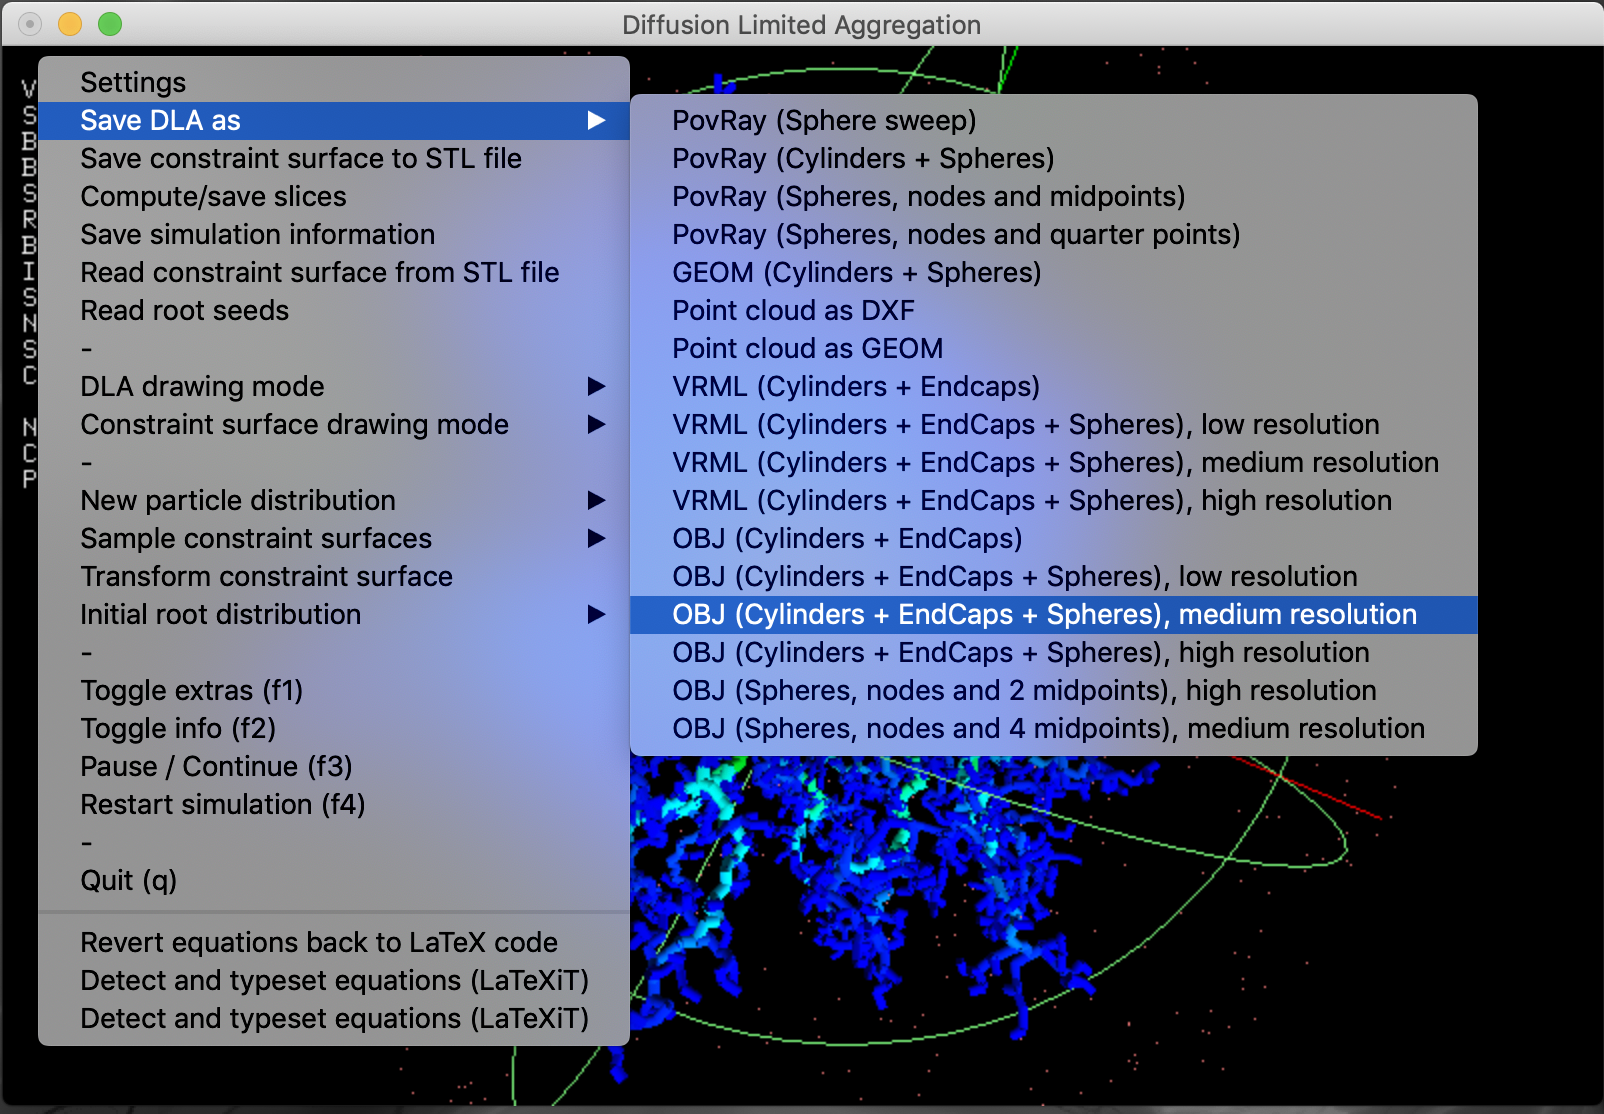
Open the OBJ file in MeshLab, or another 3D model viewer of your choice. Disable surface rendering, enable wire frame to reveal that the model is made up of cylinders for the branches and spheres at the joints, see Pipes for Rendering Engines for more details on this approach. 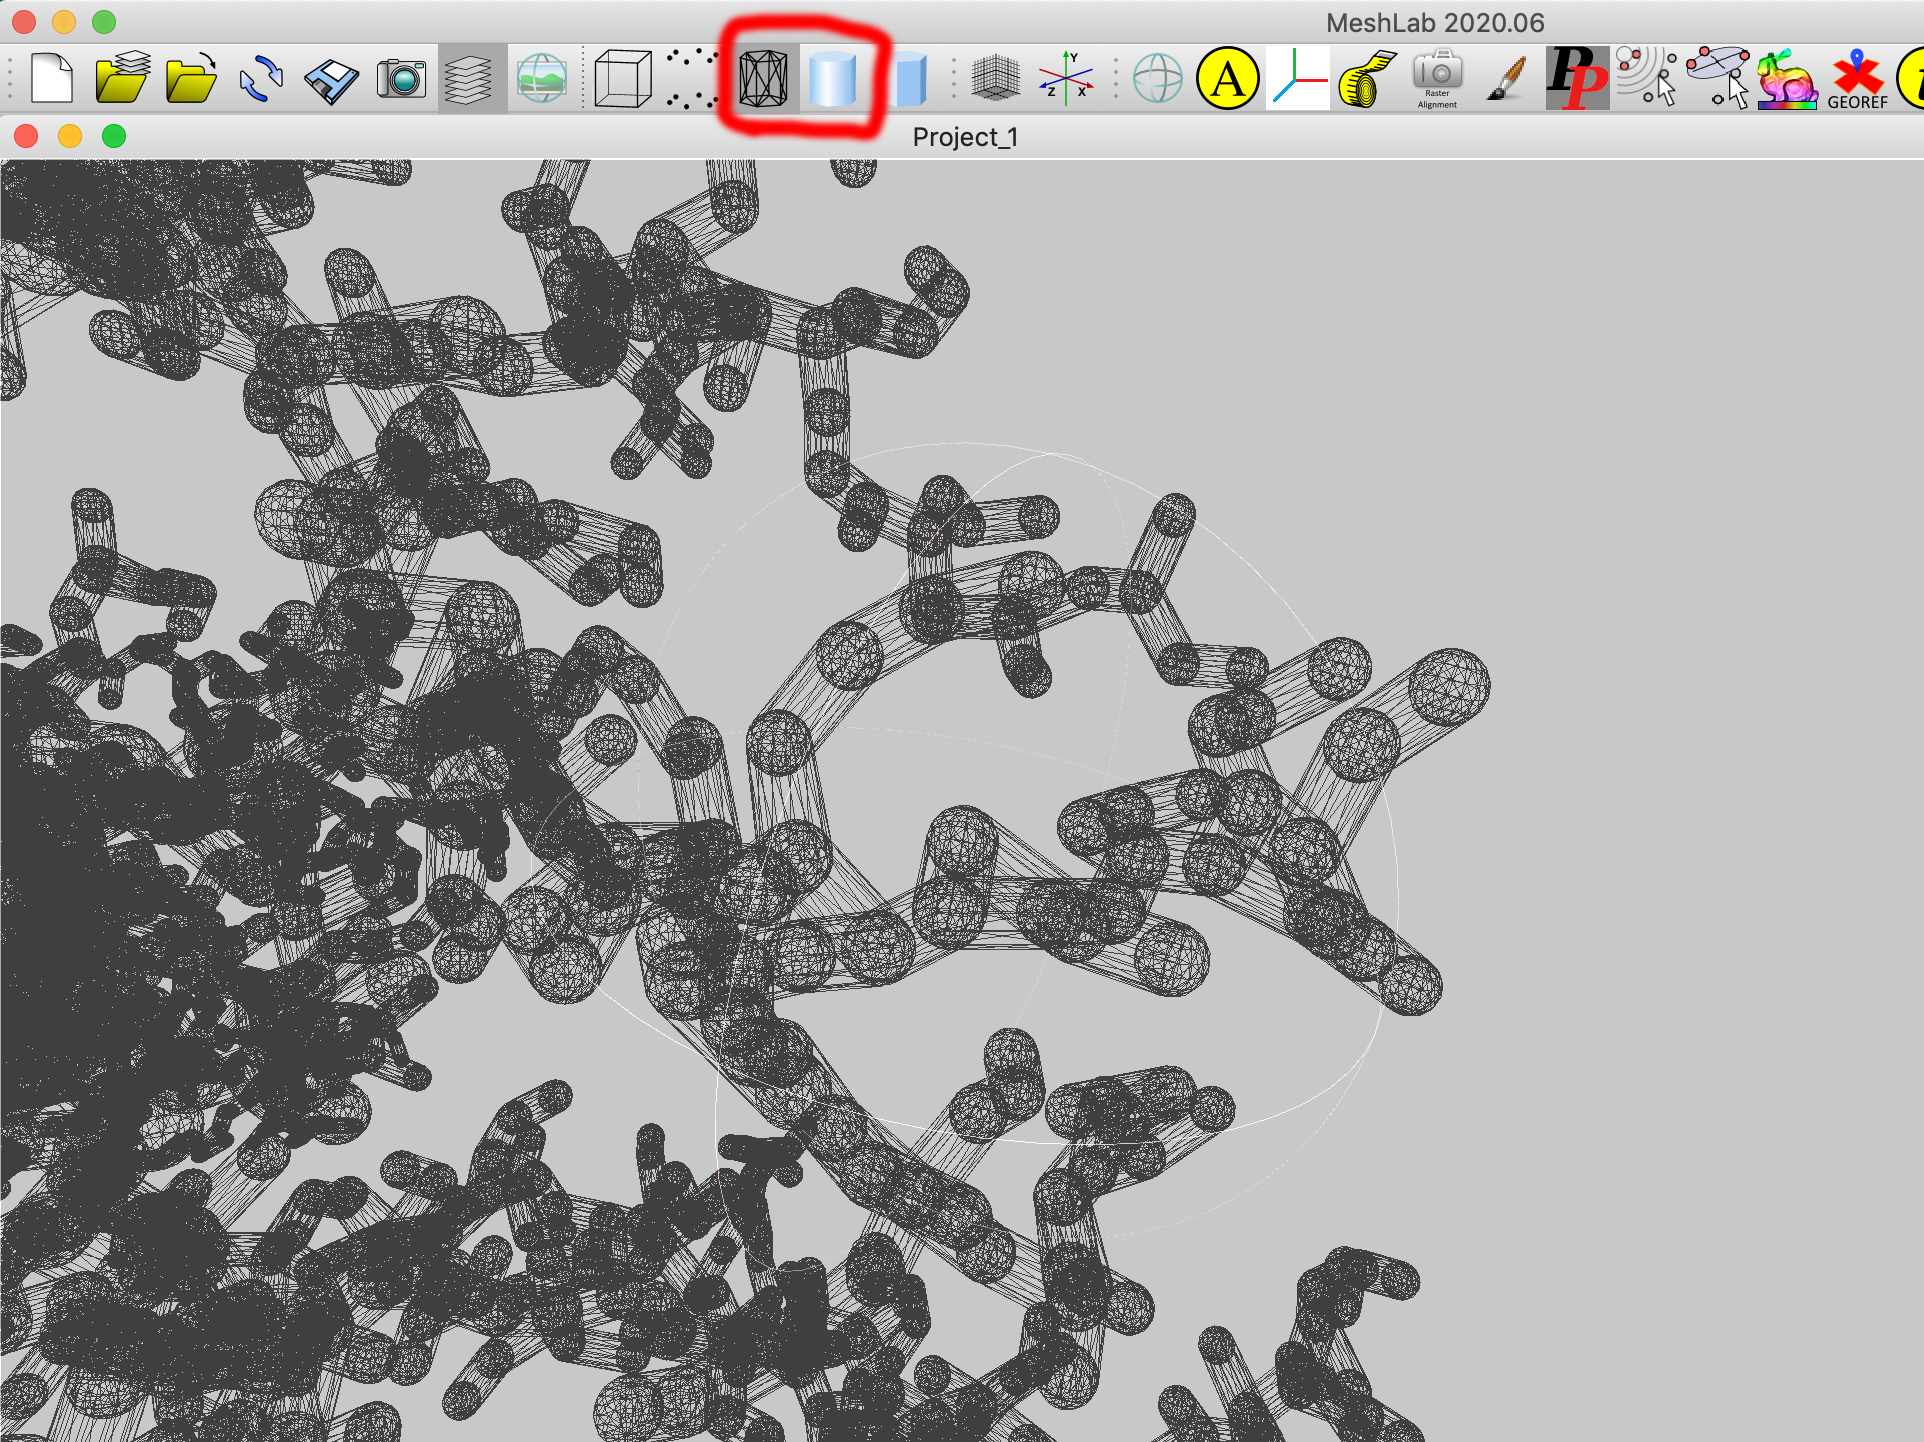
This model, due to the way dla3dviewer works, does not share an many vertices as it could. In the interests of efficiency, using the Filter menu - Cleaning and Repairing - Remove duplicate vertices will increase the number of shared vertices. The number of vertices should reduce significantly. Export the model to OBJ. 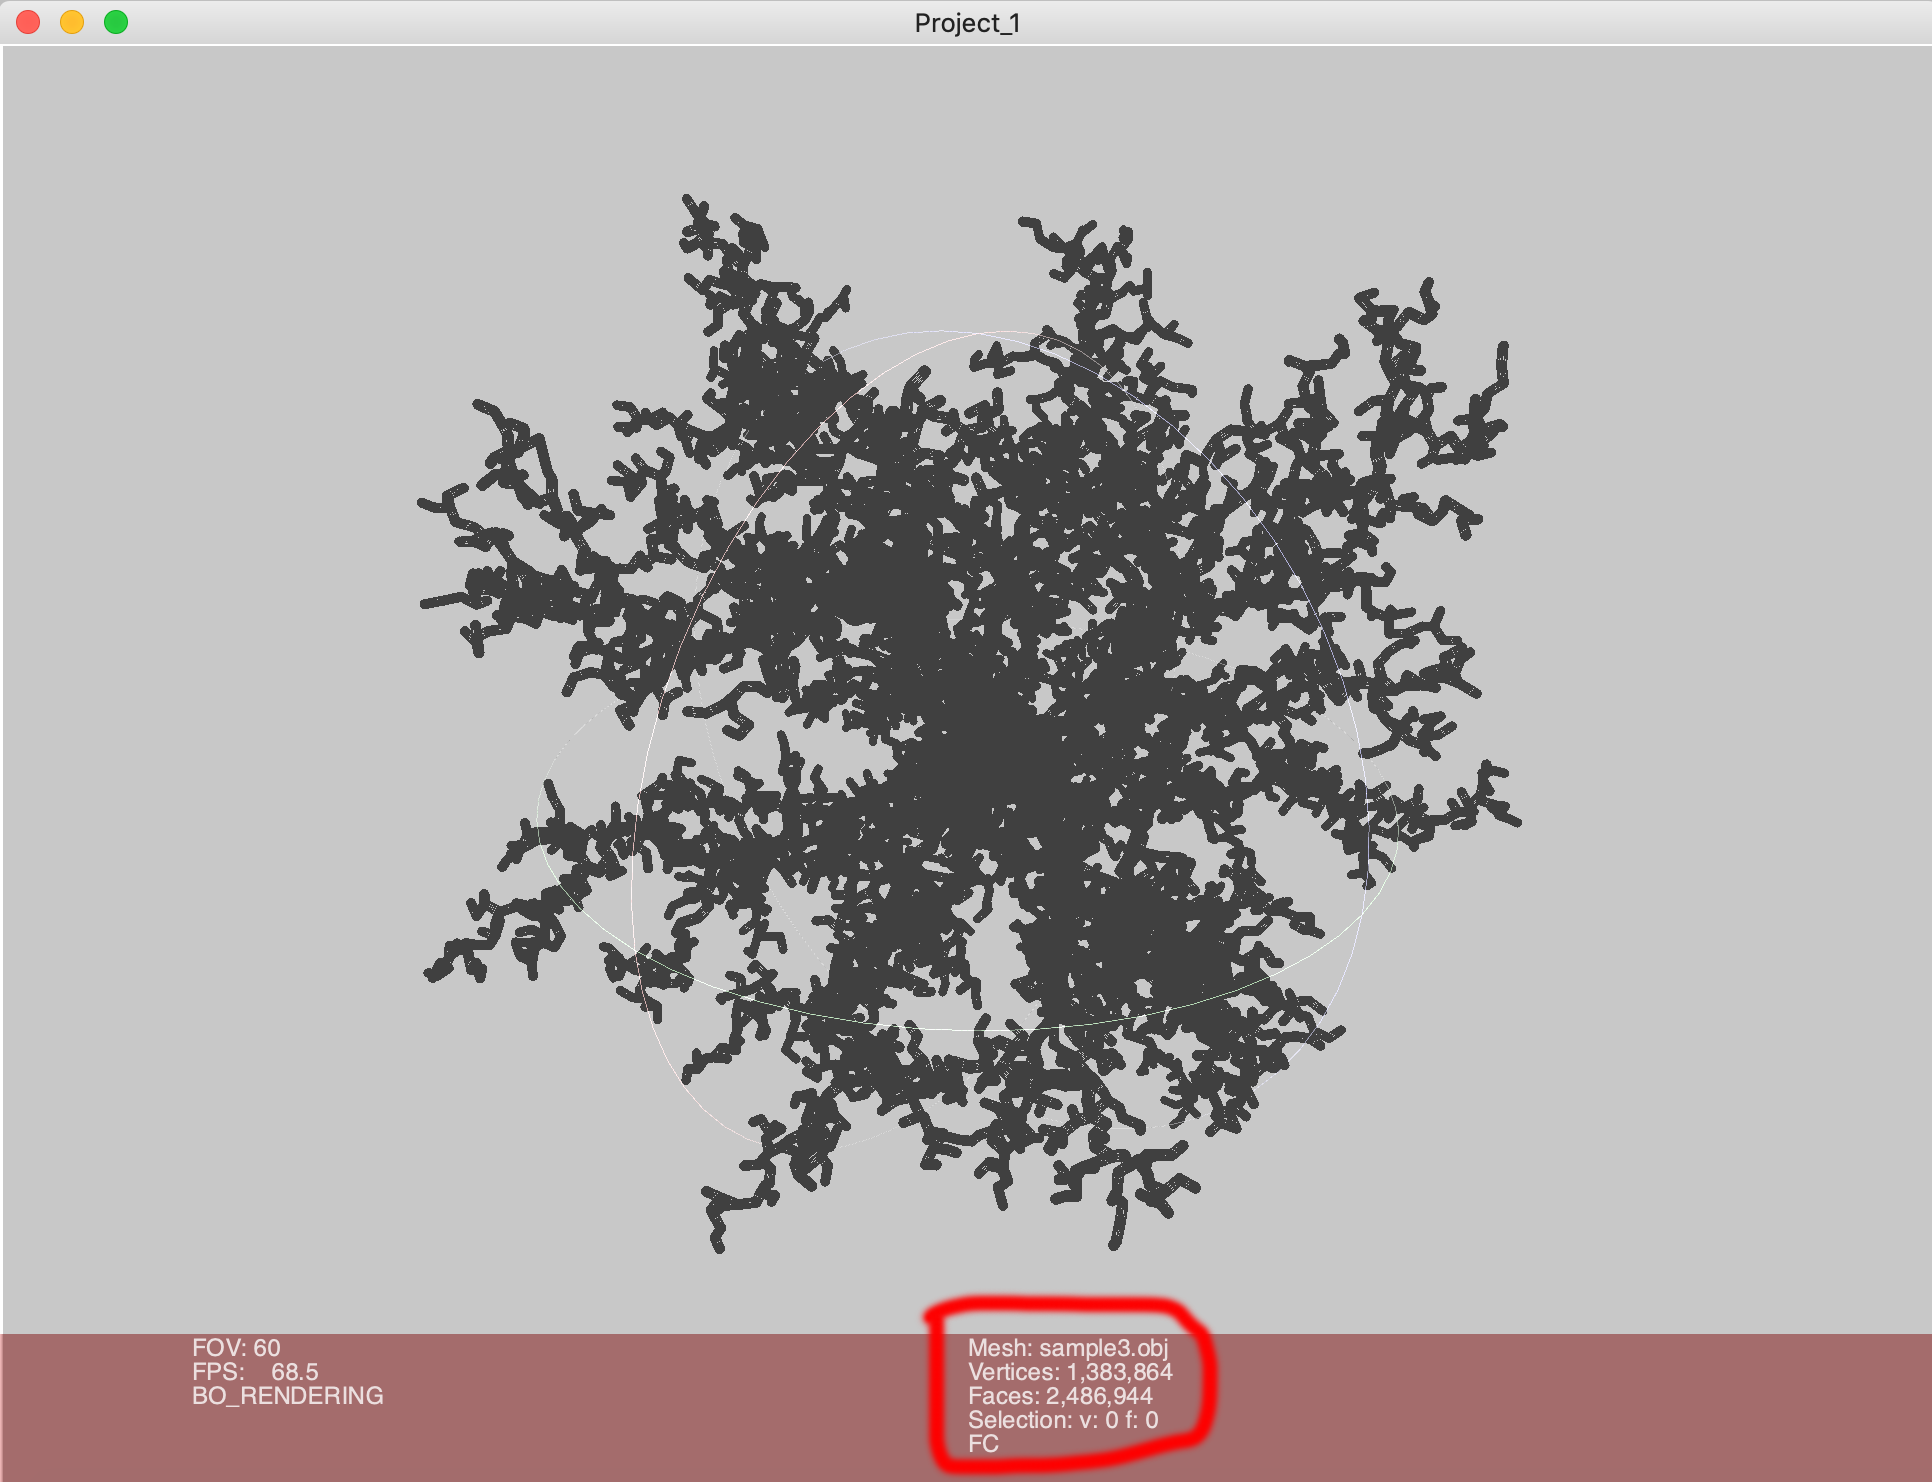
This is also a good time to create the mesh at the final scale. Using the Filters menu - Normals, Curvatures and Orientation - Transform: Scale, Normalise. Do this twice, first time choose "Scale to unit box". Second time choose the desired size, in this case 300 units (which will be interpreted later by the 3D printing software as mm, but in the interim Blender will interpret the units as m). 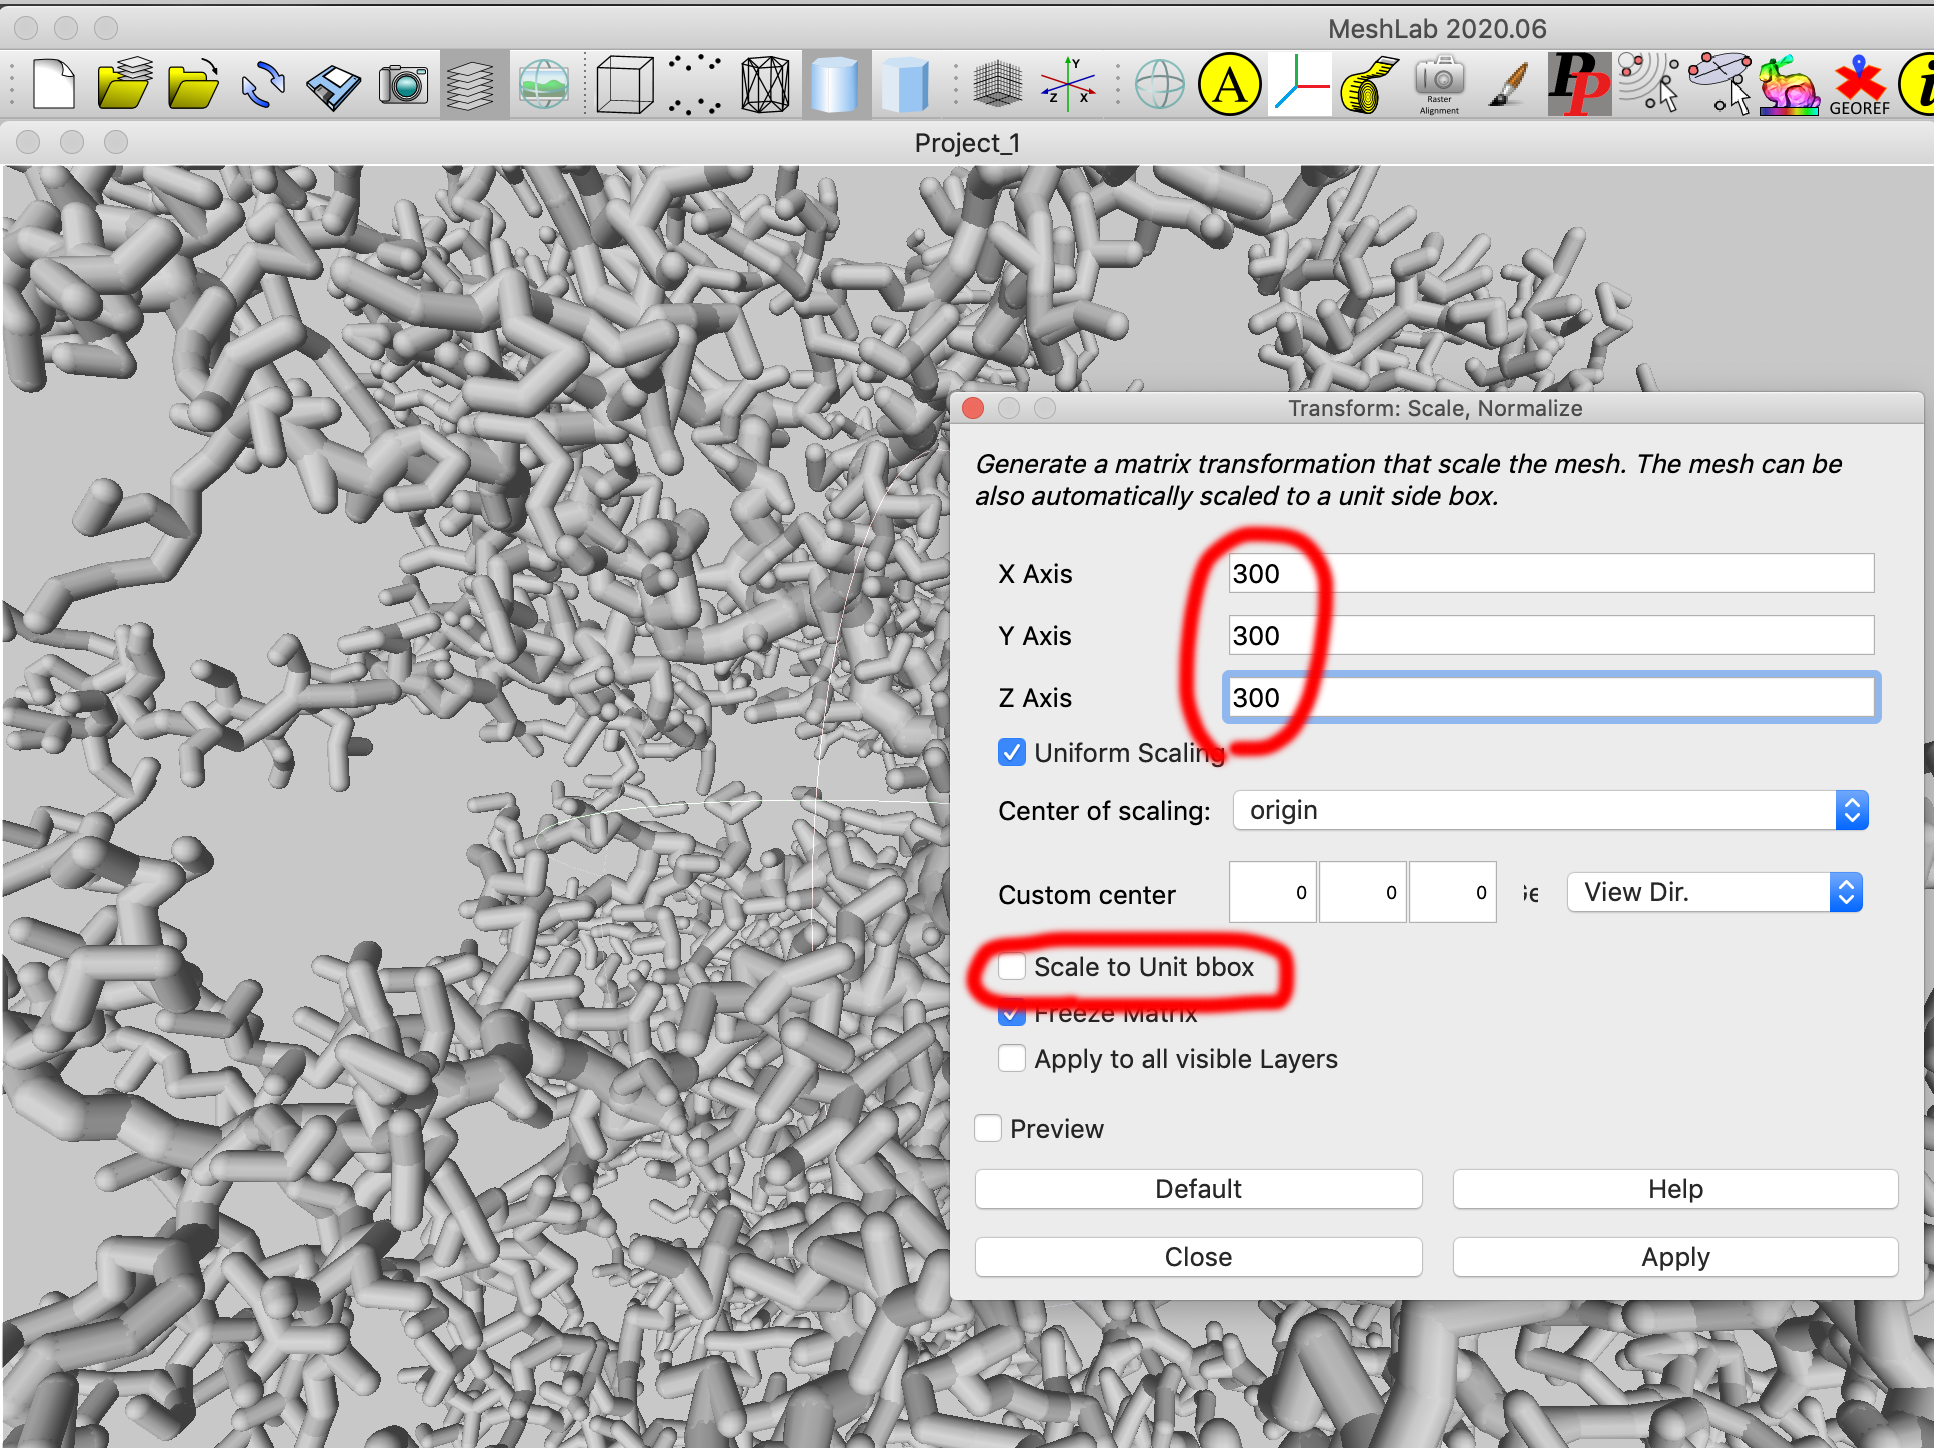
This is a good time to check the thickness of the thinnest parts using the measure tool in MeshLab. If the parts are too thin then the branch thickness needs to be adjusted in dla3dviewer. 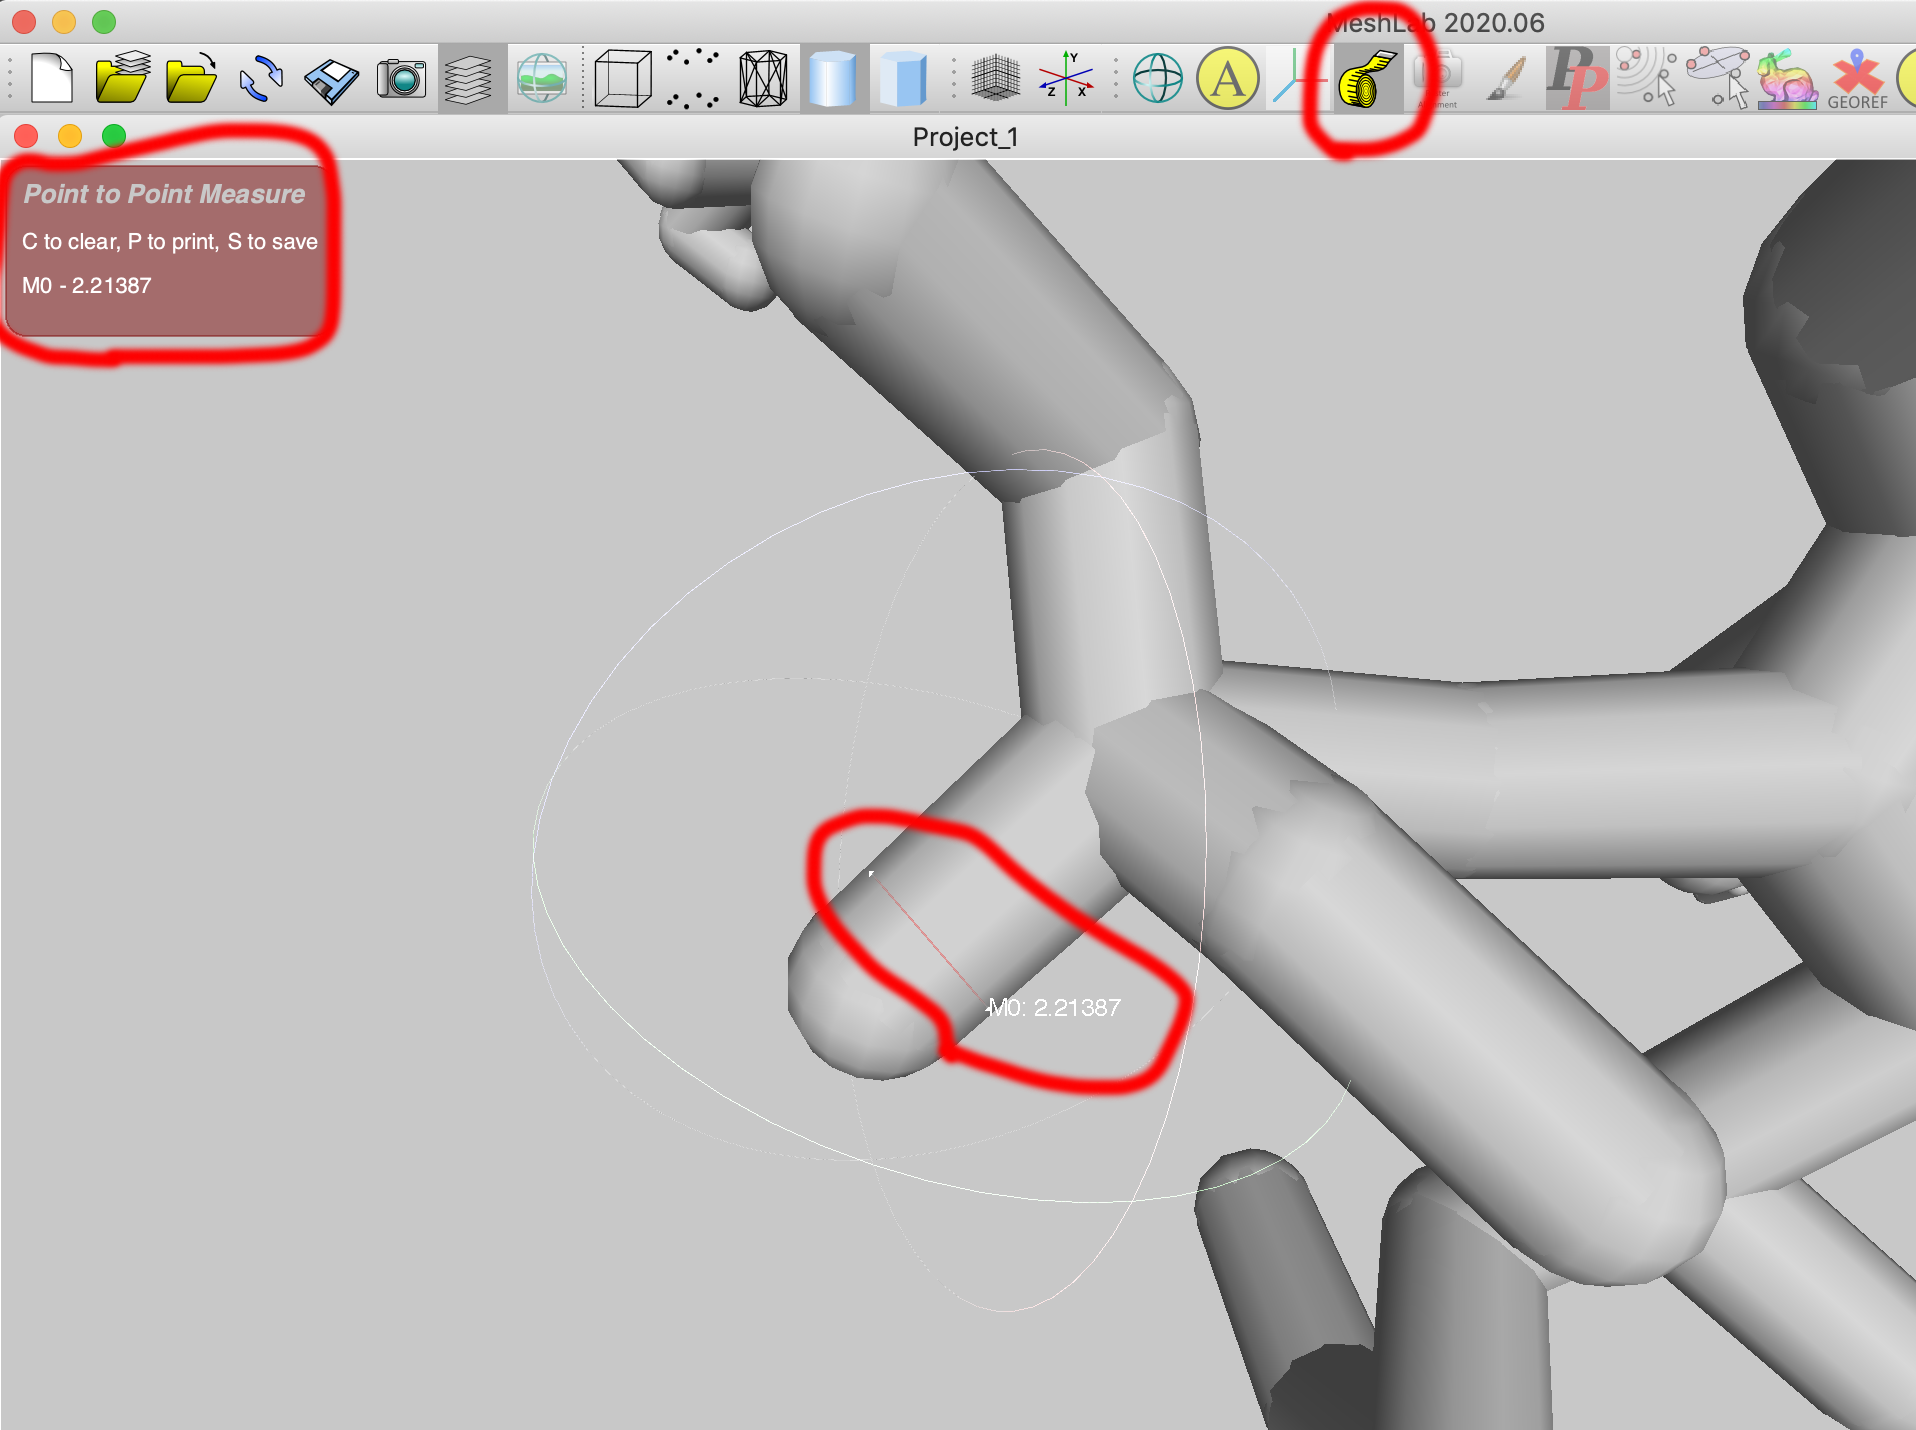
Import the OBJ file into Blender. The first thing to do is create a single shell of a mesh, without any internal structures. This is achieved with the re-mesh modifier. 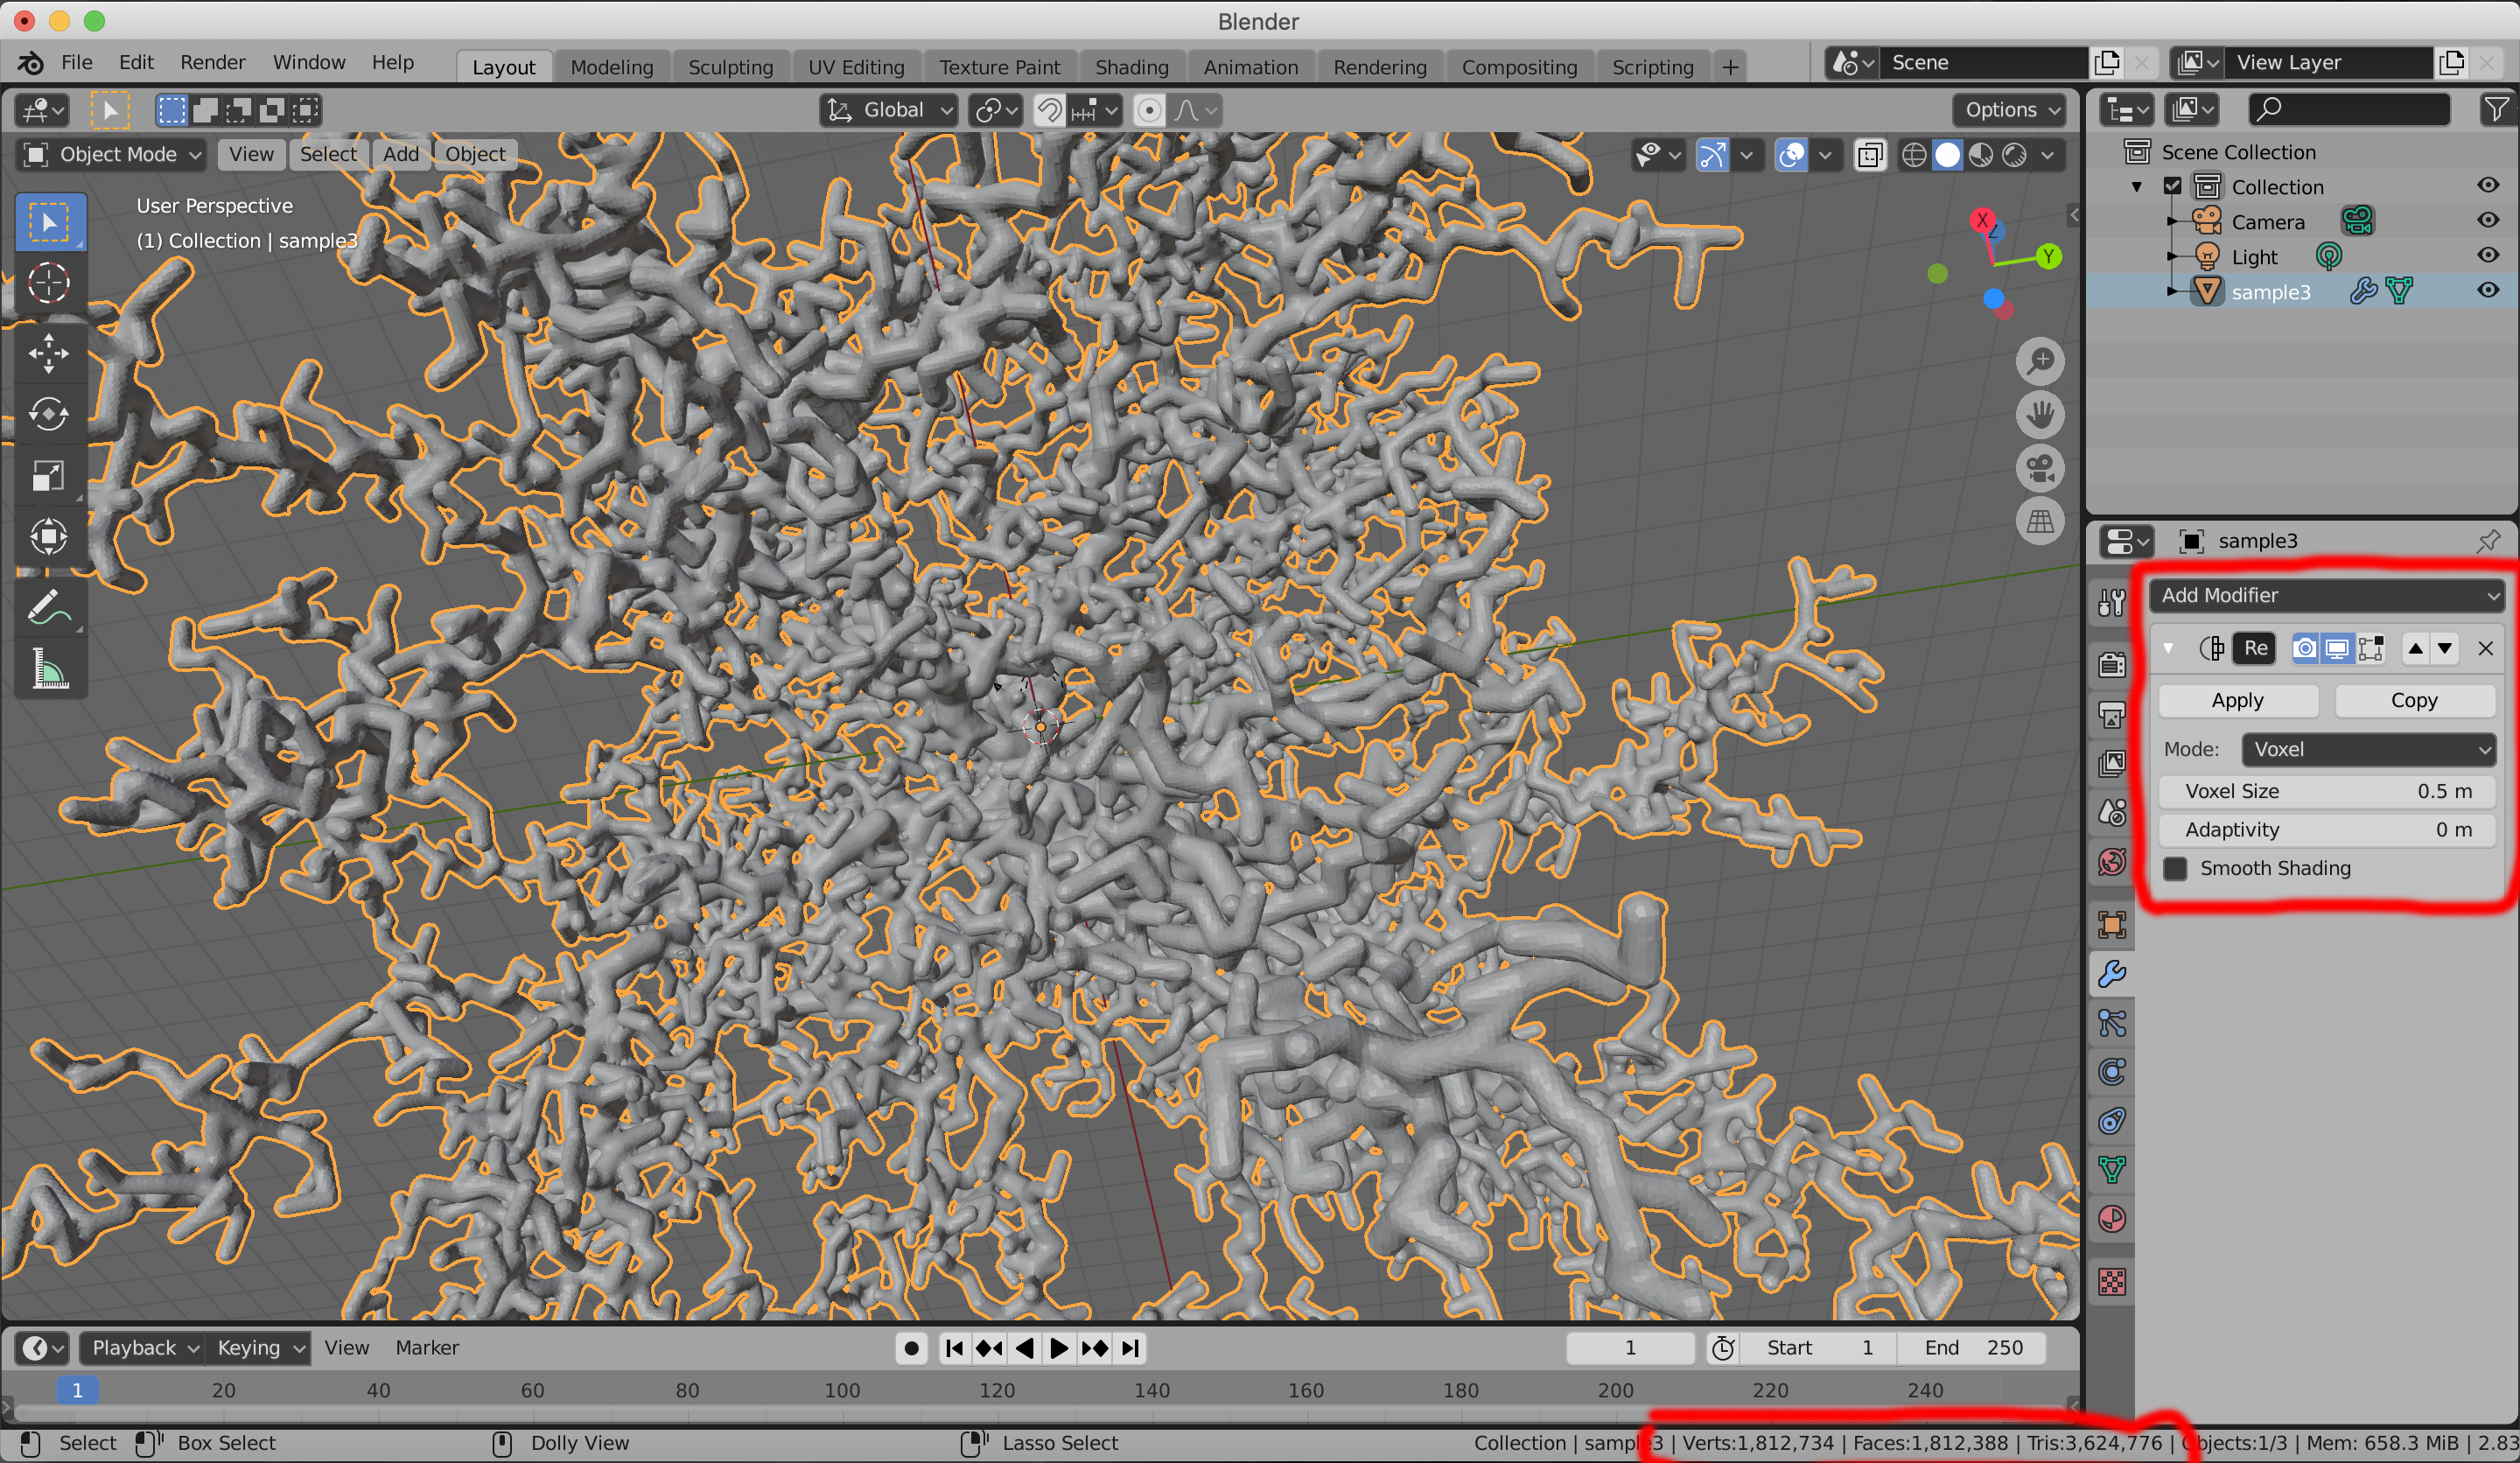
Save the Blender model and optionally save an OBJ file.
If one opens the re-meshed OBJ file in Meshlab one can check that there are no longer any internal structures. If the mesh is considered two coarse, or too fine, it can be adjusted by changing the voxel size parameter in the Blender re-mesh pane. 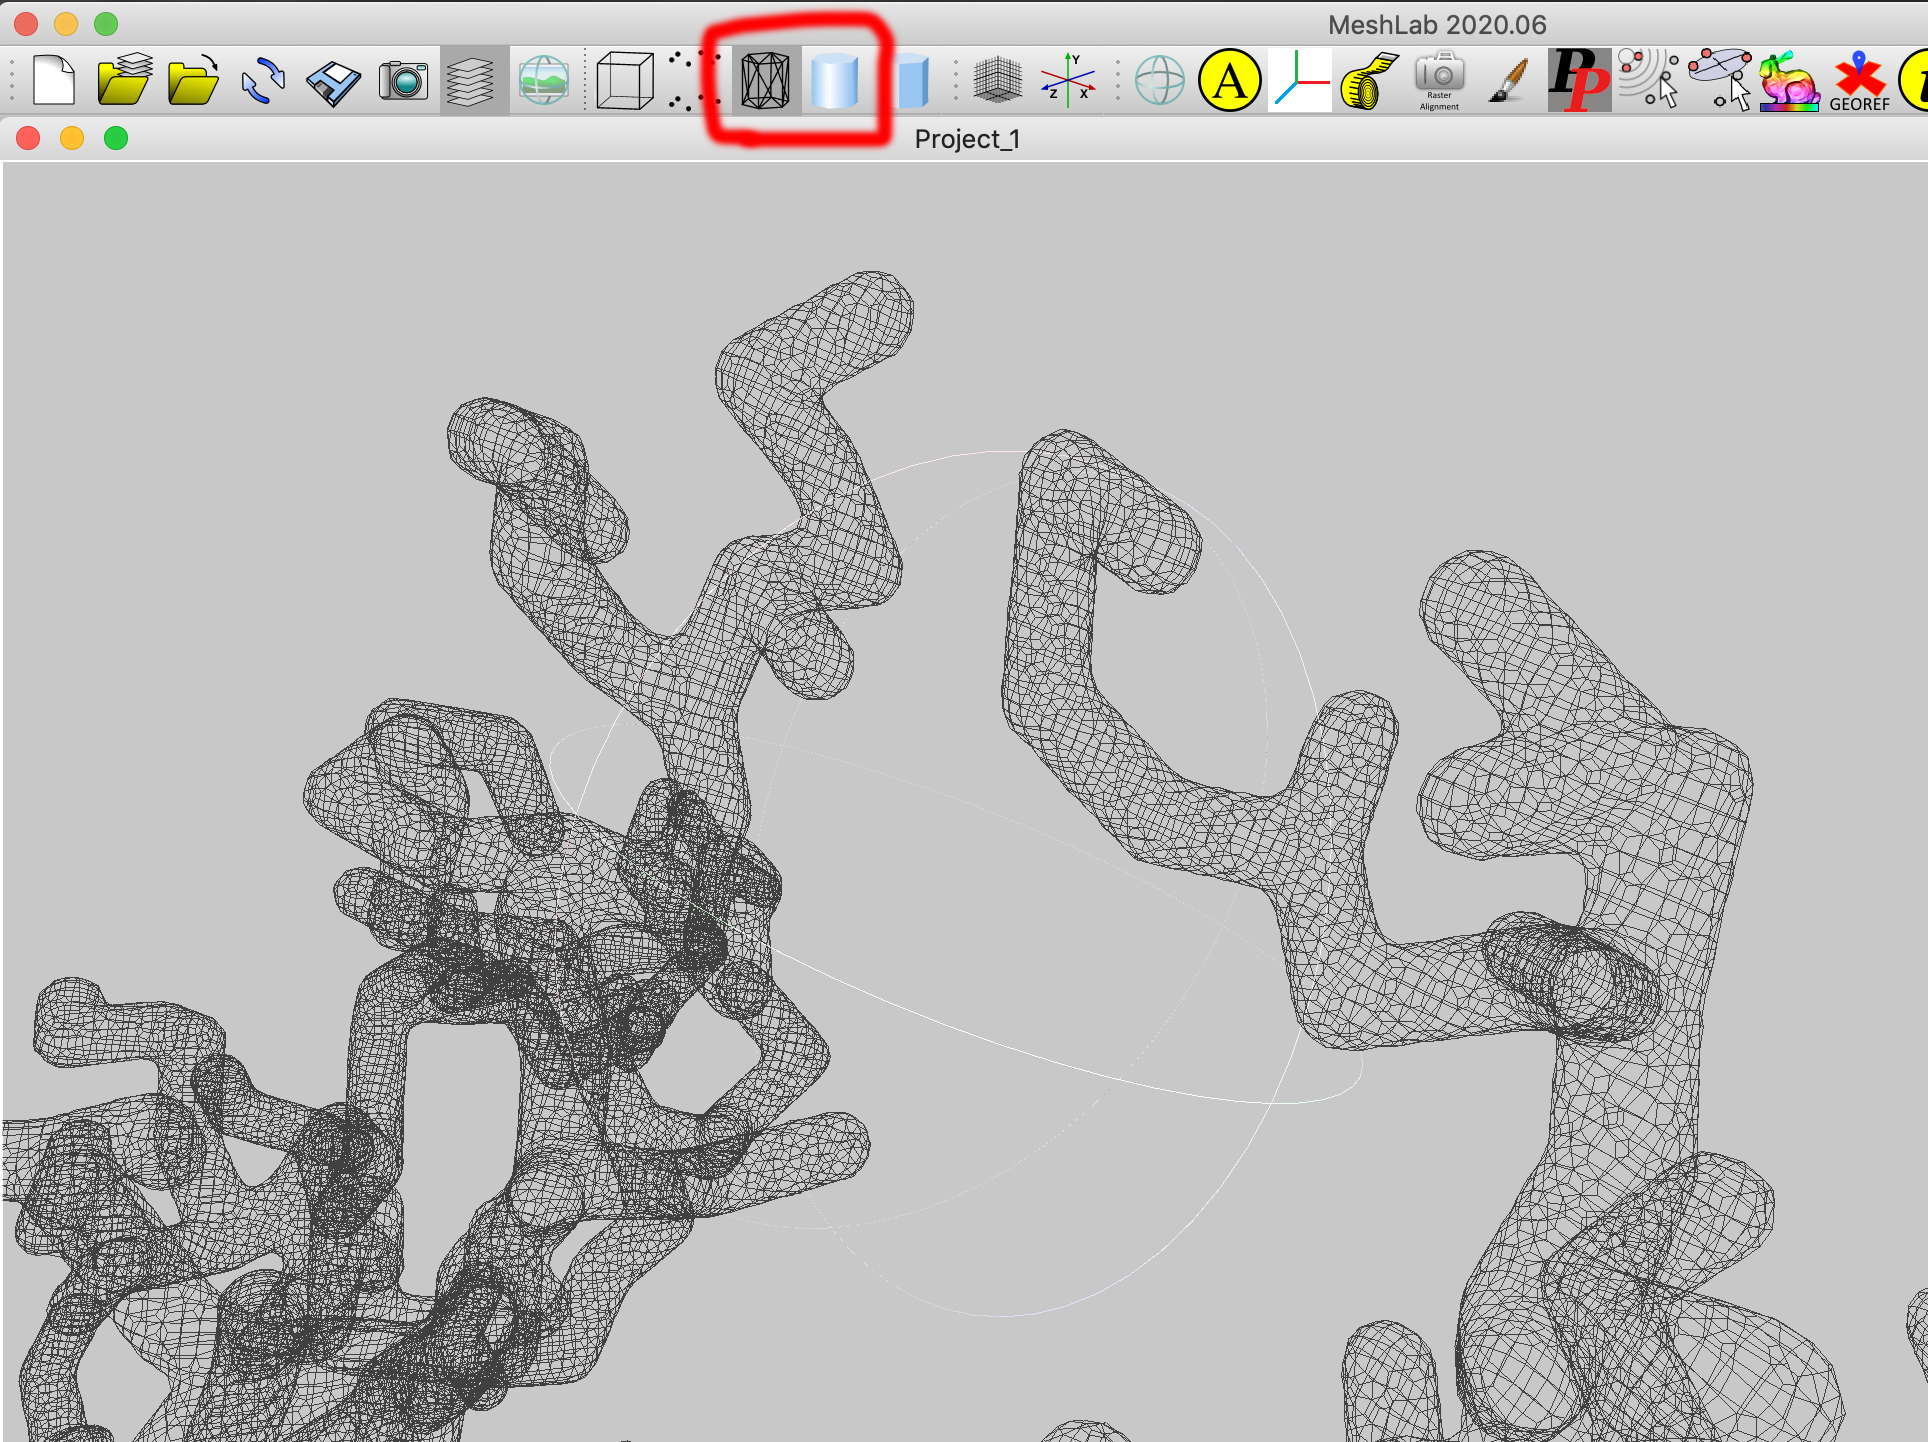
If it is acceptable for the interior of the model to remain solid then the next stage can be skipped. But generally the cost a 3D print is directly proportional to the volume of material used. There are other times when it may be desirable to have a hollow model because something will be inserted into the cavity after printing. This second stage is to "solidify" the mesh, that is, create a surface on either side of the current mesh surface, thus creating an internal cavity. The main Blender solidify controls are the thickness and offset parameter. The offset parameter determines which side of the current mesh the two new skin layers will be created. A value of 1 means the outer layer will be on the exterior of the current mesh surface. A value of -1 means the inner layer will be on the interior of the current mesh surface. A value of -0.5 (or 0.5) means the new mesh layers will be equal distances on either side of the current mesh surface. By zooming in and displaying the mesh in wire frame the effect of changing these can be observed. Note that Blender modifiers are applied to the model dynamically until applied, as such, exporting to OBJ can be slow. But not applying is preferred as one can go back and adjust at will. 
The export from Blender is a mixture of triangle and quad mesh elements, this confuses some software and algorithms that might be applied later. The mesh can be converted to a purely triangular mesh in Meshlab. See Filters menu - Remeshing, Simplification, Reconstruction - Turn into a Pure Triangle mesh. 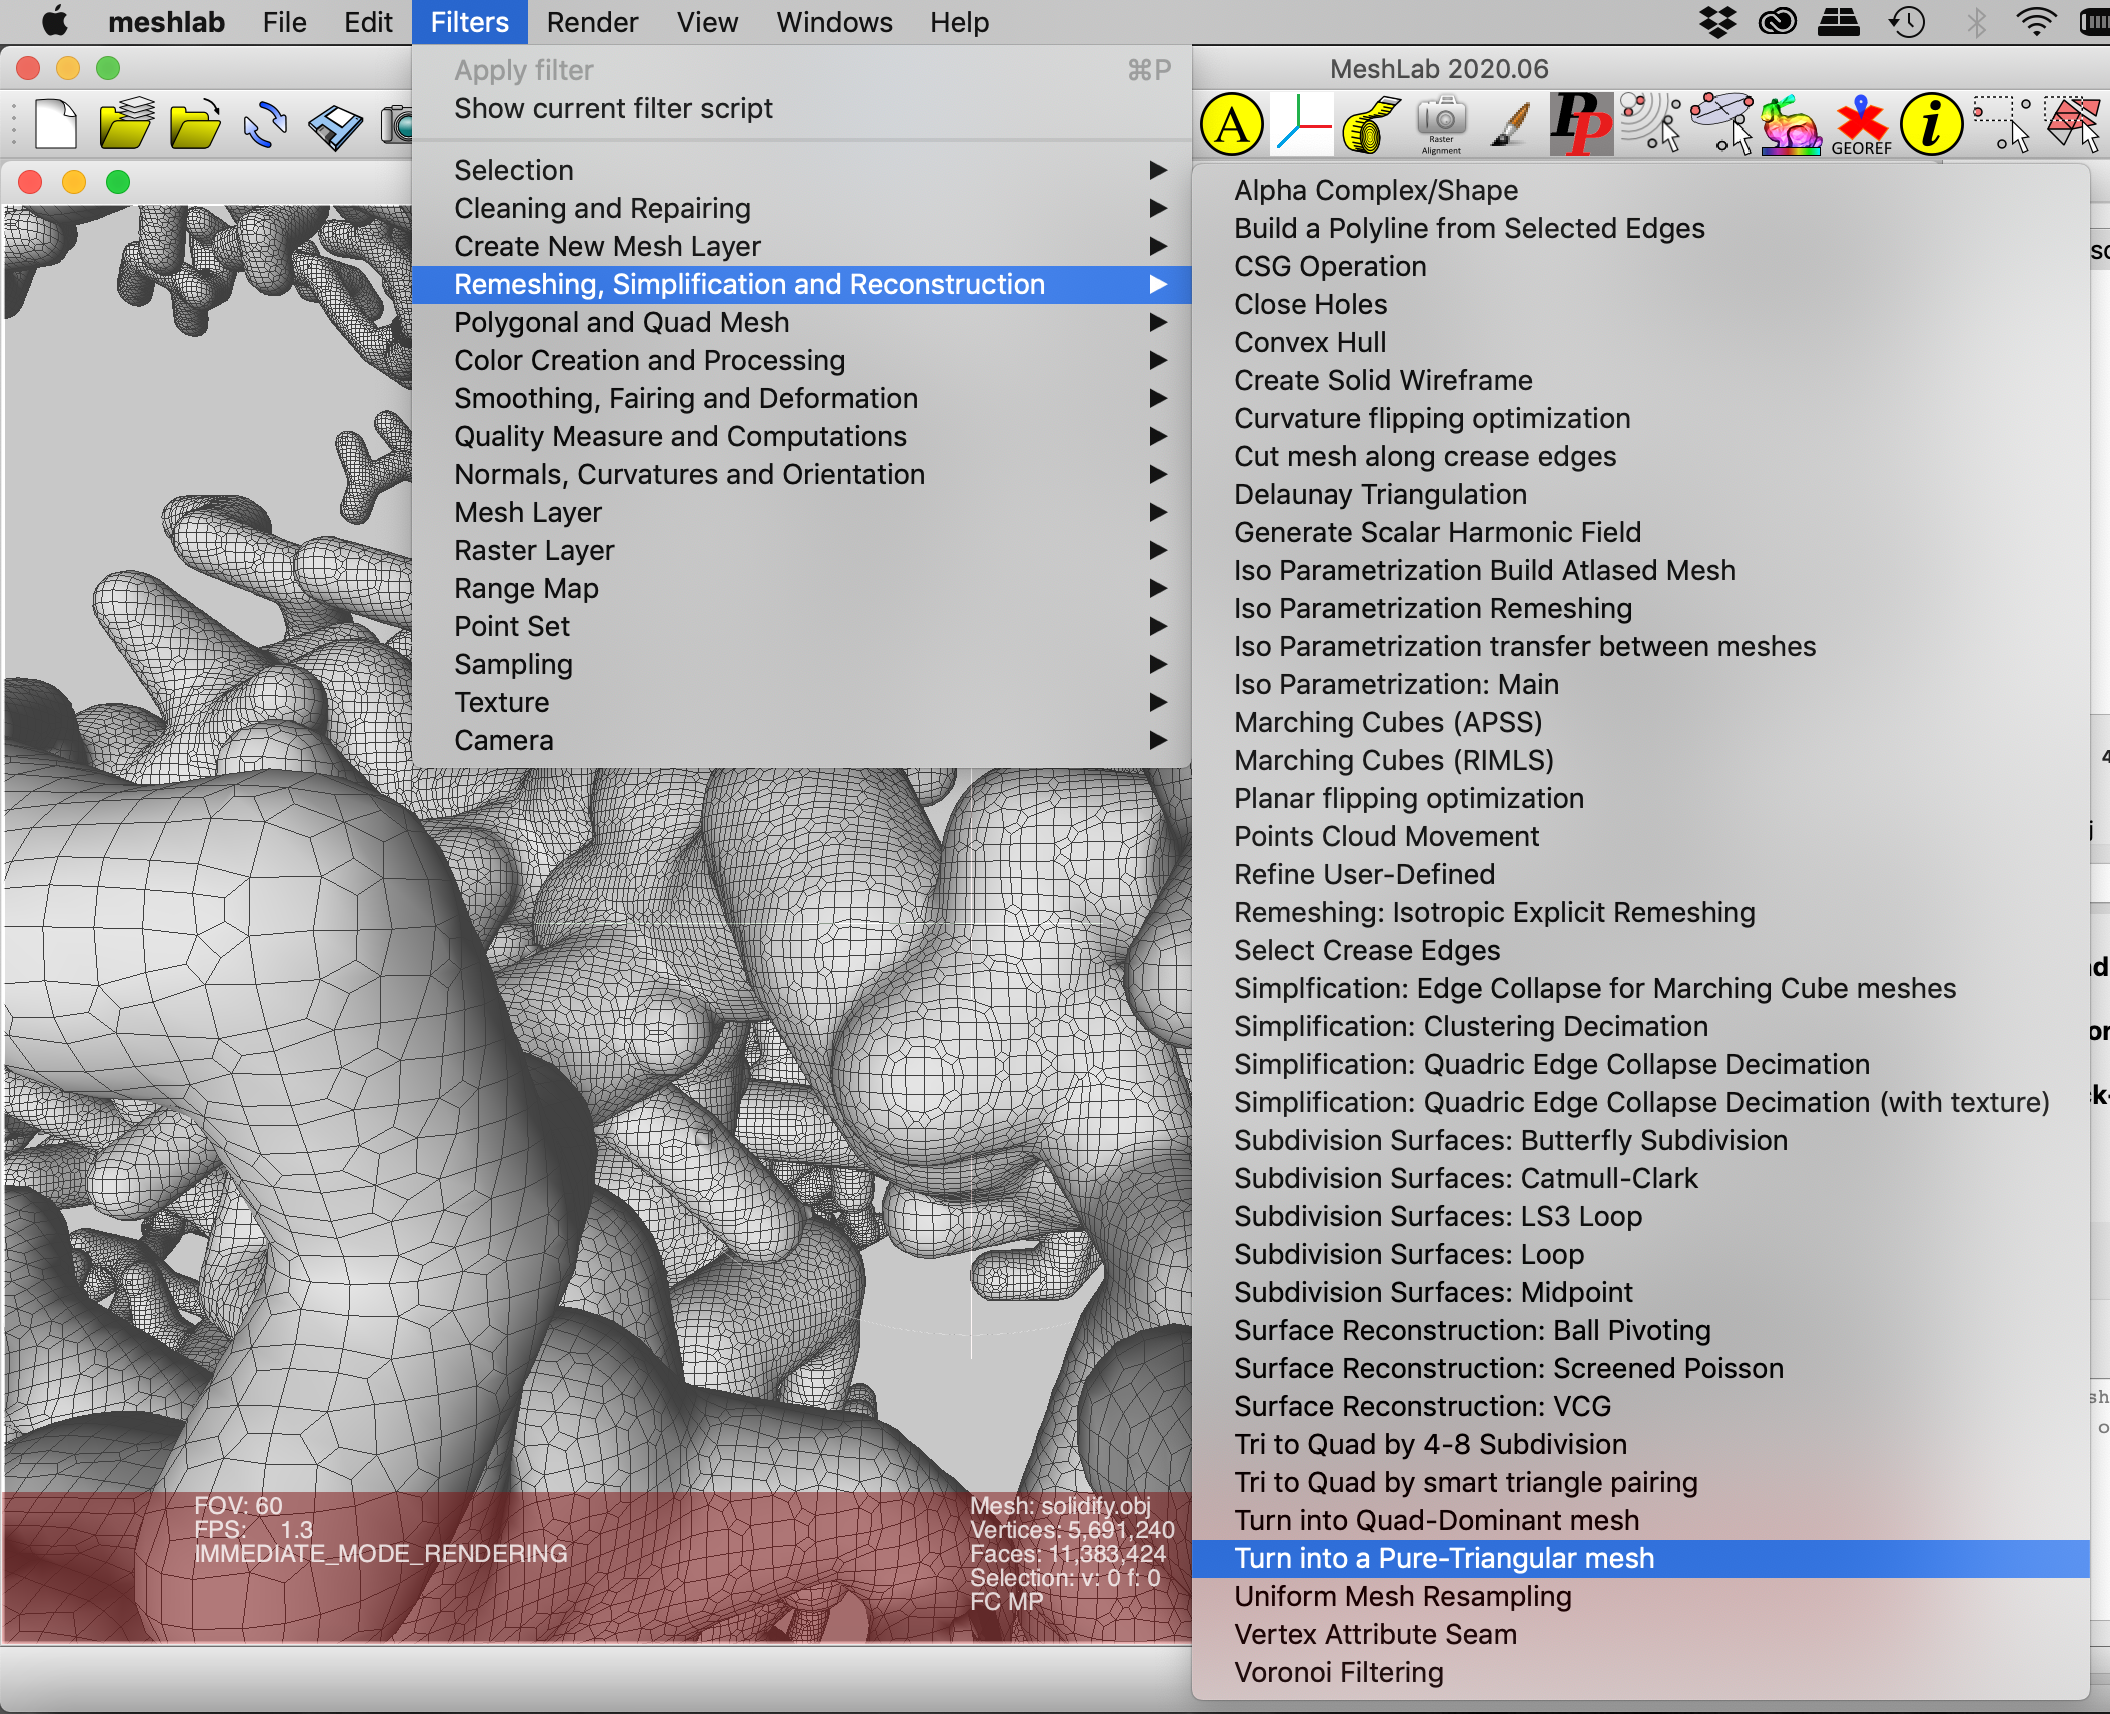
The OBJ file might now be saved, and also STL if that is required for 3D printing. One can also use the measure tool again to check the diameter of the outer and inner tubes, in the example below 3mm and 1mm respectively. 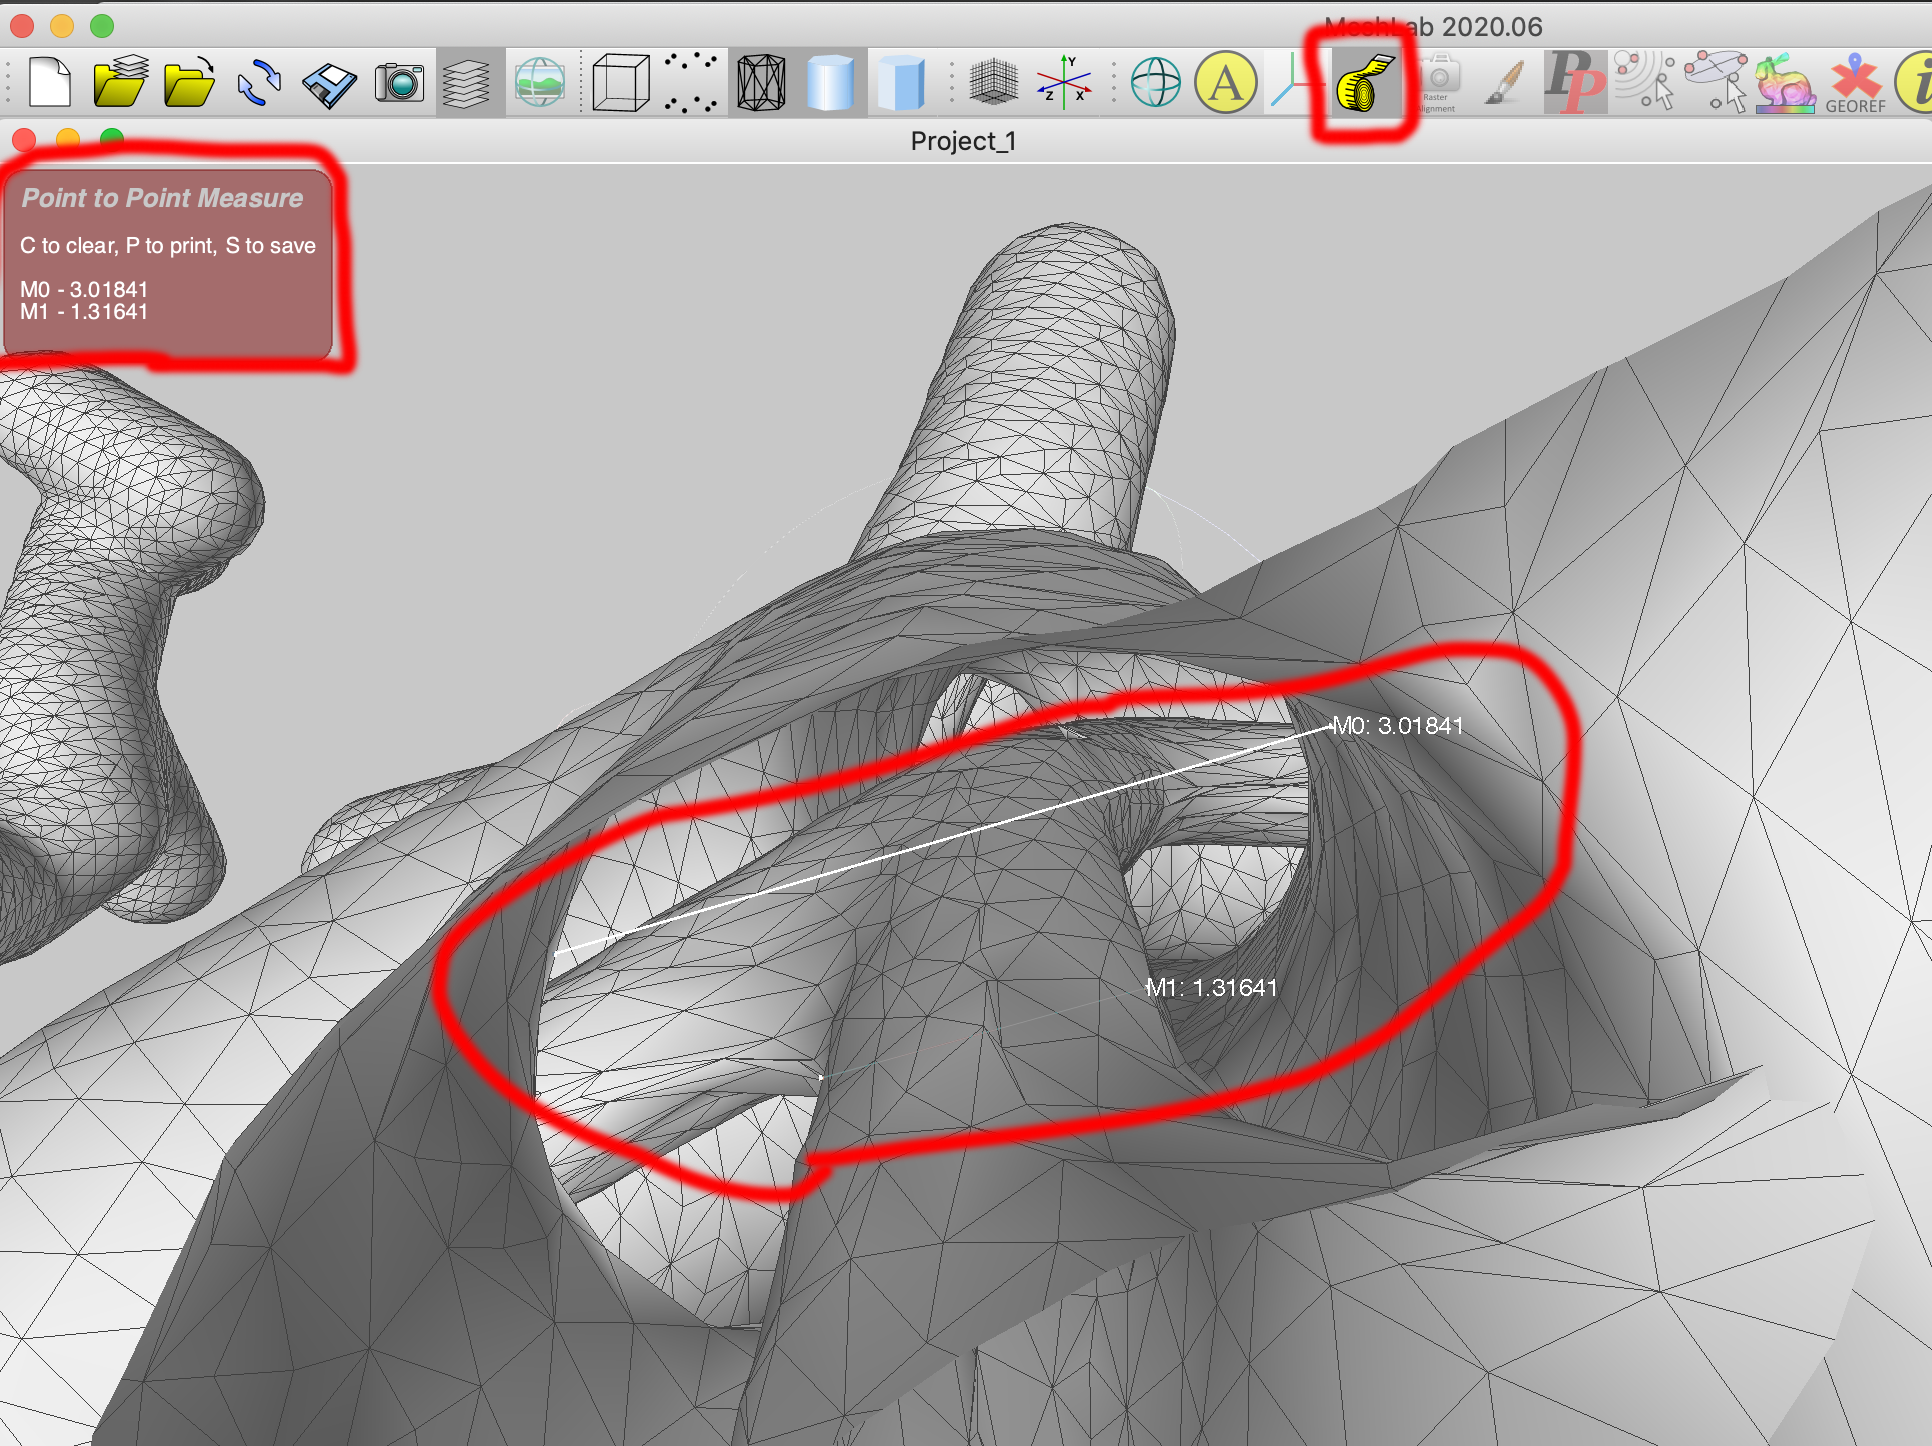
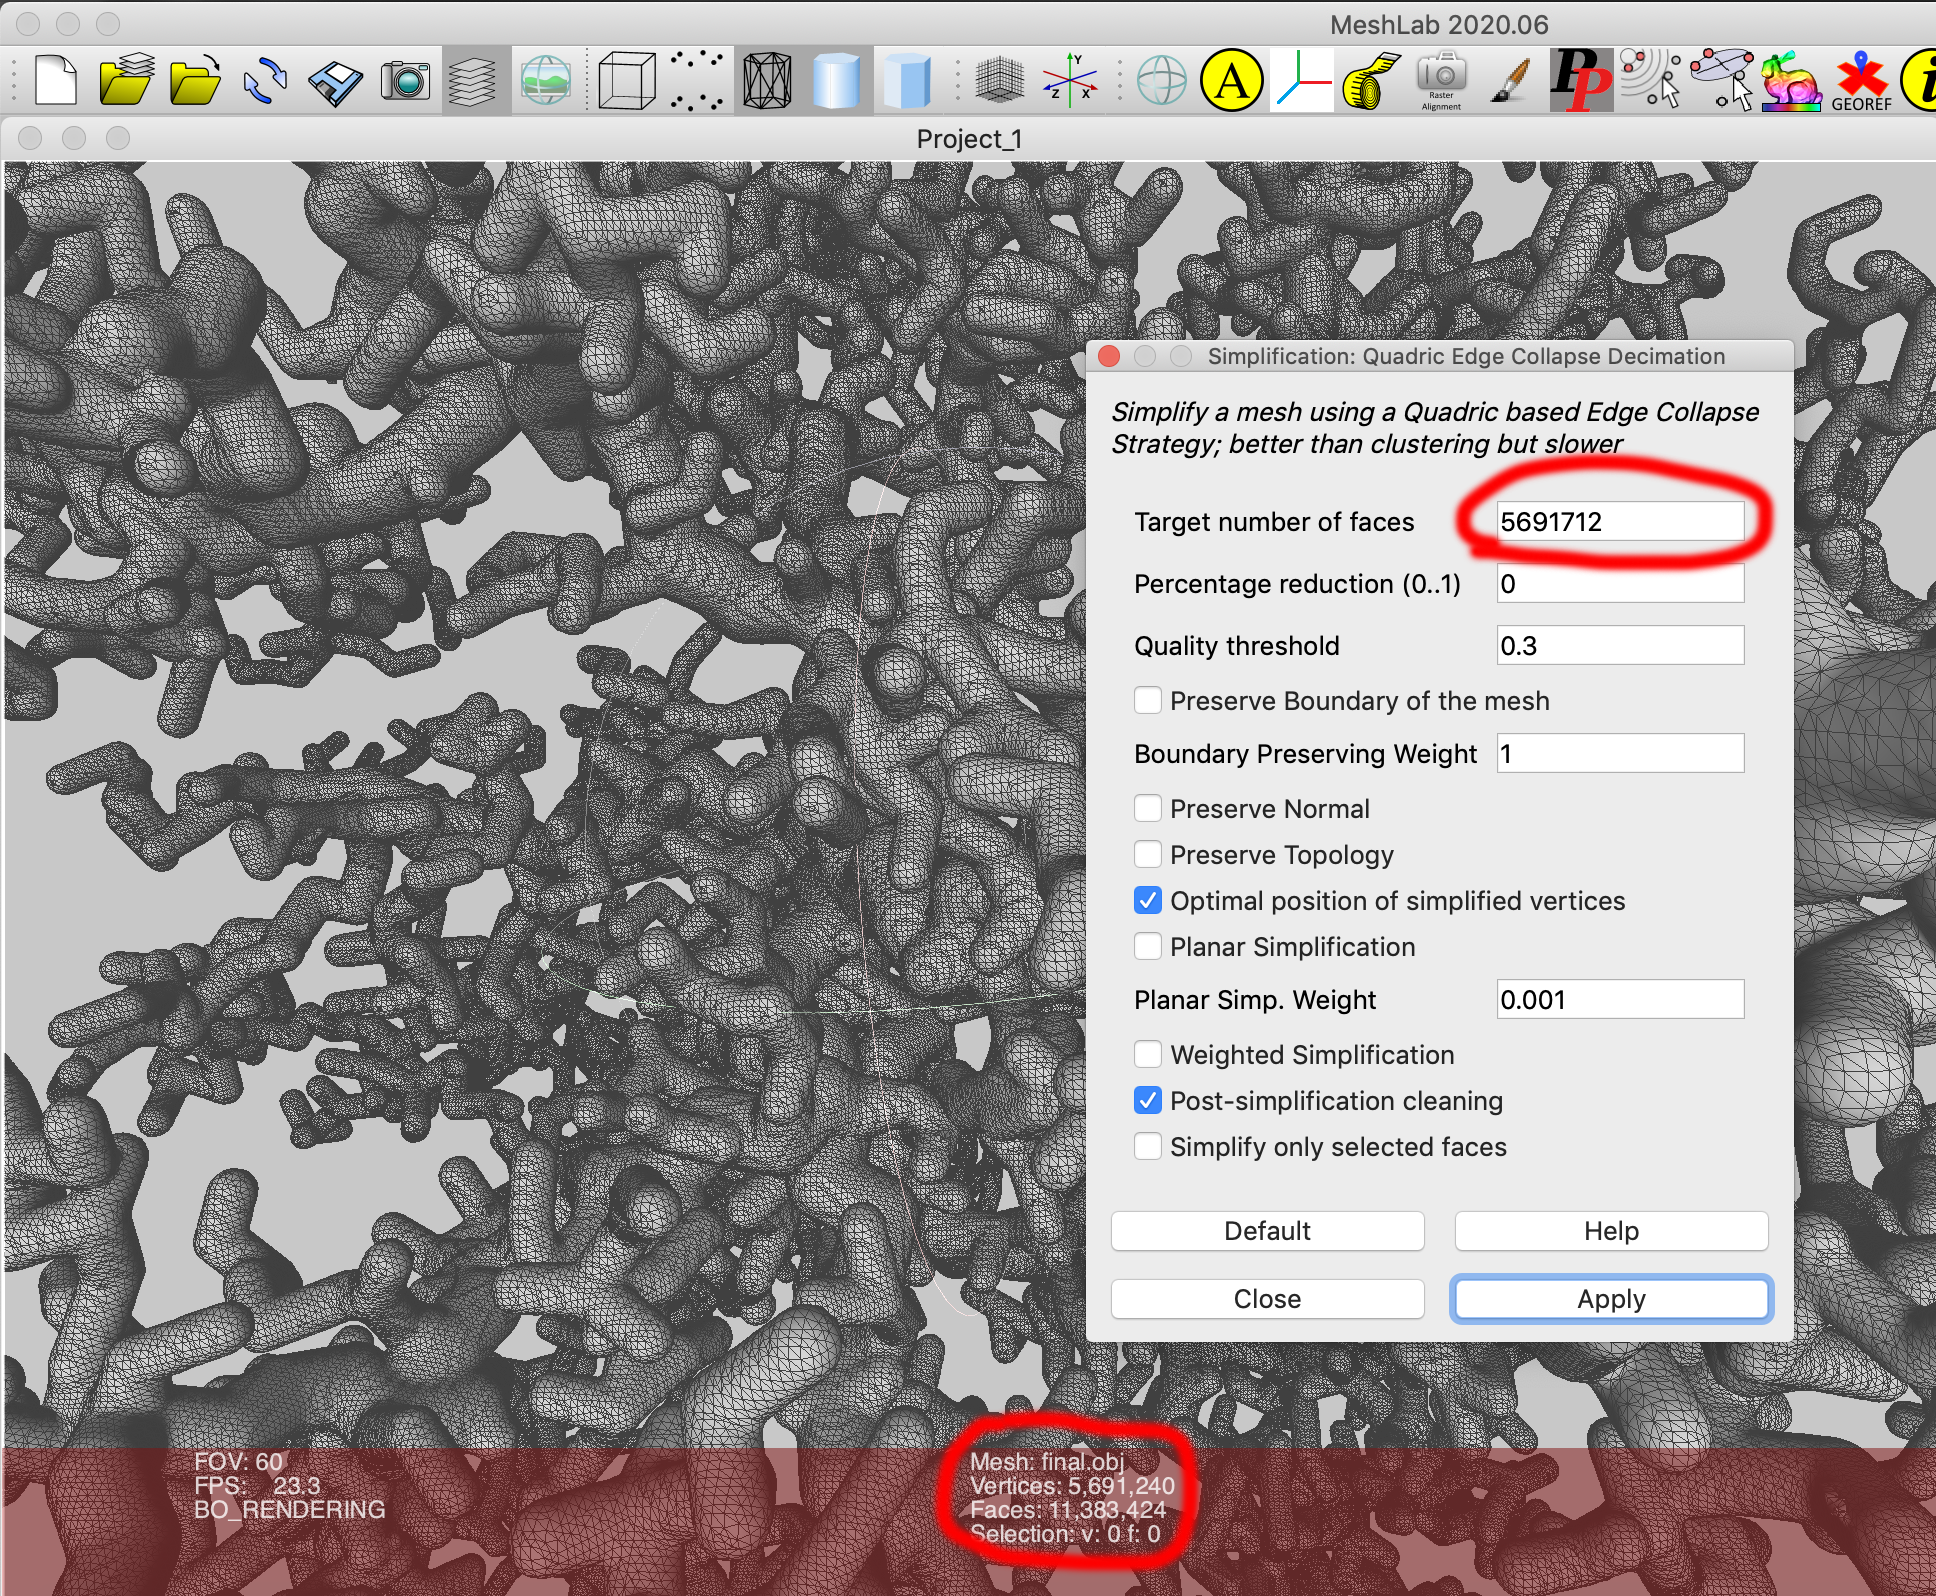
Meshlab is also a convenient place to decimate the mesh to reduce the number of triangles, if required. See Filters menu - Remeshing, Simplification, Reconstruction - Simplification: Quadratic Edge Collapse Decimation. 
Notes
|