VISION-3DUser Manual, Version 1.7Written by Paul Bourke Credits VISION-3D was written by Paul D. Bourke starting in November 1988. It is copyright (c) 1989 by Paul D. Bourke (all rights reserved). The author would like to acknowledge the following: Dr. Mike Linzey for many suggestions and comments, Dr. Robert Meurant for help with the polyhedra coordinates, to the many students at the Architecture School who were the first users and hence debuggers. Congratulations to Apple for building computers people want to use, and to the developers at Symantec for a C development system that makes programming efficient and enjoyable.
Notice All rights reserved. No part of this publication may be reproduced or used in any form by any means, without the prior written permission of the author. The information contained in this publication is believed to be accurate and reliable. However, the author makes no representation or warrantees with respect to the program material described within and specifically disclaims any implied warrantees of merchantability or fitness for any particular purpose. Further the author reserves the right to revise the program material and make changes therein from time to time without obligation to notify the purchaser of the revisions or changes. In no event shall the author be liable for any incidental, indirect, special or consequential damages arising out of the purchaser's use of the program material.
Copyright (c) 1989 Paul D. Bourke
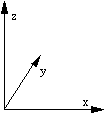
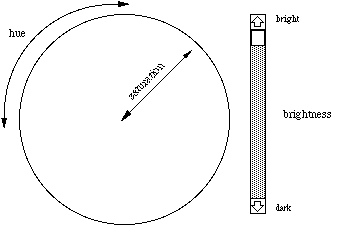
1.0 IntroductionVISION-3D is a 3D model creation, editing, rendering, and partial animation package for the Macintosh family of computers. An attempt has been made to create a productive, low cost, and easy to use 3D modelling package. This manual assumes the reader has used the Macintosh before and understands how to use the mouse, menus, operate dialog boxes, and handle windows. These topics and others relating to the Macintosh operating system and user interface are covered in documentation supplied by Apple. Vision3D is distributed as shareware, this means that you may freely copy and distribute it but if you keep and use it then the shareware should be paid. 1.1 Hardware1.1.1 Minimum hardwareVision3D runs on any Macintosh computer with colour quickdraw installed. There are two versions distributed, one for all machines and the other for machines with a maths coprocessor. If you have a coprocessor then the later version will perform significantly better. For best results Vision3D expects at least some colour capability and preferably 8 bit colour. 1.1.2 CompatibilityVISION-3D has been tested on a vide range of patforms from the Macintosh II through the LC series and onto the Quadra family. It functions with both system 6 and system 7 versions of the operating system. Vision3D will not function correctly fron locked disks. 1.2 SoftwareThe development and testing of VISION-3D has been carried out under System6 and system 7. No problems are expected under future system releases, ie: Apple development guidelines have been followed closely. The compiler used was originally THINK C version 3.0, this version is written using Symantec THINK Object C version 6.0. VISION-3D will run under AppleShare(as well as other networks) but only for a single user, this is due to unique work file requirements. VISION-3D creates its own clipboard and scratch files in the same directory as the application and therefore that directory must not be locked, or in the case of a file server VISION-3D will need read/write/delete/modify access to its directory. One copy of the program can not be used by multiple users on a network because the names of the above mentioned work files are unique. The input and output file formats have been tested for compatibility as far as possible. Macintosh PICT output has been tested with a wide selection of Macintosh applications which support version II of PICT (Version II which provides colour support). In the case of a system crash due to bugs in this application or other causes a file called VISION_SCRATCH will be left on the disk (if UNDO is turned on) in the same directory as the application. This file may be renamed and opened from VISION-3D and will contain the model one undo before the crash occured. (Note: this will only work if the scratch file is renamed before running the VISION-3D application again) 1.3 Coordinate system1.3.1 Cartesian coordinates
1.3.2 Polar coordinates
1.4 Colour
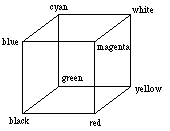
cyan = white - red magenta = white - green yellow = white - blue Greyslie on the diagonal of the colour cube from black to white, the three RGB components are equal, red = green = blue. Some commonly used colours and their RGB values are listed below.
The number of colours available depends on the video cardand monitor currently being used as well as the settings under the monitor control device listed under the control panel. In a 4 bit system it is possible to have 16 colours on the screen at a time. Since this does not provide many shades, the shading capabilities of VISION-3D are not enabled for 4 bit colour. The next step is usually 8 bit colour which lets 256 colours be present at once. This is just adequate for simple shading. Shading will work best when using RGB or greys. With 256 colours the system defines the colours it will use, when software attempts to draw in a particular RGB colour the nearest colour from those allocated is chosen. It is possible for software to request an exact colour but for generality VISION-3D does not do this. There is an option in the preferences which enables a 2x2 pixel pattern for shading. This is of main interest for those interested in improving shading on 8 bit colour systems, the number of apparent shades increases to over 2000. Full colour systems have 24 or 32 bit colour generally allowing about 17 million colours to be displayed simultaneously. These may be used for very sophisticated colouring and shading. In these colour systems the exact colour is always supplied. 1.5 Screen layoutThe window layout is illustrated below.
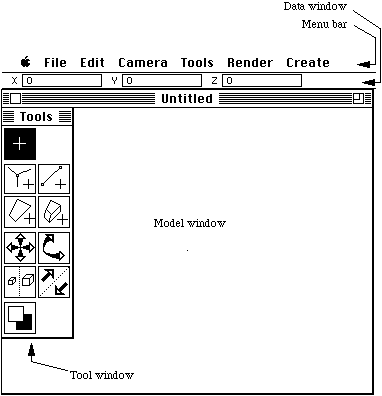
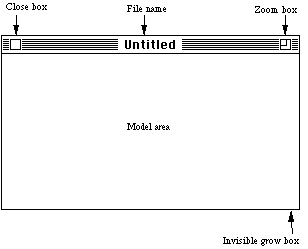
1.6 Model windowThe model window is where the current model is viewed. It initially fills the whole screen excluding the menu bar, tool and data windows. It may be placed on a secondary monitor or span across monitors if multiple monitors are available. Although it does not have a visible grow boxit may be resized by click-dragging from the bottom right hand corner (as if a grow box was there). Resizing with the shift key will result in square windows with sizes 64x64, 128x128, 256x256, 384x384, or 512x512 whichever is the closest. The zoomrectangle, box in the top right will zoom from a resized window to the full screen window and back again. There may only be one model window open at a time, therefore the close box in the top left closes the window and quits from the VISION-3D program.
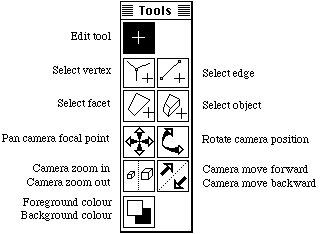
1.7 Tool windowThe tool window always appears on the far left of the screen and has the following appearance..
1.8 Data windowThe data window appears just below the menu bar and has the following appearance.


1.9 Extensions to the Macintosh interfaceThe CANCEL button on any dialog box related to VISION-3D can be activated by clover-. (period), ie: holding down the key and typing a period. In general clover-. will stop any long operations (for example: a redraw of a complex model) and return control to the user. Some dialog control items such as check and radio boxes provide audio feedback when selected. The cursor changes over items in inside dialog boxes depending on the particular item. For example the cursor changes to an edit cursor over text items, to a finger pointer over buttons. 2.0 Model creationA model in VISION-3D is made up of two fundamental building blocks, edges and plane faces(facets). Edges are lines joining two points in space, facets are made of three or four edges. Edges and facets can also be combined together into objects, which then can be treated as one entity. Three methods are provided for model creation, they are coordinate entry, standard building blocks, and form generators. On top of this it is also possible to import3D models created from other software given that the appropriate file formats can be generated. 2.1 Coordinate entryFor precise model creation it is possible to create an object made from edges entered in coordinate form. This is the most general method of creating arbitrary but precisely known forms. For speed it is preferable to be in wireframe rendering mode, see later, when creating or editing a model. For all coordinate entry creation it is necessary to select the editing tool from the tool window, this is the top tool shaped as a plus sign (+). 2.1.1 Keyboard controlCoordinates may be specified either as an absolute coordinate or as an offset from the current editing position, indicated by a flashing cursor. The following table illustrates the keyboard coordinate entry commands. Each command is following by a number, the coordinate display reflects the current coordinate status.
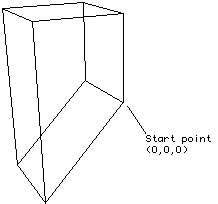
As soon as one of the key commands is used the relevant coordinate box becomes boldface. A number is then typed made up of the following an optional sign + or - digits from 0 to 9 an optional decimal place digits from 0 to 9 The backspacekey will reset the coordinate to 0. After a coordinate is entered, hitting the return key will move the editing cursor to that location, shift-return will draw a line segment (create an edge) from the previous editing position to the new coordinate. 2.1.2 Mouse controlIf the two points already exist (as the end points of edges) then clicking on the first point in editing mode will move the editing cursor to that point. Shift-clicking on a second point will draw a line segment (create an edge) between these two points. 2.1.3 Example
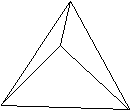
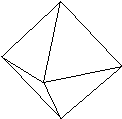
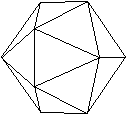
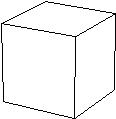
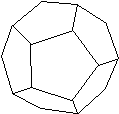
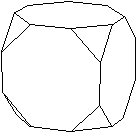
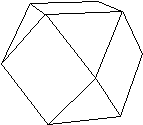
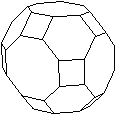
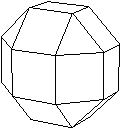
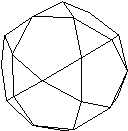
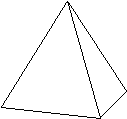
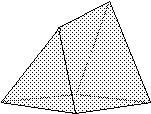
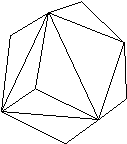
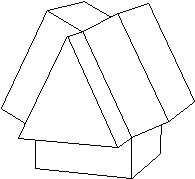
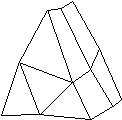
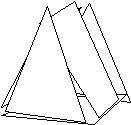
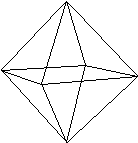
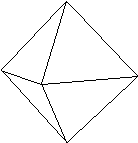
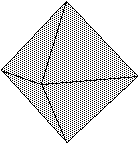
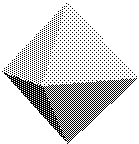
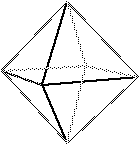
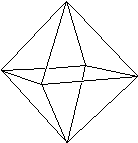
2.2 Standard building blocks2.2.1 PolyhedraA comprehensive collection of polyhedra are predefined for rapid and precise creation. These include the five platonic solids, the tetrahedron, octahedron, cube, icosahedron, and the dodecahedron. They may be made either as consisting entirely of edges or as a collection of facets. All the polyhedra are defined as unit size and positioned at the origin. The user is prompted for the final dimensions, position and orientation. Icons attempting to represent each polyhedra are shown besides each menu item. Each form is created as a single object, ie: all the edges and/or facets are grouped together. The polyhedra are:
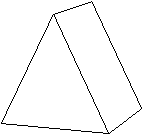
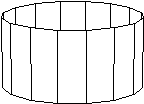
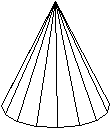
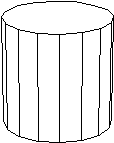
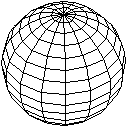
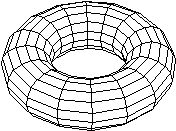
2.2.2 Other building blocksOther fundamental building blocks of common geometric forms are provided for rapid and precise generation. All the building blocks are defined in a unit cube and positioned at the origin. The user is prompted for the final dimensions, position and orientation. Depending on the exact form there may be other attributes the user may alter. For example the number of ribs can be adjusted for all the circular objects, the more ribs the closer the object will come to the ideal. Icons attempting to represent the form a shown besides the menu items. Each form is created as a single object, ie: all the edges and/or facets are grouped together. The other standard building blocks are:
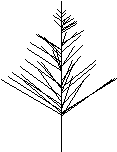
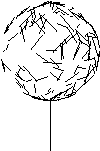
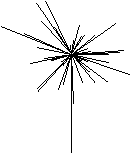
2.2.3 Plant building blocksThis menu contains a mixture of randomly generated plants and some predefined deterministic plants. All the plants are defined in a unit cube and positioned at the origin. The user is prompted for the final dimensions, position and orientation. Depending on the choice of plant there may be other attributes the user may alter. Each plant is created as a single object, ie: all the edges and/or facets are grouped together. The plants are:
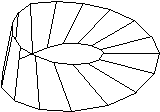
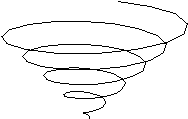
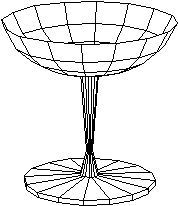
2.3 Model Generators.2.3.1 Lathe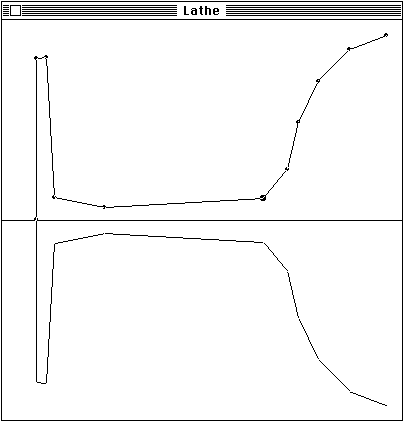
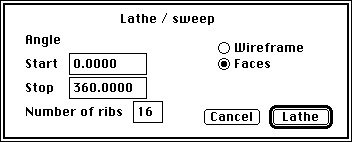
Simple line drawings from other Macintosh programs may be pasted into the lathe window. The lathe window may be placed on a secondary monitor it one is available. See also later on sweeps which are model space rotations of a selection of edges. 2.3.2 Extruder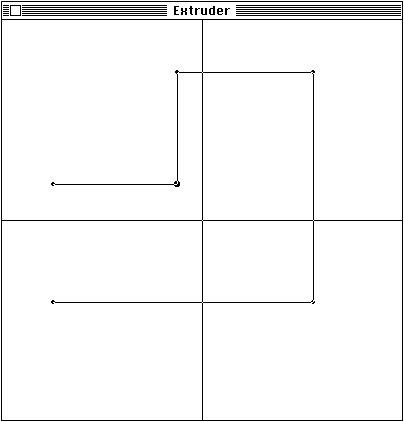
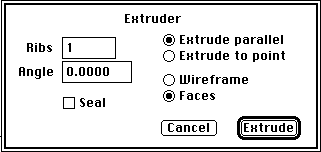
The outline is formed in a unit cube, positioned at the origin, the extruder plane aligned on the x-y plane plane (extrusion in the z direction), at creation time the user is prompted for the real size, position and orientation. As points are dragged about the window the coordinates are displayed in the data window. A new point may be added in the middle of the outline by option-dragging from any existing point. The outline of the extruder may be saved for later recall and editing, the file menu items change when the extruder window is active. Simple line drawings from other Macintosh programs may be pasted into the extrude window. The extruder window may be placed on a secondary monitor it one is available. 2.3.3 3D Text
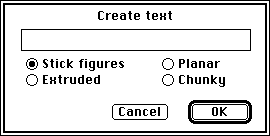
2.3.4 SurfaceA surface defined over a grid may be generated by letting the vertical dependence be some function of two variables, x and y.
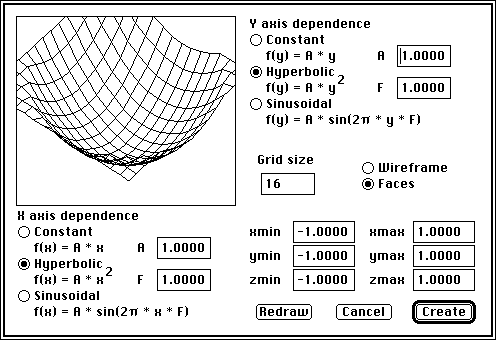
Three functions are currently provided, all three can be used to control the x or y dependence. Each function has one or two parameters which govern the exact form of the surface. The functions are Linear, A determines the slope f(u) = A u Hyperbolic, A determines the curvature f(u) = A u2 Periodic, A is the amplitude, 1/F is the number of cycles f(u) = A sin(2 [pi] u F) Some example surfaces are listed below.
3.0 Editing3.1 Selection toolsThere are four tools beneath the editing tool in the tool window, each one is used to select a different type of item (objects, facets, edges, and vertices). Select the tool for the item type to be manipulated, move the cursor to the model window and click on or near a particular item. The item selected is always that nearest to the camera. If the mouse is clicked on no item then click dragging will form a bounding rectangle, all items enclosed in that rectangle are selected. Holding the shift key down for either of the above selections will add new items to the selection list or if an item is already selected remove it from the list. There is generally a two pixel tolerance on selecting an item, it may be necessary to zoom in if the item to select is closely surrounded by other items. An implication of the front to back selection order is that facets behind other facets cannot be selected. the camera must be moved so that the facet to be selected is in front of all others.
3.2 Shifting itemsIf any item is selected it may be shifted in three ways. The first method is to shift by a known amount by using the coordinate entry facility. The item is selected, a coordinate is entered (either absolute or relative), return will shift the item to the new position. The second method is to option-drag with the mouse, this is only suitable for relatively rough shifting operations although the current position (its centroid for composite items) is displayed in the coordinate boxes in the data window. Note, the item is shifted in the plane perpendicular to the camera direction, it is common to align the camera on one of the coordinate axes (front, back, top, bottom, left, right) before manually shifting. Thirdly, the shift menu item will prompt for either an absolute or relative shift for the current selection.
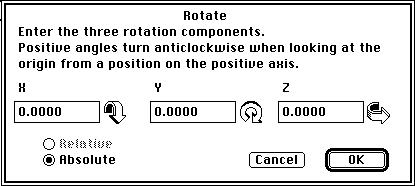
3.3 ScalingSelected item may be scaled along any of the three coordinate axes. The scaling menu item will prompt for either an absolute or relative scale factor. The scaling is about the centroid of the selection and is usually applied to single objects. 3.4 RotatingSelected item may be rotated about any of the three coordinate axes. A positive rotation is defined as anticlockwise when looking towards the origin from the respective positive axis. The rotate menu item will prompt for the relative rotation amount. The rotation is about the centroid of the selection.
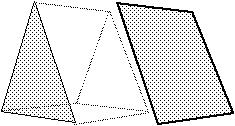
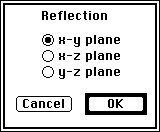
3.5 Reflection
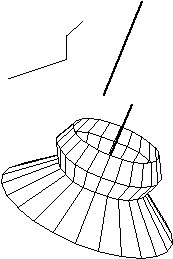
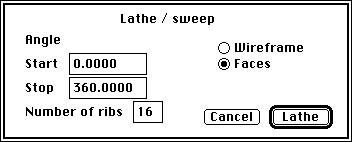
3.6 Surface reflectivityThe shading algorithm requires various reflection coefficients. At the moment only the diffuse reflection coefficient is implemented, the other coefficients (specular reflectivity and gloss factor) are only necessary for specular reflection. The reflection coefficient ranges from 0 to 1. 0 means the object does not reflect any light (absorbs all light) and hence cannot be seen (a black hole). 1 means that it reflect all light and will appear white (since VISION-3D only supports white light sources) 3.7 Surface colourWhen an item is created it is automatically assigned the current foreground colour as shown in the tool window. To change the foreground colour click on the foreground colour tool which results in a popup menu bar. A list of predefined colours will be displayed in the menu for selection. On systems with only a few colours, for example in 1,2,4 bit systems, all the available colours are shown. In 8 or greater colour systems 16 prefined colours are shown along with an "OTHER" item which will prompt for a colour with the colour wheel. 3.8 SweepSweep provides lathe capabilities directly in the model space. The definition of a sweep requires the user to select the edges to be rotated and the axis of rotation. Using the edge selection tool a number of edges are selected, they will all be swept except for the last edge which is the axis of rotation.
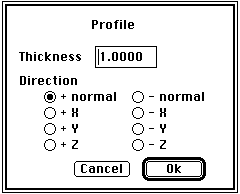
3.9 Profile
3.10 Group/ungroupGrouping takes the current selection whether it consists of edges, facets, or objects and combines them into a single object. An object is identified by a single object ID. The items in an object will be treated as a single item for shifting purposes, colouring, etc. An object may be split into its constituent parts by ungrouping, effectively each item becomes a group on its own. 3.11 Make face/unmake faceMake face attempts to combine the currently selected edges or vertices into a single facet. The edges or vertices must be selected in either a clockwise or anticlockwise order (although this is only important when selecting 4 or more). In the following example the selection must be made in one of the following ways
 or
not as
or
3.12 SplittingA number of methods can be used to splitedges or faces into parts. An icon besides each menu item attempts to illustrate each splitting method. These include: 1) split first selected edge by the second selected edge. Note: this is the intersection as seen by the camera, the projection of the edges onto a plane perpendicular to the camera direction. Therefore the edges may not necessarily intersect in 3D space. If they do intersect then the camera view is irrelevant. The first edge must be a lone edge, ie: not connected to a face, the second edge may be any edge (it may be part of a face). This is a useful construction tool when the exact intersection between edges is not known, the edge can be drawn overshooting the intersecting edge, split and the overshoot deleted. 2) split the first selected face by the plane defined by the second selected face. This is useful when two objects intersect, their facets may be split and the unnecessary parts removed.
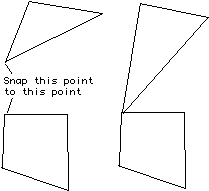
3.13 Alignment3.13.1 Point snap
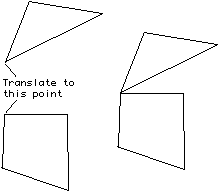
3.13.2 Translate snap
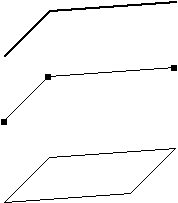
3.14 Miscellaneous3.14.1 Reverse facet orderThis reverses the internal order the edges and hence vertices appear in the description of a facet. A few operations depend on the direction of the normal of a plane face, for example, specular reflection and exploding. The direction of the normal depends on the order of the vertices. 3.14.2 Remove duplicate items.It is not uncommon when creating large models to occasionally create duplicate edges or facets. This will search though the whole data base and automatically remove any duplicate items. This operation may take a considerable amount of time to complete. 3.14.3 KaleidoscopeRandomly colours edges and facets contained in the current selection. 3.14.4 Complete parallelogram
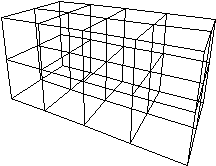
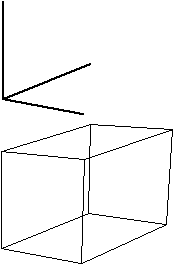
3.14.5 Complete parallelpiped
3.15 Distortion effects
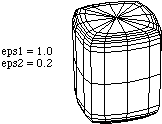
3.15.1 Quantize
3.15.2 SpikeThe centroid of each face is used to split the face into further 3 point facets, the centroid is then pulled out perpendicular (along the facet normal) to the original facet by a user defined amount.3.15.3 Knobble
3.15.4 Thicken
3.15.5 Crumple
3.15.6 Shatter
3.15.7 Explode
3.15.8 Shear
3.15.9 Inflate
4.0 Camera4.1 CameraThe position and direction of the camera dictates what is "seen" on the view plane located a specified distance in front of the camera. The camera attributes consist of its position, the point it is focused upon and its zoom setting. Complete camera control is provided by the camera menu item and associated dialog box. Double clicking on the focus or camera rotate tools also displays the camera control dialog.
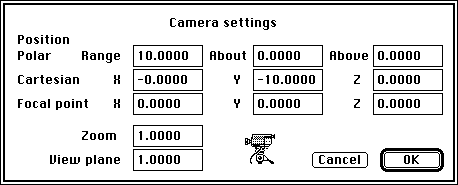
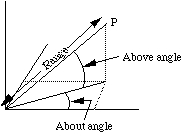
4.1.1 Camera positionp> Keyboard control of the about and above polar coordinates of the camera is with the arrow keys. The left and right pointing keys increase or decrease the about angle, the up and down pointing arrows control the above angle. The angular change is specified with the preferences, usually between 5 and 20 degrees is useful. The above angle is restricted to the range [-90,90], from directly below to directly above.There is also a tool in the tool window for changing the camera viewing angle. Choose this tool, move the hand cursor to the model window, click and drag. A small pyramid will be displayed in the center of the screen and will rotate as the mouse is dragged left/right and up/down, this indicates the resulting camera viewing angle when the mouse button is released. The above and about angles are displayed in the data window message area. Holding down the shift key while dragging will restrict the angles to 45 degree increments.
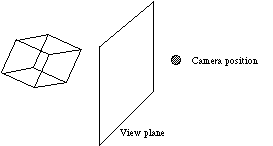
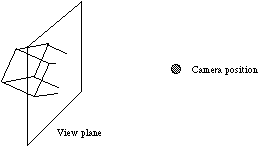
4.1.2 Camera focal pointThe camera is always pointing towards the focal point which is always located at the center of the screen. The focal point may be chosen in a number of ways. If a selection has been made, choosing the focus menu will focus on the midpoint of the selection. If no selection is made the focus becomes the centroid of the whole model, this is useful if the user has "lost" the model in space. If the editing tool is active the focal point is moved to the current editing point. There is a focus tool in the tool window which gives mouse dragging control over the focal point. The cross hairs indicate the new focal point, the screen boundary gives an idea of the resulting view position. The focal point coordinates are displayed in the coordinate display in the data window as the focal point is dragged along the viewing plane. The arrow keys can also shift the focal point by holding down the option key. For example holding down the option key and hitting the left arrow will shift the focal point approximately half a screen width to the left, similarly with the up, right , and down arrows. (Page up and page down keys also shift the focal point up and down but by a whole screen height) To work in detail on some part of the model it is usual to select an item in the region to be edited, focus on it and zoom into that selection to the appropriate degree. 4.1.3 Moving the camera forwardThe camera (and focal point) can be moved forward by using the w (move in the direction of the focal point) and s (move in the opposite direction of the focal point. 4.1.4 Camera zoomIt is also possible to apply a zoomto the camera effectively linearly scaling the view of the model. Keyboard control of the zoom is with the w (zoom in) and the s (zoom out) keys. The amount of zoom is specified in the preferences, usually a factor of 1.5 to 2.0 is most useful. There is also a zoom tool on the tool window which functions equivalently, the left hand side zooms out, the right hand side zooms in. It is not recommended that the zoom become very large or small except for detailed editing. To fit the model in the model window set the camera to an appropriate distance from the model. 4.1.5 Camera rangeKeyboard control of the camera range is using the t (decrease range) and g (increase range) keys. The amount by which the range is increased or decreased is specified in the preferences. Note: using polar coordinates the range should always be kept positive and cannot be zero. 4.1.6 View plane distanceThe position of the viewplane is measured from the camera position and it is always perpendicular to the direction the camera points. All items in the model will be clipped to this plane. The view plane can be used for two effects, firstly to create cut-away sections of a model if the view plane intersects part of a model, secondly the distance of the view plane simulates a wide or narrow angle camera lens. If the viewplane is close to the camera the effect is of a wide angle lens, when the viewplane is distant from the camera the effect is of a telephoto lens. For a "normal" appearance the viewplane should be as far from the model as the window in high or wide, whichever is the larger. Warning: A model may be appear "lost" if it lies entirely behind a distant view plane.
4.1.7 Standard camera positionsAt any time the camera may be aligned to one of six positions on the three cartesian coordinate axes. These positions are: left and right (negative and positive x axis) front and back (negative and positive y axis) bottom and top (negative and positive z axis). These size positions are assigned control keys 1 to 6 for rapid selection. These views may be particularly useful when freehand dragging items on the viewing plane. 4.1.8 Isometric viewsFor an isometric view the projection plane is orientated so that it cuts each axis at the same distance from the origin. Note there are three possible isometric views, one in each quadrant. To create an isometric projection firstly choose a parallel projection, then open the camera attributes dialog. Method 1) set the camera position to equal positions along the three axes using cartesian coordinates, ie: x = +/-r, y = +/-r, z = +/-r. Choosing the sign of the coordinates for the camera position gives any one of the six possible positions. Method 2) set the about angle to one of 45, 135, -135, or -45 and the above angle to +/-35.2644 = arctan(1/[radical]2), again giving 6 possible views. 5.0 RenderingRendering is the process by which the model is displayed on the computer screen. The different rendering modes will have different relative speeds. To stop a long model redraw hold down the clover key while typing a (period) full stop. 5.1 Drawing mode5.1.1 Wireframe, monochromatic and colouredThis is the simplest mode and the one VISION-3D defaults to. It is much faster to use this mode for all editing, not only is the model update faster but often changes may be made without redrawing the whole model.
5.1.2 Hiddenline
5.1.3 Coloured
5.1.4 Shaded
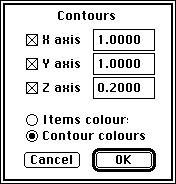
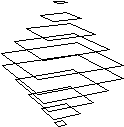
5.1.5 Stereoscopic displayThis will draw two wireframe images one in red and the other in cyan from two different viewpoints separated by a small about angle. By using glasses with a red filter in one eyepiece and a cyan filter in the other eyepiece a 3D stereoscopic effect is perceived. The separation angle in degrees of the two images is prompted for. 5.1.6 Contour drawing
5.1.7 Intensity depth cueing
5.1.8 Haloed lines
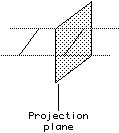
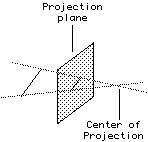
5.2 ProjectionThere are two basic methods for projecting a three dimensional object onto a two dimensional plane. All the points of the object may be projected to the surface along parallel perspective projection). In both cases the intersection of a projection line with the viewing surface (also known as the projection plane) determines the coordinates of the projected point on the projection plane. 5.2.1 Parallel projection
5.2.1 Perspective projection
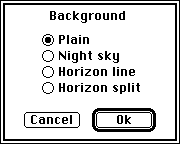
5.3 Line thicknessUsually the line thickness will be the minimum of 1x1 pixels, the thinnest possible. Other line thicknesses are provided, it is a global parameter and therefore effects the whole model. VISION-3D defaults to single line thickness. 5.4 Background
Note: objects created in the same colour as the background will not be visible in most of the rendering modes. While editing users will most likely find it less of a strain to use a plain backgound in either white or black. 5.5 Foreground
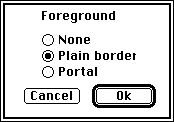
The Foreground image is not used when printing or copying. 5.6 LightingThe lighting model consists of ambient light and the directional light from two monochromatic sources. For each source the user may specify its intensity and position, by the elevation and azimuth. The source is assumed to be an infinite distance away, rays from the sources strike the scene with parallel lines. 6.0 Flight pathAnimationis the process by which motion of either the items in a model and/or the camera are moved generating a sequence of images which when played one after the other give the effect of motion. VISION-3D does not provide special object animation capabilities such as a control language for object movement. It does however provide powerful camera fly though capabilities. No attempt is made in VISION-3D to provide real time animation. There are good reasons for this, no matter how fast a scene may be rendered there will always be sufficiently complex models which require a significant amount of time to render. Also, the more realistic the rendering algorithm the longer processing time is required. Instead, VISION-3D should be used to create the frames for the animation process. These frames may be saved to disk for incorporation into dedicated animation software, or they may be recorded directly to video where the relevant frames may be extracted with conventional video editing hardware. 6.1 AutocameraThe simplest means of automatically moving the camera is to simply "fly" around the model on a circular path or to move toward or away from the model. These would generally be used to check the overall model from a range of camera positions.
Note: this and the flight path frame saving can generate a large number of files, check that sufficient room is available on the disk. The files are placed in the same folder that the VISION-3D application is located. A text file is also created which contains a list of the file names created above, this can be used with the frame animator software teleVISION, see later. 6.2 Flight pathMore useful is to define a flight path about or though the model and then automatically fly along this flight path.
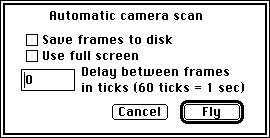
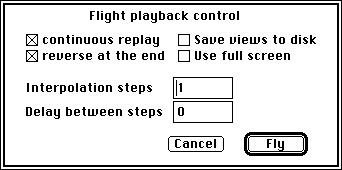 The flight path playback dialog includes a number of options such as: continuous the path can be flown over and over again or just once. The sequence may be left playing without operator intervention with continuous play turned on. reversal after the path is completed it may then be reversed. In continuous replay mode this allows for a smoother overall sequence. saving views the views may be saved to disk for possible inclusion into dedicated animation software. Any of the export formats may be chosen but for animators the colour MacPaint format is the most common. full screen the sequence may be shown in the current window or on the full screen. This is useful for presentation purposes or for recording directly onto a video player where the menu bar and tool windows are not required. delay there may be a pause between frames to allow concentration on the individual frames. The units are in ticks, a tick being 1/60th of a second. If the views are saved to disk the files are given names indicating their position in the sequence. To stop the flight path a period (full stop) while holding down the clover key. 6.3 Saving/Reading flight pathThe current flight path may be saved to disk for later reading and replay. The user is prompted for the file name and directory as usual. The flight path file contains a list of the camera attributes in a text format, an example of a five step flight path is shown below where the camera is just panning about in 10 degree steps.
7.0 Menus7.1 Apple Menu7.1.1 About VISION-3D

7.1.2 Desk accessoriesp> The remainder of the Apple menu contains the desk accessorieswhich vary depending on the configuration of the current System.
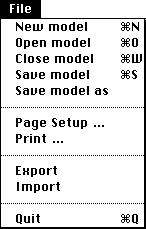
7.1.2.1 ChooserThe choose is a desk accessory supplied by Apple. The chooser selects one of the available printers to be used for all subsequent printing. If there are any options associated with that printer and its connection to the Macintosh they will also be prompted for. The printers available depend on the drivers in the System Folder as well as the physical printers attached to the computer. See the Apple manuals for more details. 7.1.2.2 Control panelThe control pane is also a desk accessory supplied by Apple. Various user selectable parameters controlling the Macintosh hardware are available. Of importance to VISION-3D is the colour depth selection which is controlled with the control panel monitor control. See the Apple manuals for more details. Note: the number of colours being used may be adjusted from inside VISION-3D. 7.2 File Menu7.2.1 New
7.2.2 Open
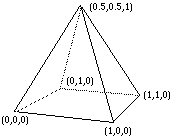
7.2.3 SaveSaves the current model to disk. If the model has not previously been saved, a filename and directory is prompted for in the usual way. The current model is only saved if changes have been made since the last save. The camera and lighting settings are also saved in the model file. This menu item will change depending on the foremost window. For example if the lathe or extruder window are active then their outlines will be saved. 7.2.4 Save asSaves a model as a new document. The file name and directory are prompted for in the usual way. Use this to preserve a particular stage of a model. 7.2.5 Page setupThis sets up various aspects of the printer and the paper it takes. The exact details vary according to the printer driver being used.VISION-3D currently only supports single page printing. These settings are maintained across prints. A common trick employed with the Apple Postscriptdrivers for the Apple LaserWriteris to set a 25% reduction but print an image 4 times as large. The result is an image the same size as on the screen but with lines that are 1/300" thick instead of around 1/75" thick (depending on the monitor). In VISION-3D set the page setup to 25% and just before printing zoom in 4 times. 7.2.6 PrintPrinting functions are like any other Macintosh application except for a few points. In particular what happens on a black and white device like the Apple LaserWriterseries? The version before 6.0 of the LaserWriter driver from Apple will not convert colours into greys according to the brightness of the colour. If your version of the printer driver is of this type then it is only possible to print from wireframe rendering mode. In this case all colours except for white are converted to black. Images may of course be pasted either as bitmaps or PICTobjects into other Macintosh applications which support colour printing via postscript. The background and foreground is not used when printing. 7.2.7 ImportingModels created with other 3D packages may be imported into VISION-3D with the import menu item located in the file menu. On selecting the import menu item a list of acceptable formats is provided followed by the usual file selection procedure. 7.2.7.1 Text fileThis is the most basic of the input data formats, it provides all the information necessary to define an object. Each object is defined as shown below nv id rd rs rg x y z x y z x y z r g b where nv is the number of vertices, not to exceed 10 integer id is the object id, for grouping purposes integer rd is the diffuse reflection coefficient float rs is the specular reflection coefficient float rg is the gloss factor, form 2 to 100 float x y z are the coordinates of the vertices float the number depends on nv r g b is the red green blue colour component float Range from 0 to 1 for each component For example: to define a green square based pyramid.
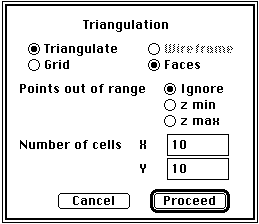
4 100 0.6 0.5 2.0 # vertices, id and reflection attributes 0 0 0 vertices 1 0 0 1 1 0 0 1 0 0.0 1.0 0.0 3 100 0.6 0.5 2.0 next facet 0.5 0.5 1.0 1 0 0 0 0 0 0.0 1.0 0.0 3 100 0.6 0.5 2.0 0.5 0.5 1.0 0 1 0 0 0 0 0.0 1.0 0.0 3 100 0.6 0.5 2.0 0.5 0.5 1.0 1 1 0 0 1 0 0.0 1.0 0.0 3 100 0.6 0.5 2.0 0.5 0.5 1.0 1 1 0 1 0 0 0.0 1.0 0.0 7.2.7.2 Super3D text files< Not implemented > 7.2.7.3 MOVIE BYU< Not implemented > 7.2.7.4 DXF< Not implemented > 7.2.7.5 MacPerspectiveModels created in MacPerspectivemay be imported directly into VISION-3D. MacPerspective only supports wireframe models and therefore the model will appear in VISION-3D as a collection of edges. All the edges will be given the same colour and will be part of one object. MacPerspective provides a manual method of splitting and removing the hidden line segments. In general this should not be used if importing into VISION-3D is anticipated as it is only correct for one camera view. Importing from MacPerspective should be anticipated if colour coding is required or it it is intended to create facets for hidden line removal. Note however that an understanding of the requirements for making facets should be appreciated before creating the wireframe. 7.2.7.6 Symbol filesThese files list a symbol type, the x,y,z position of the symbol, and the colour of the symbol. The following format is as follows symbol# x y z red green blue symbol# x y z red green blue : : : : symbol# x y z red green blue where each field is separated by a space, each symbol by a new line, all but the id field are real numbers. The symbol numbers can be one of the following: 0 line segment parallel with the z axis 1 line segment parallel with the x axis 2 line segment parallel with the y axis 3 plane perpendicular to the z axis 4 plane perpendicular to the y axis 5 plane perpendicular to the x axis 6 tetrahedron The dimensions of the symbol be will prompted for. If a symbol type is not one of the above then that coordinate is ignored. 7.2.7.7 Randomly distributed samples
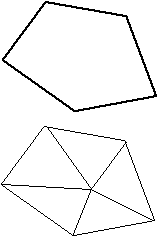
Such a triangulation has many desirable features. It can be shown that a convex equilateral formed by two adjacent triangles has a greater minimum internal angle than if the equilateral was formed another way. In this sense the triangles are as equilateral as possible, thin wedge shaped triangles are avoided. The triangulation is unique (independent of the order in which the sample points are ordered) for all but trivial cases. One particular situation where many other techniques perform poorly is when there is a mixture of regions of high and low density sampling. Triangulation based methods honour this situation by giving a large number of triangles and hence more detail to the highly sampled regions and large triangles, less detail, to the regions with a few samples. Discontinuities are handled quite naturally. The surface can have a discontinuity as narrow as the sampling process permits, it simply results in near vertical triangular facets. Note however that unless special action is taken there can not be two samples at precisely the same point on the sample plane but with different heights. This can occur with discrete digitizers when digitizing near discontinuities. A perturbation of the sample point in the correct direction is usually a satisfactory solution to this problem. The algorithm as implemented is very fast for its type, however it may still take a significant amount of time for a large number of point. It increases approximately with the 5/4 power of the number of points. 7.2.8 Exporting7.2.8.1 Text onlySee importing for details of this format. 7.2.8.2 Super3DThis creates a text file suitable for importing into Super3D. Note:
7.2.8.3 DXFDXF is one of the standard formats for transfering data between CAD packages. VISION uses the 3D entities supported by DXF namely 3DLINE and 3DFACE. To transfer a data file from VISION to another package it will be necessary for the other package to support the inporting of these two entities. 7.2.8.4 RayShadeRayShade is a popular public domain rendering package for Unix machines.. 7.2.8.5 RIBRIB scene description files for a RenderMan renderer. 7.2.8.6 Colour MacPaintThis is a PICT file that consists of a bitmap representation of the window contents. Other Macintosh applications which work on colour PICT bitmaps will be able to read this format. 7.2.8.7 PICT (Version 2)Generates the standard Macintosh clipboard PICTformat suitable for reading by many other Macintosh applications which can handle colour images. In this case the PICT description contains the graphical items required to represent the image, for example, lines, polygons etc. 7.2.8.8 RadianceRadiance is a raytracing/radiosity based package normally running on UNIX workstations. It is written by Greg Ward at Lawrence Berkeley Laboratories as a research tool for predicting the distribution of visible radiation in illuminated spaces. 7.2.8.9 POV-RayPOV-Ray (Persistence of Vision) is a raytracing package available for a number of hardware platforms. 7.2.9 QuitQuits from VISION-3D, saving any model files if they have not already been saved. Only one model window may be open at a time, closing the model window will also quit from VISION-3D. 7.3 Edit menu7.3.1 Undo
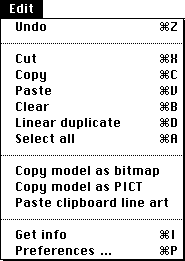
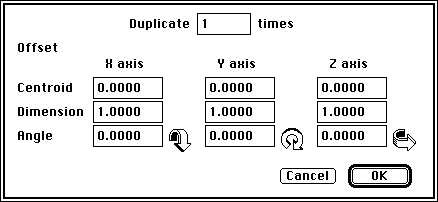
7.3.2 Cut/copy/pasteThe Macintosh cut/copy/paste commands usually use the clipboard and the PICT format (which is fundamentally 2 dimensional). 3D data cannot be readily transmitted with this medium so VISION-3D maintains its own clipboard file and data structures for these operations. As with most Macintosh applications each of these items are assigned control keys (as well as function keys on the Apple extended keyboards) from x (for cut) to b (for clear), see the edit menu for keys. The only difference with the usual Macintosh paste is that the user is prompted for the coordinate at which to place the items to be pasted. Two special copy menu items will place a bitmap or a PICT representation of the current model window on the clipboard. These are for exporting into other Macintosh applications. The exact one to use depends on the destination application. 2D images from other Macintosh applications cannot be pasted into the VISION-3D model window. 7.3.3 ClearCleardeletes the current selection. There are some restriction on clear. For example if an edge is selected which belongs to a face that edge may not be cleared. Similarly a vertex belonging to an edge or face cannot be cleared. 7.3.4 DuplicateDuplicatewill copy the current selection and make a number of copies offset in position, size, or angle from the original. Each displaced copy is made into a new group.
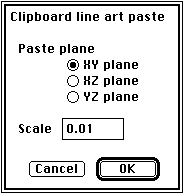
7.3.5 Select allSelects all the items in the model by selecting them as objects, the current tool switches to the object selection. 7.3.6 Copy as bitmapWhen transferring data some applications insist on a particular format on the clipboard. For those applications who deal in colour bitmapsthen copying the model window as a bitmap will provide a convenient method of pasting into those applications. 7.3.7 Copy as PICTWhen transferring data some applications insist on a particular format on the clipboard. For those applications who deal in PICTimages then copying the model window will provide a convenient method of pasting into those applications. The exact objects copied depends on the rendering mode, they are either line segments, filled polygons, or framed polygons. Warning: this requires that QuickDraw create an internal representation of the image in memory. For complex models there may not be sufficient memory for this. Note: do not cancel while the PICT representation is being created, the model is effectively being redrawn during this process and cancelling it will result in only part of the model being copied to the clipboard. 7.3.8 Paste clipboard line art
7.3.9 Get infoDisplay information about the global settings of the current model or if something is selected displays any information about the selection. If multiple items are selected and some attribute is not all identical then Not Applicable will be displayed for that attribute. 7.3.10 PreferencesThese are user controllable settngs, they allow a user may customise his/her user interface. They are saved with the document.
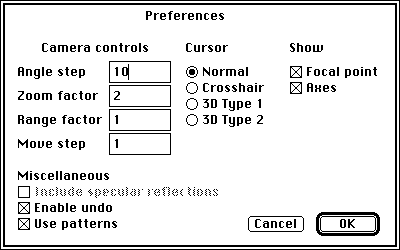
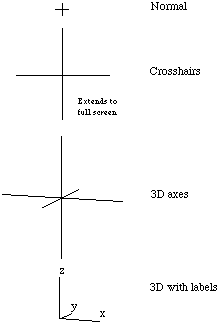
Preferences Camera attributes The amount of camera movement using the keyboard controls Undo Whether undo is enabled or disabled Cursor types Different shaped cursors, including 3D cursors
Pattern shading Using patterns results in improved shading for some colours
8.0 How to8.1 Create a box with length 1m, height 1.5m, and depth 2mSelect the cube menu item in the create menu, type in the dimensions in the appropriate dialog box. 8.2 Delete an edgeSelect the edge using the edge tool from the tool window. Use the menu item "clear" to remove the edge or use the clover key sequence -B.Note: this will not work if the edge is part of a facet, in this case the facet would need to be unmade and then the individual edges are available for individual editing. 8.3 Rotate a group of objectSelect the items to be grouped using the appropriate tool from the tool window. Select the rotate menu item from the utilities memu and fill in the rotation angles about each axis. 9.0 Technical info9.1 VISION-3D Icons
9.2 VISION-3D cursors
9.3 ConstantsThere are a few constants defined in string resources which a knowledgeable user may alter if necessary. They are listed in STR# resource 1000 as follows
9.4 KeyboardCommand keys provide a keyboard means of using menus. Hold down the command (or clover) key and types the character. They are supplied for the more commonly used menu items to speed up use of the program by the experienced user. They are shown on the right hand side of the menu items.
|
